Introduction
Thank you for purchasing the Juki HZL-353Z Free Arm Automatic Needle Threader Sewing Machine. This machine incorporates Juki's industrial sewing machine technology, offering high quality and ease of use for various sewing projects. It features 21 built-in sewing patterns, an automatic 1-step buttonhole, LED lighting for a bright sewing area, and an automatic needle threader. Its lightweight and free arm design provide flexibility for both beginners and experienced users.

Figure 1: Front view of the Juki HZL-353Z Sewing Machine, showcasing its compact design and accessible controls.
Safety Instructions
Always follow basic safety precautions when using electrical appliances to reduce the risk of fire, electric shock, or injury to persons.
- Read all instructions before using the machine.
- Keep the manual in a convenient place for future reference.
- Unplug the machine from the electrical outlet when not in use, when servicing, or when changing needles.
- Keep fingers away from all moving parts. Special care is required around the sewing machine needle.
- Use only accessories recommended by the manufacturer.
- Never operate the machine if it has a damaged cord or plug, if it is not working properly, or if it has been dropped or damaged.
- Do not operate where aerosol (spray) products are being used or where oxygen is being administered.
Setup
1. Unpacking and Placement
Carefully remove the sewing machine from its packaging. Ensure all accessories are present. Place the machine on a stable, flat surface with adequate lighting. The machine comes with a hard cover for protection and portability.

Figure 2: The durable hard cover provided with the Juki HZL-353Z, designed for protection and easy transport.
2. Power Connection
Connect the power cord to the machine's power input and then to a suitable electrical outlet. Ensure the machine's power switch is in the "OFF" position before connecting.
3. Bobbin Winding
The Juki HZL-353Z features an easy drop-in bobbin system. To wind a bobbin:
- Place a spool of thread on the spool pin.
- Guide the thread through the upper thread guide and around the bobbin winding tension disc.
- Place an empty bobbin onto the bobbin winder spindle.
- Wrap the thread around the bobbin a few times clockwise.
- Push the bobbin winder spindle to the right.
- Press the foot controller to start winding. The machine will stop automatically when the bobbin is full.
- Cut the thread and return the spindle to the left.

Figure 3: Top view of the machine showing the bobbin winding area and thread spool placement.
4. Threading the Machine
Proper threading is crucial for good stitch quality. The HZL-353Z features an automatic needle threader for convenience.
- Raise the presser foot lever.
- Place the thread spool on the spool pin.
- Follow the numbered threading path indicated on the machine, ensuring the thread passes through all guides and tension discs.
- Pull the thread through the take-up lever from right to left.
- Thread the needle using the automatic needle threader or manually.
- Insert the wound bobbin into the bobbin case, ensuring the thread feeds correctly through the tension spring.
- Pull the bobbin thread up through the needle plate opening using the upper thread.
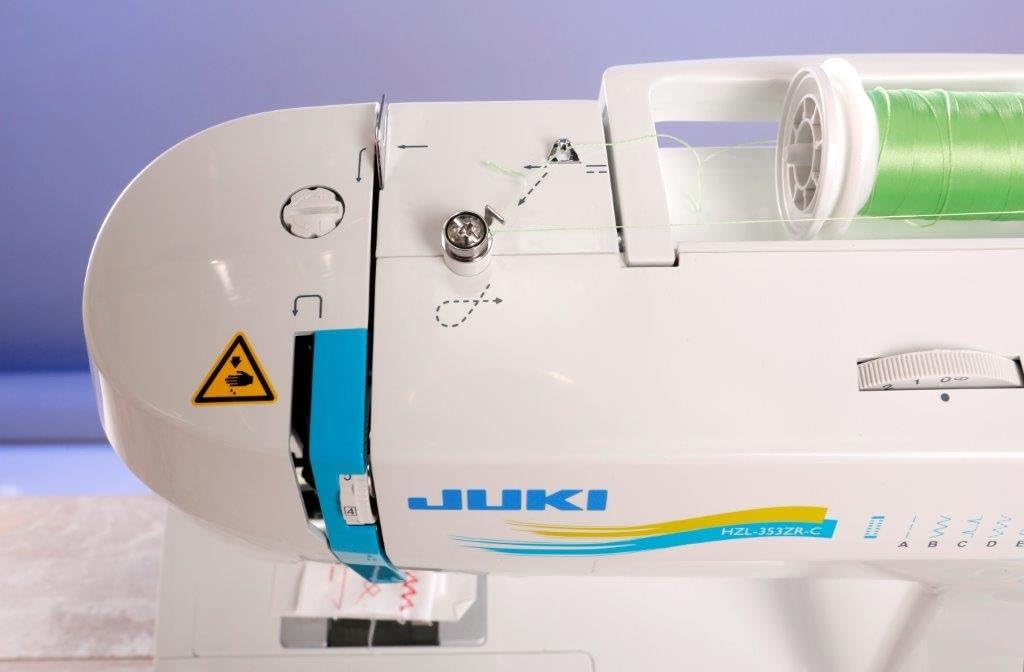
Figure 4: Close-up view illustrating the upper threading path and the automatic needle threader mechanism.
Operating Instructions
1. Stitch Selection
The HZL-353Z offers 21 built-in sewing patterns. Use the large and easy-to-use stitch selection dial on the front of the machine to choose your desired stitch. Refer to the stitch chart on the machine body for visual reference.
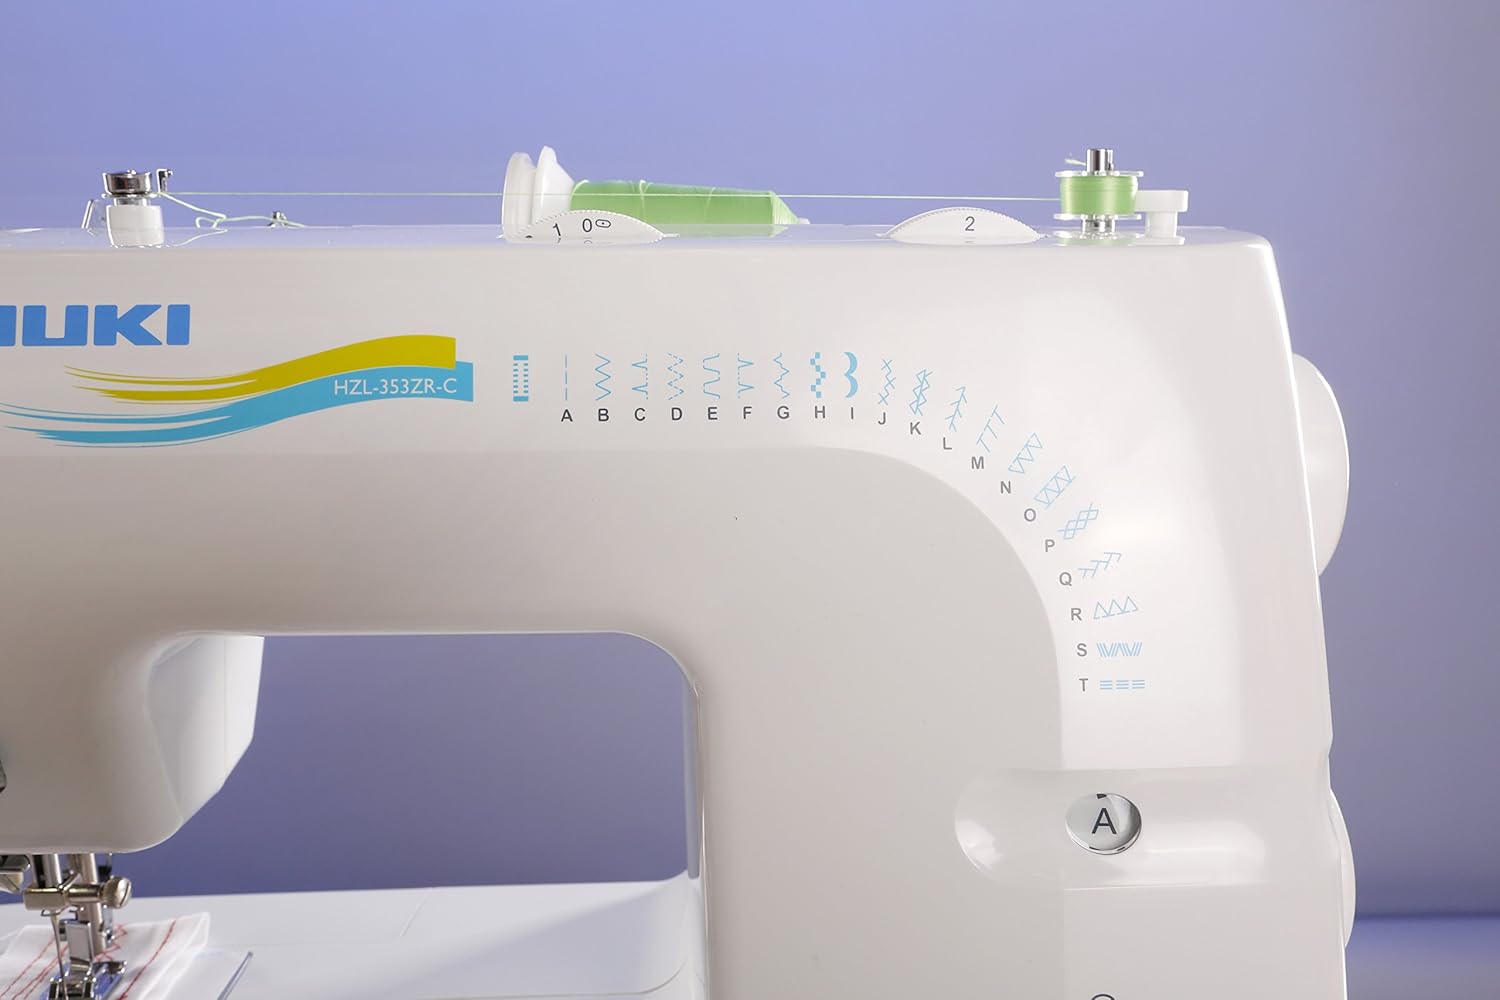
Figure 5: Side view showing the stitch selection dial and the integrated stitch pattern guide on the machine's body.
2. Sewing Basics
Place your fabric under the presser foot. Lower the presser foot lever. Gently press the foot controller to begin sewing. The machine features a reverse lever for reinforcing stitches at the beginning and end of seams.
3. Automatic 1-Step Buttonhole
The machine simplifies buttonhole creation with its automatic 1-step function. Attach the buttonhole foot and follow the specific instructions in the detailed manual for precise buttonhole sizing and stitching.
4. Free Arm Usage
To use the free arm, slide off the accessory box. This exposes the narrow free arm, ideal for sewing cuffs, sleeves, pant hems, and other small, circular items.
5. Presser Foot Pressure Adjustment
Adjust the presser foot pressure according to the fabric thickness. This feature helps ensure even feeding of various materials, from delicate silks to heavier denims.
6. LED Light
The built-in LED light illuminates the sewing area, providing clear visibility and reducing eye strain during prolonged use.
Maintenance
1. Cleaning
Regular cleaning helps maintain optimal performance. Use a small brush to remove lint and dust from the bobbin area and feed dogs. Do not use liquid cleaners or solvents.
2. Needle Replacement
Replace the needle regularly, especially after 8-10 hours of sewing or if it becomes bent or dull. Always use the correct needle type and size for your fabric.
Troubleshooting
| Problem | Possible Cause | Solution |
|---|---|---|
| Skipped Stitches | Incorrect needle, bent needle, improper threading, wrong needle size for fabric. | Replace needle, re-thread machine, use appropriate needle for fabric type. |
| Thread Breaking | Improper threading, incorrect tension, poor quality thread, bent needle, burr on needle plate. | Re-thread machine, adjust tension, use good quality thread, replace needle, check for burrs. |
| Fabric Not Feeding | Feed dogs lowered, presser foot not lowered, incorrect presser foot pressure. | Raise feed dogs, lower presser foot, adjust presser foot pressure. |
| Bobbin Thread Bulky/Jamming | Improper bobbin winding, incorrect bobbin insertion, lint in bobbin case. | Re-wind bobbin evenly, ensure bobbin is inserted correctly, clean bobbin case. |
Specifications
- Model: HZL-353Z
- Dimensions: 19 x 11 x 15 inches
- Weight: 21.4 pounds
- Stitch Patterns: 21 built-in patterns
- Buttonhole: Automatic 1-step
- Needle Threader: Automatic
- Lighting: LED
- Bobbin Type: Easy drop-in
- Power: Electric
- Color: White
Warranty and Support
This product comes with a manufacturer's warranty. Please refer to the warranty card included with your purchase for specific terms and conditions. For technical support, service, or parts, please contact Juki customer service through their official website or authorized service centers.
For further assistance, please visit the official Juki America website or consult your local dealer.


