
Introduction
Welcome to the Janome Memory Craft Horizon 8200QCP Special Edition sewing machine instruction manual. This document provides essential information for the safe and effective use of your new sewing machine. Please read this manual thoroughly before operating the machine to ensure proper setup, operation, and maintenance. Familiarizing yourself with the machine's features and functions will enhance your sewing experience.
Setup
1. Unpacking and Placement
Carefully remove the machine from its packaging. Place the machine on a stable, flat surface. Ensure adequate space around the machine for comfortable operation and material handling. The machine dimensions are approximately 19.5" W x 12.25" D x 9.5" H, and it weighs 35 pounds.

Image: The Janome Memory Craft Horizon 8200QCP Special Edition sewing machine, showcasing its overall design and workspace.
2. Power Connection
Connect the power cord to the machine's power socket and then to a suitable electrical outlet. Ensure the power switch is in the 'OFF' position before connecting. The machine operates on standard household electricity.
3. Attaching the Foot Control
Insert the foot control plug into the designated jack on the machine. The foot control allows for variable speed operation.
4. Bobbin Winding
- Place a spool of thread on the spool pin.
- Guide the thread through the thread guide and around the bobbin winding tension disc.
- Place an empty bobbin onto the bobbin winder spindle.
- Wrap the thread around the bobbin a few times clockwise.
- Push the bobbin winder spindle to the right.
- Press the foot control or the Start/Stop button to begin winding. Stop when the bobbin is full.
- Cut the thread and push the spindle back to the left.
5. Inserting the Bobbin
The machine features a top-loading, drop-in bobbin system.
- Open the bobbin cover plate located on the needle plate.
- Insert the wound bobbin into the bobbin case, ensuring the thread unwinds in the correct direction (usually counter-clockwise).
- Guide the thread through the tension spring and into the thread guide channel.
- Replace the bobbin cover plate.
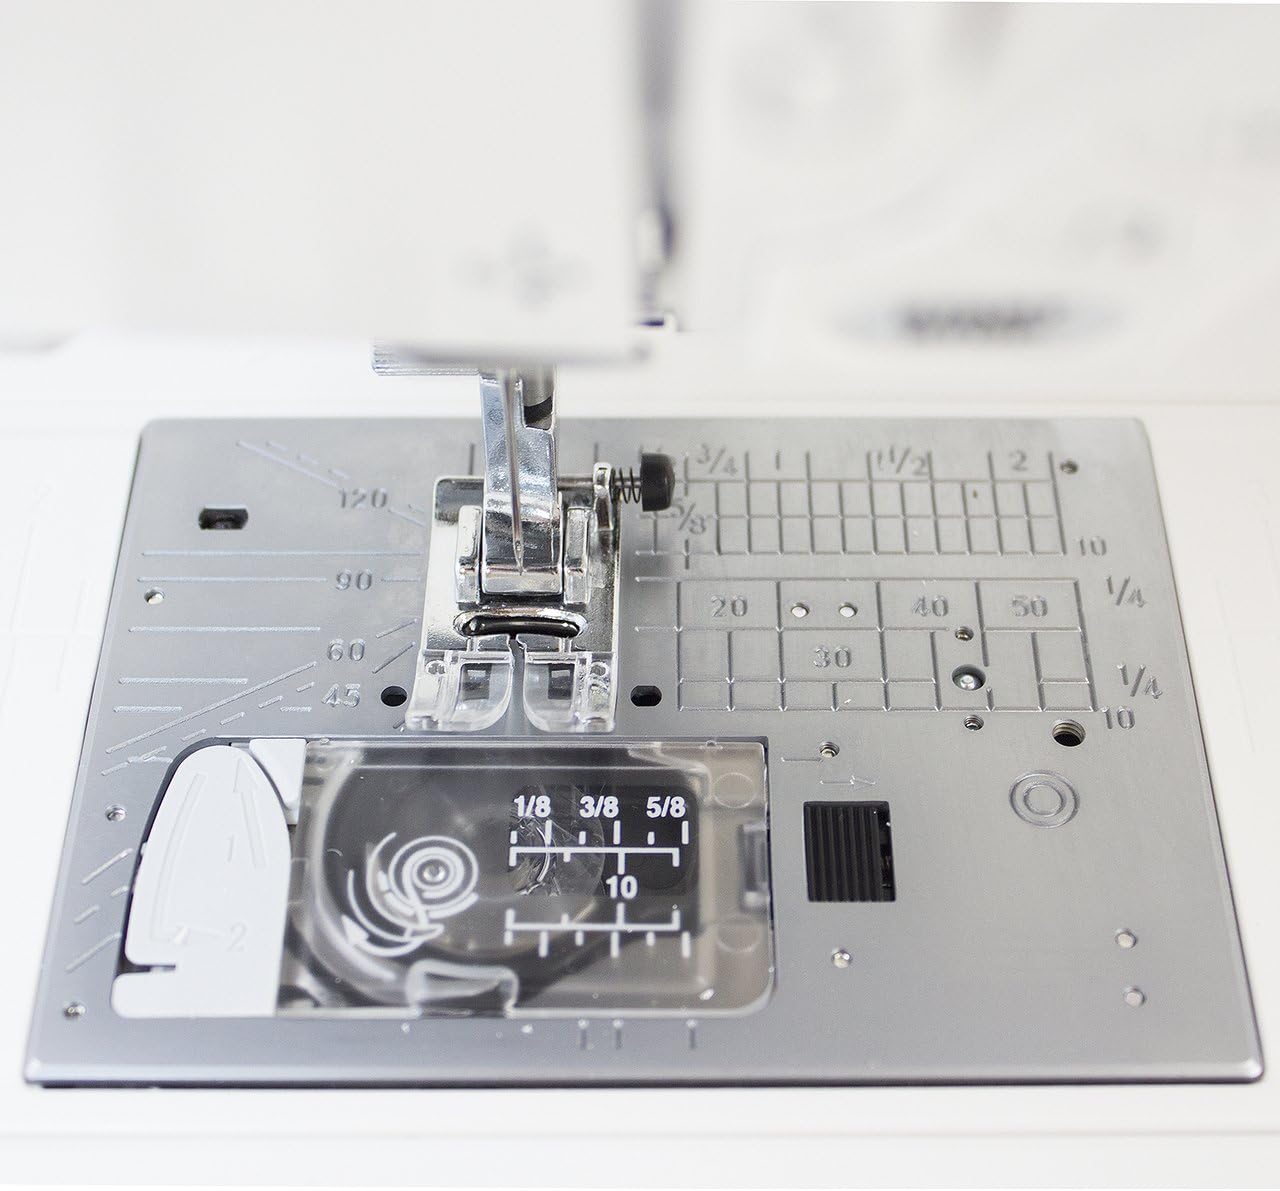
Image: A detailed view of the needle plate and the transparent bobbin cover, indicating the drop-in bobbin system.
6. Threading the Upper Thread
- Raise the presser foot lever.
- Place a spool of thread on the spool pin.
- Follow the numbered threading path indicated on the machine, guiding the thread through the thread guides and tension discs.
- Bring the thread down and around the take-up lever, then down to the needle.
- Use the built-in automatic needle threader for easy needle threading.

Image: A close-up of the needle area, showing the threading path and the automatic needle threader mechanism.
7. Attaching the Extension Table
The Janome 8200QCP Special Edition includes an extra-wide extension table. Slide the extension table onto the free arm of the machine until it locks into place. This provides an expanded work surface, ideal for larger projects like quilts.

Image: The Janome 8200QCP machine displayed with its full range of accessories, including the extra-wide extension table and a 2-spool thread stand.
Operating Instructions
1. Powering On and LCD Touchscreen
Turn on the power switch. The high-resolution LCD touchscreen will illuminate, displaying the default stitch settings. Use the touch panel for stitch selection and adjustments.

Image: A detailed view of the machine's LCD touchscreen, showing stitch patterns, stitch length/width settings, and the numerical keypad for stitch selection.
2. Stitch Selection
The machine offers over 224 built-in stitches, including utility stitches, decorative stitches, alphabets, and 10 one-step buttonholes. Navigate through stitch categories using the touchscreen. Enter stitch numbers directly using the numerical keypad.
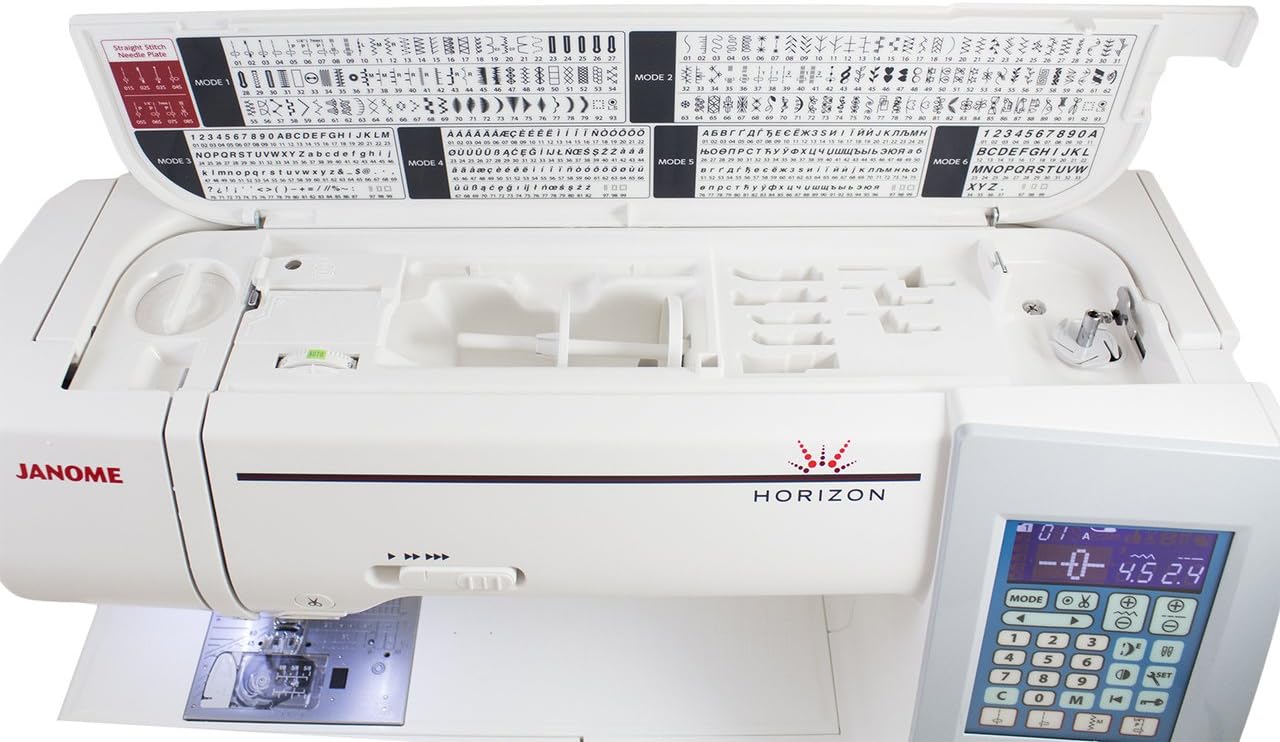
Image: The top cover of the machine opened, revealing a comprehensive stitch chart for various modes and a storage compartment for accessories.
3. Basic Sewing
- Select your desired stitch.
- Place fabric under the presser foot.
- Lower the presser foot.
- Press the Start/Stop button or gently press the foot control to begin sewing.
- The machine can reach speeds of up to 860 stitches per minute.
4. Automatic Features
- Automatic Needle Threader: Simplifies threading the needle.
- Automatic Thread Cutter: Trims both upper and bobbin threads at the touch of a button.
- Lock Stitch Button: Secures the end of a stitch pattern.
- Needle Up/Down Button: Programs the needle to stop in either the up or down position, useful for pivoting.
- Speed Controller: Adjusts the maximum sewing speed.
- Automatic Thread Tension Control: Automatically adjusts tension for selected stitches.
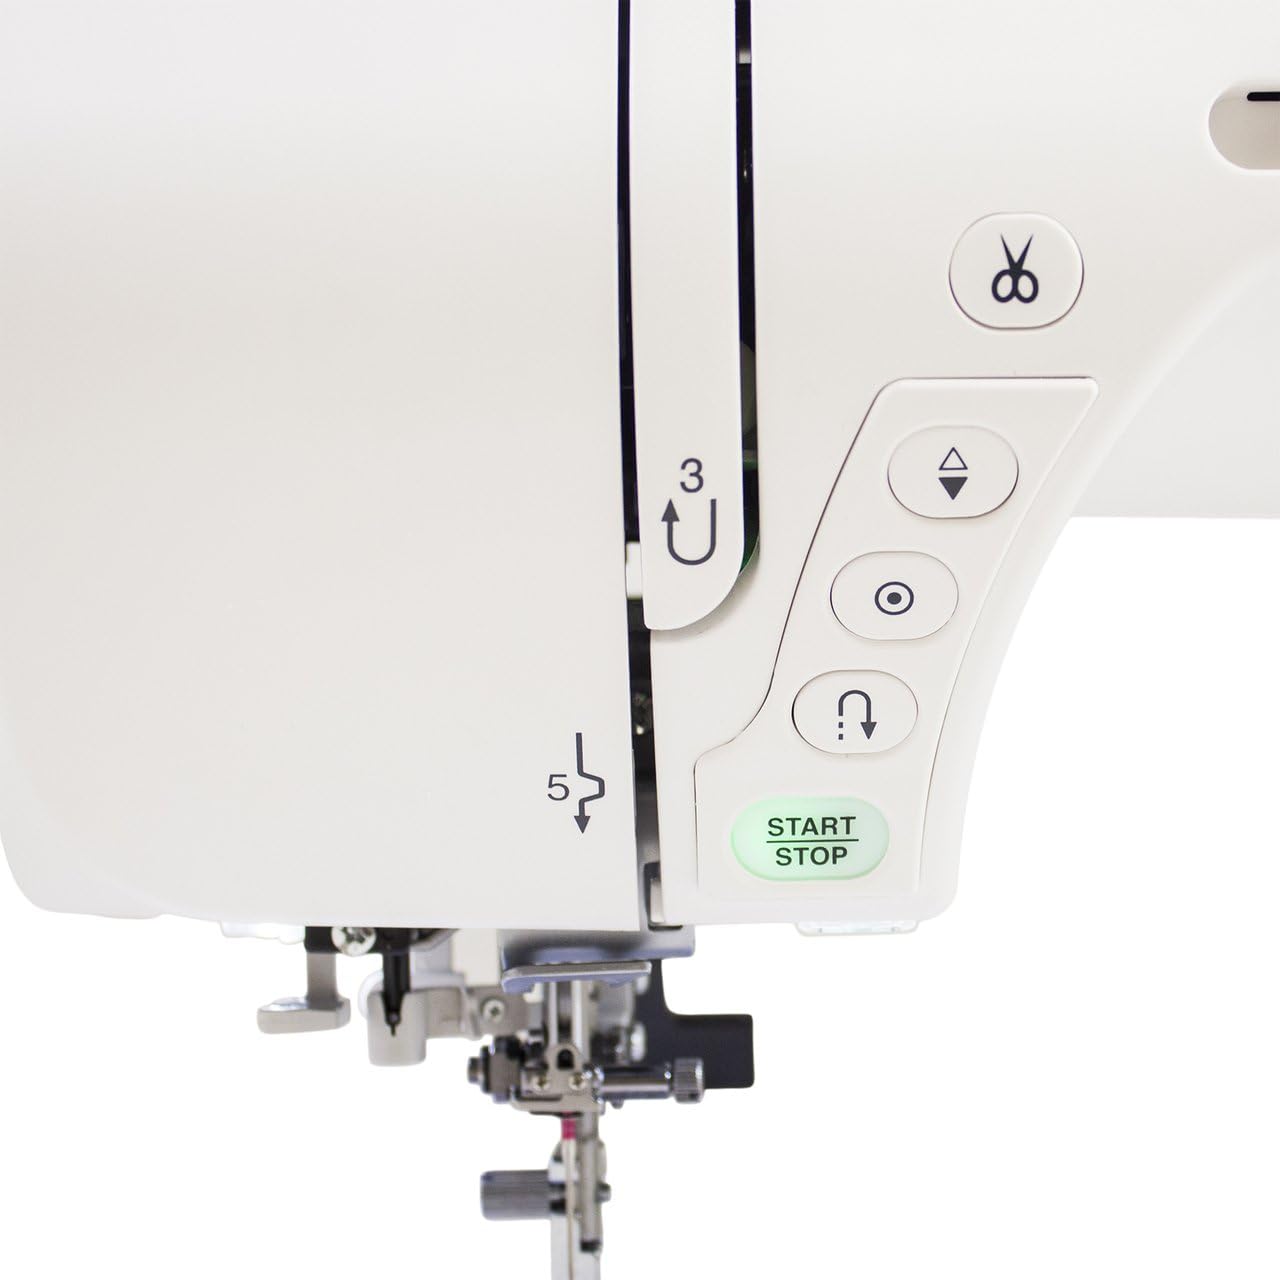
Image: A close-up of the control panel located near the needle, featuring buttons for automatic thread cutting, needle up/down, reverse, and the Start/Stop function.
5. AcuFeed Flex Fabric Feeding System
The detachable AcuFeed Flex system ensures precise fabric handling, especially useful for quilting and working with multiple layers or slippery fabrics. Attach the AcuFeed Flex foot as instructed in the detailed manual for even feeding.
Maintenance
1. Cleaning the Bobbin Area and Feed Dogs
Regularly clean the bobbin case and feed dog area to remove lint and thread buildup. Turn off the machine and unplug it before cleaning.
- Remove the needle and presser foot.
- Remove the bobbin cover plate and bobbin.
- Use the provided brush to remove lint from the bobbin case and around the feed dogs.
- Reassemble the components.
2. Needle Replacement
Replace the needle frequently, especially after 8-10 hours of sewing or if it becomes bent or dull. Always use the correct needle type and size for your fabric and thread.
- Turn off the machine and unplug it.
- Loosen the needle clamp screw.
- Remove the old needle.
- Insert a new needle with the flat side facing the back of the machine, pushing it up as far as it will go.
- Tighten the needle clamp screw securely.

Image: A detailed view of the needle, needle bar, and presser foot assembly, highlighting the area for needle replacement.
3. General Care
Wipe the machine's exterior with a soft, dry cloth. Avoid using harsh chemicals. Store the machine with its semi-hard cover to protect it from dust and damage.
Troubleshooting
This section addresses common issues you might encounter. For more detailed troubleshooting, refer to the comprehensive manual or contact Janome support.
- Skipped Stitches: Ensure the needle is inserted correctly, not bent, and is the appropriate type for your fabric. Re-thread the machine completely.
- Thread Breakage: Check for correct threading, proper needle insertion, and appropriate thread tension. Ensure the thread is not old or damaged.
- Fabric Puckering: Adjust thread tension, use a smaller stitch length, or consider using a stabilizer for delicate fabrics.
- Machine Noise: Excessive noise can indicate lint buildup, an incorrectly inserted bobbin, or a dull/bent needle. Clean the machine and check components.
- Machine Not Starting: Verify the power cord is securely plugged in, the power switch is on, and the foot control is connected (if used).
Specifications
| Feature | Specification |
|---|---|
| Model Number | SVDMC8200QCPSEBONUSBUNDLE |
| Product Dimensions | 19.5 x 12.25 x 9.5 inches |
| Item Weight | 35 pounds |
| Maximum Sewing Speed | 860 stitches per minute (SPM) |
| Maximum Stitch Width | 9mm |
| Maximum Stitch Length | 5mm |
| Built-in Stitches | Over 224 (including 3 alphabets, 10 one-step buttonholes) |
| Work Space | 11" x 4.7" (280mm arm space) |
| Lighting | 5 Ultra-Bright LED lights |
| UPC | 716715482504 |
Warranty and Support
For information regarding your product's warranty, please refer to the warranty card included with your purchase or visit the official Janome website. For technical assistance, parts, or service, please contact Janome customer support directly. Keep your purchase receipt and model number handy when contacting support.
You can find more information and support resources on the Janome Store on Amazon.