1. Introduction
This manual provides instructions for the MaximalPower RHF MOT 2PIN HQ Surveillance Headset Earpiece. This earpiece is designed for use with Motorola two-way radios and other compatible devices featuring a 2-pin (M1) connector. It features a Kevlar-reinforced cable, a Push-To-Talk (PTT) microphone, and a clear acoustic tube for discreet and reliable communication.
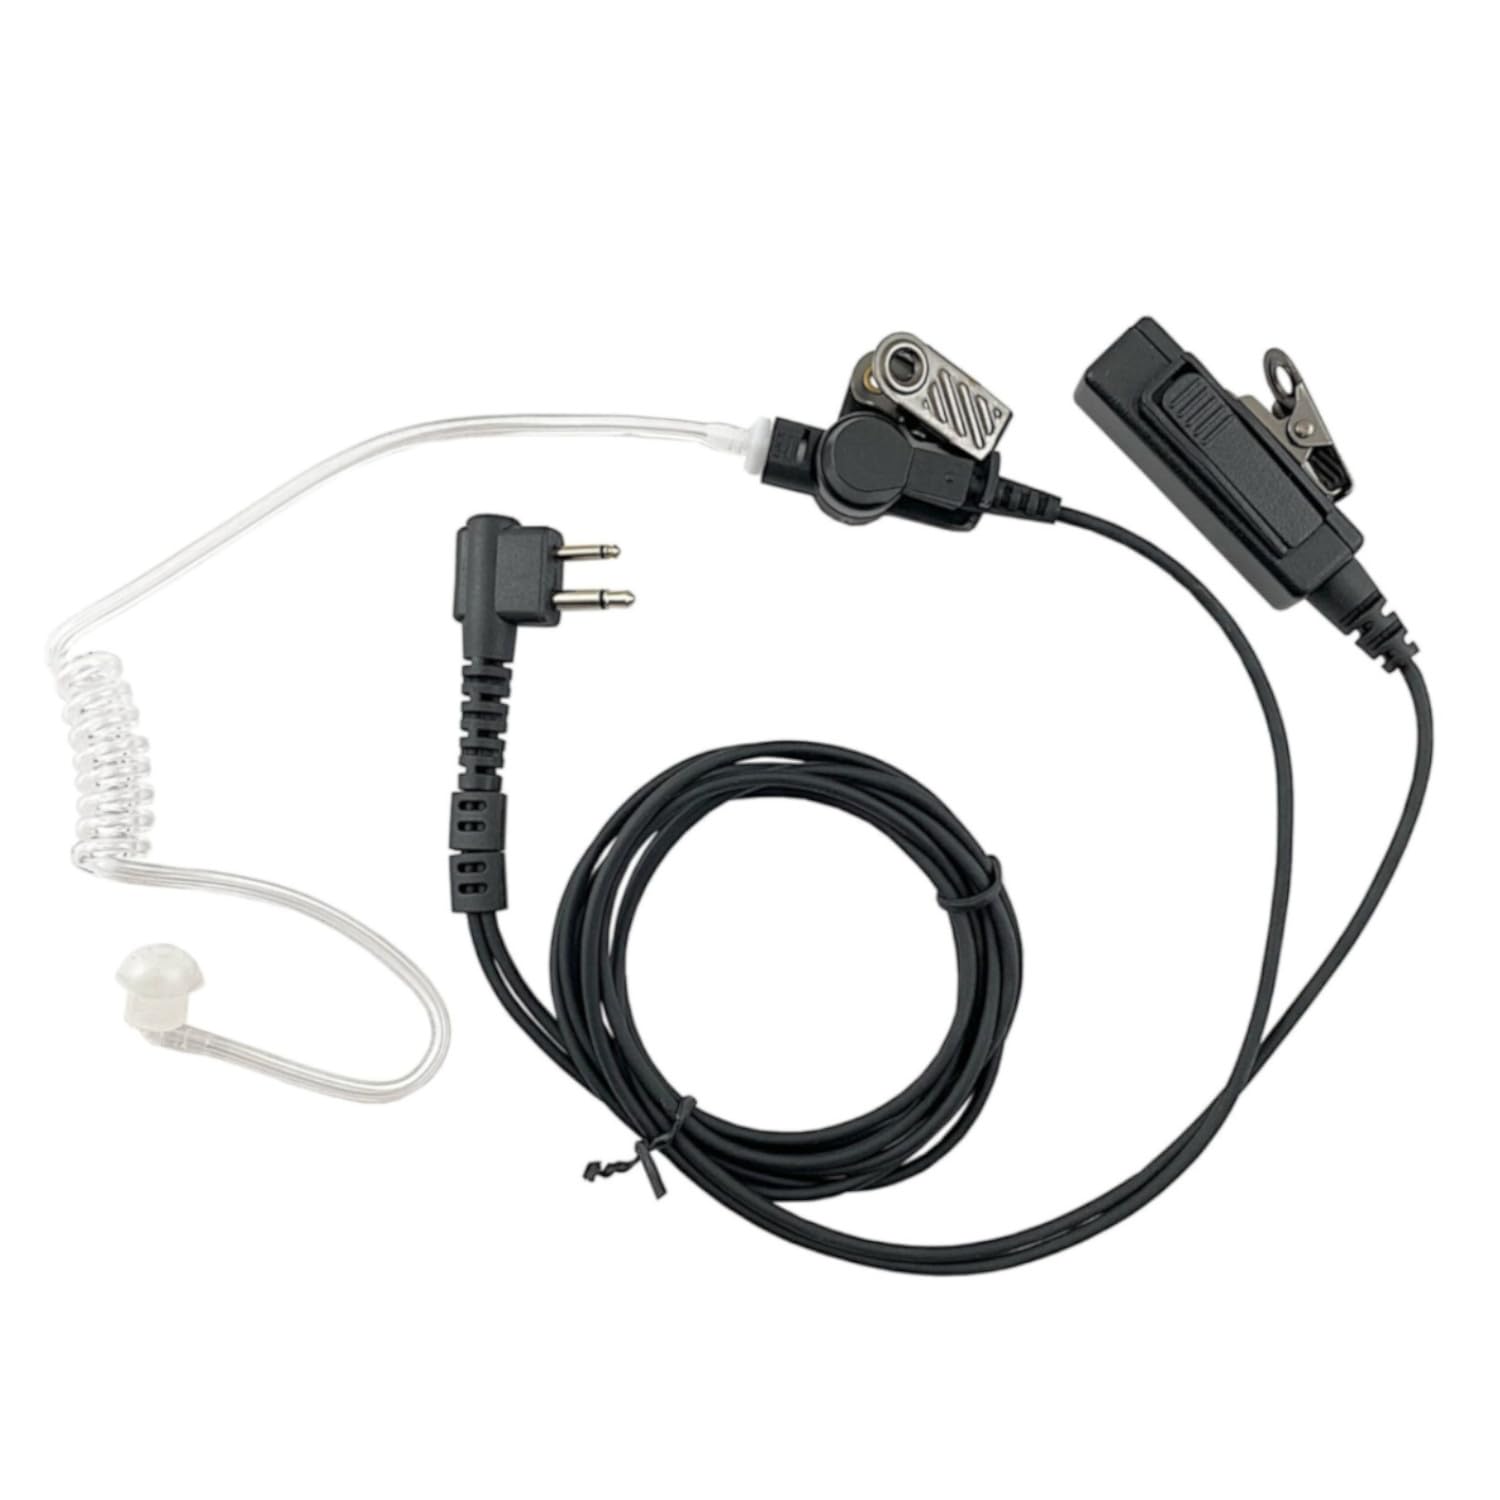
Figure 1.1: The MaximalPower RHF MOT 2PIN HQ Surveillance Headset Earpiece, showing the 2-pin connector, PTT mic, and clear acoustic tube.
2. Package Contents
Verify that all items are present in your package:
- MaximalPower 2-Wire Surveillance Headset Earpiece
- Push-To-Talk (PTT) Microphone with metal clip
- Clear Acoustic Tube with earbud

Figure 2.1: Components of the MaximalPower Surveillance Headset. This image displays the 2-pin connector, the PTT mic with clip, the acoustic tube, and the earbud, along with approximate cable lengths.
3. Product Features
- Low-Profile Clear Eartube: Provides discreet and clear audio reception.
- Surveillance Style Acoustic Tube: Enhances privacy and audio clarity.
- Heavy-Duty Kevlar Reinforced Cable: Designed for durability and resistance to wear.
- Metal Clip: Secures the microphone/PTT unit to clothing for convenient access.
- 100% Compatibility: Designed to be compatible with original manufacturer equipment for specified models.
4. Compatibility
This headset is compatible with Motorola two-way radios and other devices that utilize a 2-pin (M1) connector. Compatible Motorola models include, but are not limited to:
- BPR40, BR250 CLS series (CLS 1110, CLS 1410)
- CP series (CP88, CP100, CP110, CP125, CP150, CP185, CP200, CP220, CP240, CP300)
- CT series (CT150, CT250, CT450, CT450LS)
- DTR series (DTR410, DTR550)
- EP450, GP series (GP2000, GP280, GP300, GP308, GP350, GP68, GP88)
- GTI, GTX, LTS2000
- P series (P040, P080, P110, P1225, P1225LS, PR400, PRO3150)
- SP series (SP10, SP21, SP50)
- XT series (XT420, XT460, XTN446, XTN500, XTN600, XU4100, XV1100, XV1400, XV2100, Xu1100, XU2100, XU2600)
- VL series (VL130, VL50), HT850
- MU/MV series (MU11C, MV11C, MV12C, MU21CV, MV21C, MU22CV, MV22CV)
- RDU/RDV/RDM series (RDU2020, RDU2080, RDU4100, RDU4160, RDU4160D, RDV2020, RDV5100, RDM2020, RDM2070d)
- Also compatible with select BEARCOM, HYT (Hytera), RELM, TEKK, RCA, and FDC models.
5. Setup
- Connect to Radio: Insert the 2-pin connector firmly into the corresponding port on your two-way radio. Ensure a secure connection to prevent audio interruptions.
- Attach Acoustic Tube: Gently push the clear acoustic tube onto the earpiece connector. The earbud should fit comfortably into your ear.
- Position Microphone: Use the metal clip on the PTT microphone unit to secure it to your lapel or collar. Position it close to your mouth for clear voice transmission.

Figure 5.1: Proper wearing and connection of the surveillance headset to a two-way radio. The PTT mic is clipped to the collar, and the acoustic tube is routed behind the ear.
6. Operating Instructions
- Receiving Audio: Once connected, audio from your radio will be transmitted through the clear acoustic tube to your ear. Adjust your radio's volume for comfortable listening.
- Transmitting Audio (Push-To-Talk): To speak, press and hold the PTT button on the microphone unit. Speak clearly into the microphone. Release the PTT button when you are finished speaking to return to receive mode.
Video 6.1: Demonstration of the Surveillance Headset PTT Mic for Motorola 2-Pin 2-Way Radio. This video illustrates the components and basic functionality of the headset.
7. Maintenance
- Cleaning: Regularly wipe the earpiece, acoustic tube, and PTT unit with a soft, damp cloth. For the acoustic tube and earbud, use mild soap and water, then rinse thoroughly and allow to air dry completely before reassembly.
- Cable Care: Avoid sharp bends or excessive pulling on the cable to maintain its integrity, especially around the connectors. The Kevlar reinforcement provides durability, but proper handling extends product life.
- Storage: Store the headset in a clean, dry place away from extreme temperatures and direct sunlight when not in use.
8. Troubleshooting
| Problem | Possible Cause | Solution |
|---|---|---|
| No audio from earpiece |
|
|
| Microphone not transmitting |
|
|
| Intermittent audio or transmission |
|
|
9. Specifications
| Model Number | RHF MOT 2PIN HQ |
| Brand | MaximalPower |
| Connectivity Technology | Wired |
| Input Device Interface | 2-pin (M1) connector |
| Cable Material | Kevlar Reinforced |
| Earpiece Type | Surveillance style acoustic tube, In-Ear |
| Microphone | Push-To-Talk (PTT) with metal clip |
| Item Weight | 2 ounces (approx. 56.7 grams) |
| Product Dimensions | 47 x 1 x 0.5 inches (approximate cable length and component size) |
| Water Resistance Level | Waterproof (as per product specifications) |
10. Warranty and Support
MaximalPower products are designed for quality and reliability. This product typically comes with a 30-day return policy for refund or replacement, subject to the retailer's terms and conditions.
For technical support, warranty claims, or further assistance, please contact MaximalPower customer service through their official website or the retailer where the product was purchased. Ensure you retain your proof of purchase for any warranty-related inquiries.
Important Note: Only purchase MaximalPower brand products from authorized dealers to ensure authenticity and warranty coverage. Products from unauthorized vendors may be counterfeit and are not covered by the MaximalPower warranty.


