1. Introduction
This manual provides detailed instructions for the safe and effective use of your Sony HXR-NX100 Full HD NXCAM Camcorder. Please read this manual thoroughly before operating the camcorder and retain it for future reference.
Key Features:
- 1.0-type Exmor R CMOS sensor for high sensitivity and resolution across various shooting conditions.
- Sony G Lens with 12x optical zoom, expandable to 24x with Clear Image Zoom and 48x with Digital Extender.
- Optical Steady Shot for image stabilization.
- Integrated ND filter control mechanism with four positions.
- Three independent lens rings for manual control of focus, zoom, and iris.
- XAVC S recording at 59.94p in Full HD 1920 x 1080.
- Dual media slots for simultaneous or relay recording.
- Slow & Quick Motion recording capabilities.
- Multi Interface Shoe (MI Shoe) for flexible accessory connection.
- Two 3-Pin XLR Audio Inputs.
- AVCHD 2.0 and DV Recording Codecs.
2. What's in the Box
Verify that all the following items are included with your Sony HXR-NX100 Camcorder:
- Sony HXR-NX100 Full HD NXCAM Camcorder (Black)
- Lens Hood
- Lens Cap
- EVF Eyepiece
- USB Cable
- Battery
- AC Adaptor
- Power Cord
- Battery Charger
- IR Wireless Remote
- Warranty Information
- Operating Guide (this document)
3. Product Overview
Familiarize yourself with the various parts of your camcorder.

Figure 3.1: Front 3/4 view of the Sony HXR-NX100 Camcorder with the LCD monitor closed, showcasing the lens, handle, and main body.

Figure 3.2: Left side view of the camcorder, highlighting the lens barrel and control panel.

Figure 3.3: Detailed view of the Sony G Lens, showing the 24x Clear Image Zoom marking and the three independent control rings for focus, zoom, and iris.
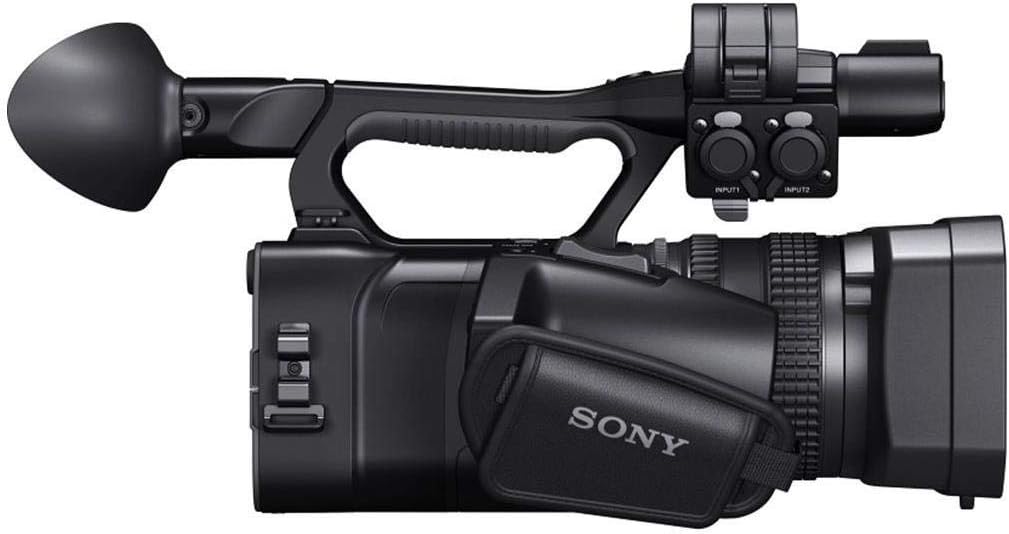
Figure 3.4: Right side view of the camcorder with the LCD monitor open, revealing additional controls and the hand strap.

Figure 3.5: Rear 3/4 view of the camcorder, showing the open LCD monitor, viewfinder, and various rear panel controls.

Figure 3.6: Rear view of the camcorder with the battery compartment open, showing the battery slot and various input/output ports.

Figure 3.7: Top view of the camcorder, illustrating the handle, microphone, and top-mounted controls.

Figure 3.8: Front view of the camcorder, focusing on the lens and lens hood.
4. Initial Setup
4.1 Charging the Battery
- Connect the AC adaptor to the battery charger.
- Plug the AC adaptor into a wall outlet.
- Insert the supplied battery into the charger. The charging indicator will illuminate.
- Once charging is complete, the indicator will turn off. Remove the battery.
4.2 Inserting the Battery
- Ensure the camcorder is powered off.
- Open the battery compartment cover at the rear of the camcorder.
- Align the battery with the battery slot, ensuring the contacts match.
- Gently push the battery into the compartment until it clicks into place.
- Close the battery compartment cover.
4.3 Inserting a Memory Card
- Ensure the camcorder is powered off.
- Locate the memory card slots (typically on the side or rear).
- Open the memory card slot cover.
- Insert a compatible Memory Stick or SD card into the slot with the correct orientation until it clicks.
- Close the memory card slot cover.
4.4 Attaching the Lens Hood
- Align the lens hood with the front of the lens.
- Rotate the lens hood clockwise until it locks securely into position.
5. Basic Operation
5.1 Powering On/Off
- To power on, slide the POWER switch to the ON position.
- To power off, slide the POWER switch to the OFF position.
5.2 Recording Video
- Ensure a charged battery and formatted memory card are inserted.
- Set the camcorder to the desired shooting mode (e.g., Camera mode).
- Frame your shot using the LCD monitor or viewfinder.
- Press the START/STOP button (usually located on the handle or rear) to begin recording. The recording indicator will illuminate.
- Press the START/STOP button again to stop recording.
5.3 Zoom Control
- Use the zoom rocker on the handle for electronic zoom control.
- For manual zoom, rotate the dedicated zoom ring on the lens barrel.
5.4 Focus Adjustment
- Set the FOCUS switch to AUTO for automatic focusing.
- Set the FOCUS switch to MANUAL and rotate the focus ring on the lens barrel for precise manual focus.
5.5 Iris (Aperture) Control
- Set the IRIS switch to AUTO for automatic aperture control.
- Set the IRIS switch to MANUAL and rotate the iris ring on the lens barrel to adjust the aperture manually.
5.6 ND Filter Function
- Use the ND FILTER switch to select from four built-in neutral density filter positions (Clear, 1/4, 1/16, 1/64).
- These filters help control the amount of light entering the lens, useful in bright conditions.
6. Maintenance
6.1 Cleaning the Camcorder
- Body: Wipe the camcorder body with a soft, dry cloth. For stubborn dirt, use a cloth lightly dampened with water or a mild detergent solution, then wipe dry.
- Lens: Use a lens brush to remove dust, then gently wipe with a lens cleaning cloth and lens cleaning fluid. Avoid touching the lens surface with your fingers.
- LCD Monitor/Viewfinder: Use a soft, dry cloth specifically designed for LCD screens. Do not apply pressure.
6.2 Storage
- Store the camcorder in a cool, dry place away from direct sunlight and extreme temperatures.
- Remove the battery if the camcorder will not be used for an extended period.
- Use a desiccant to prevent mold and mildew in humid environments.
7. Troubleshooting
If you encounter issues with your camcorder, refer to the following common problems and solutions:
- Camcorder does not power on: Ensure the battery is fully charged and correctly inserted. Check if the AC adaptor is properly connected if using external power.
- Cannot record: Verify that a memory card is inserted and has sufficient free space. Ensure the card is formatted correctly. Check if the camcorder is in recording mode.
- Image is blurry: Check the focus setting. If in manual focus, adjust the focus ring. If in auto focus, ensure there is sufficient light and contrast for the camcorder to focus. Clean the lens if it is dirty.
- No audio recording: Ensure external microphones are properly connected to the XLR inputs and their levels are set correctly. Check internal microphone settings.
- Battery drains quickly: Ensure the battery is fully charged before use. Operating in cold environments or using power-intensive features (e.g., continuous recording, LCD backlight) can reduce battery life.
For more complex issues, please refer to the official Sony support resources or contact customer service.
8. Specifications
| Feature | Specification |
|---|---|
| Product Dimensions | 14.63 x 6.75 x 7.37 inches |
| Item Weight | 4 pounds |
| Item Model Number | HXRNX100 |
| Batteries | 1 Lithium Ion batteries required (included) |
| Manufacturer | Sony |
| Photo Sensor Technology | CMOS |
| Video Capture Resolution | 1080p |
| Maximum Focal Length | 111.6 Millimeters |
| Maximum Aperture | 4.5 Millimeters |
| Flash Memory Type | Memory Stick, Memory Stick Duo |
| Video Capture Format | HD |
| Supported Audio Format | Dolby Digital/AC-3 |
| Screen Size | 3.5 Inches |
| Connectivity Technology | USB |
9. Support and Warranty
9.1 Further Assistance
For additional support, detailed guides, software updates, or to contact customer service, please visit the official Sony support website. You can also refer to the comprehensive PDF user manual available here.
9.2 Warranty Information
Your Sony HXR-NX100 Camcorder is covered by a limited warranty. Please refer to the warranty card included in your product packaging for specific terms, conditions, and registration details. Keep your proof of purchase for warranty claims.


