Introduction
This instruction manual provides essential information for the safe and effective operation, maintenance, and setup of your DeWalt DWE492-QS 230mm 2200W Angle Grinder. Please read this manual thoroughly before using the tool to ensure your safety and to achieve optimal performance. Keep this manual in a safe place for future reference.
General Safety Instructions
Always follow basic safety precautions when using electrical tools to reduce the risk of fire, electric shock, and personal injury. Familiarize yourself with all warnings and instructions.
Work Area Safety
- Keep the work area clean and well-lit. Cluttered or dark areas invite accidents.
- Do not operate power tools in explosive atmospheres, such as in the presence of flammable liquids, gases, or dust. Power tools create sparks which may ignite the dust or fumes.
- Keep children and bystanders away while operating a power tool. Distractions can cause you to lose control.
Electrical Safety
- Power tool plugs must match the outlet. Never modify the plug in any way.
- Avoid body contact with earthed or grounded surfaces such as pipes, radiators, ranges, and refrigerators. There is an increased risk of electric shock if your body is earthed or grounded.
- Do not expose power tools to rain or wet conditions. Water entering a power tool will increase the risk of electric shock.
- Do not abuse the cord. Never use the cord for carrying, pulling, or unplugging the power tool. Keep cord away from heat, oil, sharp edges, or moving parts.
Personal Safety
- Always wear eye protection. Use safety glasses or goggles.
- Wear appropriate personal protective equipment (PPE) such as dust masks, non-skid safety shoes, hard hats, or hearing protection when necessary.
- Stay alert, watch what you are doing, and use common sense when operating a power tool. Do not use a power tool while you are tired or under the influence of drugs, alcohol, or medication.
- Dress properly. Do not wear loose clothing or jewelry. Keep your hair and clothing away from moving parts.
Specific Angle Grinder Safety
- Always use the protective guard. Ensure it is securely attached and positioned to provide maximum safety.
- Use only discs that are rated for the maximum speed of the grinder and are suitable for the material being worked on.
- Never use the grinder without the side handle securely attached. The side handle provides essential control.
- Ensure the workpiece is stable and securely clamped before grinding or cutting.
- Avoid starting the grinder with the disc in contact with the workpiece.
- Be aware of kickback. Kickback is a sudden reaction to a pinched or snagged rotating wheel. Always maintain a firm grip on the tool.
- Allow the disc to come to a complete stop before setting the tool down.
Components Included
Your DeWalt DWE492-QS Angle Grinder package includes the following items:
- DeWalt DWE492-QS Angle Grinder unit
- Side Handle (1)
- Service Wrench (1)
- Protective Guard (1)
- Inner/Outer Flange Set (1)

Image: The DeWalt DWE492-QS Angle Grinder shown with its detachable side handle, protective guard, and the service wrench used for disc changes.
Setup
Before connecting the tool to a power source, ensure all components are correctly assembled.
1. Attaching the Side Handle
- Locate the threaded holes on the gear housing of the grinder.
- Screw the side handle firmly into one of the available positions. The two-position handle allows for left or right-handed operation for optimal comfort and control.

Image: The DeWalt DWE492-QS Angle Grinder with the side handle securely attached, ready for use.
2. Mounting the Protective Guard
- Ensure the grinder is unplugged.
- Slide the protective guard onto the collar of the gear housing.
- Rotate the guard to the desired position to protect against sparks and debris.
- Tighten the guard's clamping screw (if applicable) to secure it firmly in place. Never operate the grinder without the guard.
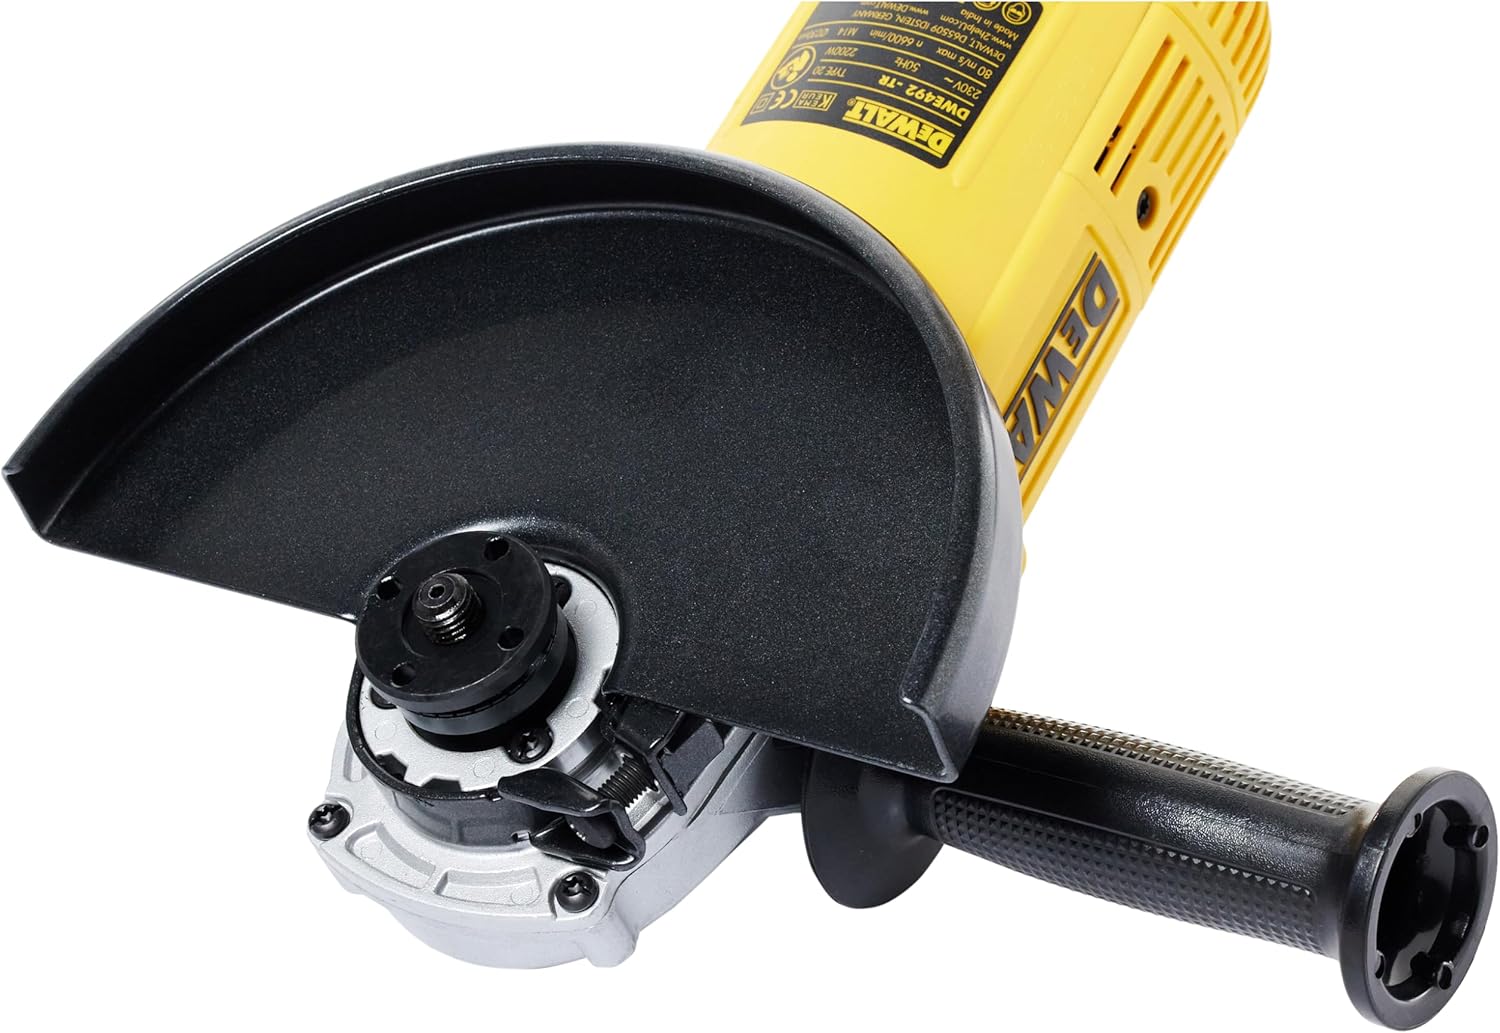
Image: A close-up view of the protective guard and the spindle lock mechanism on the DeWalt DWE492-QS Angle Grinder.
3. Installing/Changing Grinding Discs
- Unplug the tool from the power source.
- Press and hold the spindle lock button to prevent the spindle from rotating.
- Use the service wrench to loosen and remove the outer flange nut.
- Place the desired grinding or cutting disc onto the inner flange, ensuring it is centered.
- Replace the outer flange nut and tighten it securely with the service wrench while holding the spindle lock button.
- Release the spindle lock button.
Operation
Starting and Stopping the Tool
- To Start: Ensure the tool is securely gripped with both hands. Plug the tool into a suitable power outlet. Press the ON/OFF switch.
- To Stop: Release the ON/OFF switch. Allow the disc to come to a complete stop before setting the tool down.
Grinding and Cutting Techniques
- Always hold the grinder firmly with both hands.
- For grinding, apply light, even pressure and move the tool smoothly across the workpiece. Avoid excessive pressure, which can damage the disc and motor.
- For cutting, ensure the cutting disc is suitable for the material. Make shallow passes, gradually increasing depth. Do not twist or force the disc, as this can cause kickback or disc breakage.
- Maintain a safe distance from the rotating disc and direct sparks away from yourself and others.
Workpiece Securing
Always secure your workpiece using clamps, a vise, or other appropriate methods. Never hold the workpiece by hand while operating the grinder, as this can lead to serious injury.
Maintenance
Regular maintenance ensures the longevity and safe operation of your angle grinder. Always unplug the tool before performing any maintenance.
Cleaning
- Keep the ventilation openings clean to prevent motor overheating. Use compressed air to blow out dust and debris from the tool's housing.
- Wipe the exterior of the tool with a soft, damp cloth. Do not use harsh chemicals or abrasive cleaners.
Carbon Brush Replacement
The DWE492-QS features a specific opening for quick carbon brush replacement. Worn carbon brushes can lead to reduced performance or tool failure. Refer to the service diagram (if available) or consult a qualified service technician for replacement. Ensure genuine DeWalt replacement brushes are used.
Disc Inspection
Before each use, inspect grinding and cutting discs for cracks, chips, or other damage. Never use a damaged disc, as it can shatter during operation and cause serious injury.
Troubleshooting
If you encounter issues with your angle grinder, refer to the following common problems and solutions:
| Problem | Possible Cause | Solution |
|---|---|---|
| Tool does not start. | No power supply; faulty switch; worn carbon brushes. | Check power cord and outlet. Ensure switch is fully engaged. Inspect and replace carbon brushes if worn. |
| Excessive vibration. | Damaged or unbalanced disc; loose flanges; bent spindle. | Replace damaged disc. Ensure flanges are tightened correctly. If spindle is bent, seek professional service. |
| Reduced power or sparking. | Worn carbon brushes; motor overload. | Replace carbon brushes. Reduce load on the tool; allow it to cool down. |
| Tool overheats. | Blocked ventilation openings; continuous heavy use. | Clean ventilation openings. Allow the tool to rest and cool down during prolonged use. |
If the problem persists after attempting these solutions, contact DeWalt customer service or an authorized service center.
Specifications
| Feature | Detail |
|---|---|
| Model Number | DWE492-QS |
| Brand | DEWALT |
| Power Input | 2200 Watts |
| Voltage | 220 Volts |
| Disc Diameter | 230 mm |
| No-Load Speed | 6600 RPM |
| Power Type | Corded Electric |
| Dimensions (L x W x H) | 48 x 12 x 15 cm |
| Weight | 4.4 kg (approx.) |
| Material | Iron |
| Color | Black/Yellow |
| Spindle Lock | Yes |
| Side Handle Positions | 2 |
Warranty and Support
DeWalt products are manufactured to high-quality standards and come with a limited warranty. For detailed warranty information, including terms and conditions, please refer to the warranty card included with your product or visit the official DeWalt website.
For technical assistance, spare parts, or service, please contact your local authorized DeWalt service center or visit www.dewalt.com for support resources and contact information.


