Introduction
Thank you for purchasing the Capello Self-Setting Atomic Clock with Calendar & Indoor Temperature. This clock is designed to provide accurate timekeeping, date display, and indoor temperature readings, all within a sleek, contemporary design. Its self-setting atomic feature ensures precise time synchronization.
Key Features
- Self-Setting Atomic Time: Automatically synchronizes with the WWVB radio signal for precise time.
- Digital Display: Bright and easy-to-read digital readout.
- Calendar Function: Displays month, date, and day of the week.
- Indoor Temperature: Provides current indoor temperature in Fahrenheit or Celsius.
- Dual Alarms: Two independent alarm settings for versatile use.
- Sleek Design: Durable polyurethane frame with a black plastic face, suitable for any room decor.
- Battery Powered: Operates on AAA batteries (not included).
Package Contents
- Capello Self-Setting Atomic Clock
- User Manual (this document)
Setup
1. Battery Installation
Locate the battery compartment on the back of the clock. Insert 3 AAA batteries (not included) according to the polarity indicators (+ and -). Ensure the battery compartment cover is securely closed.
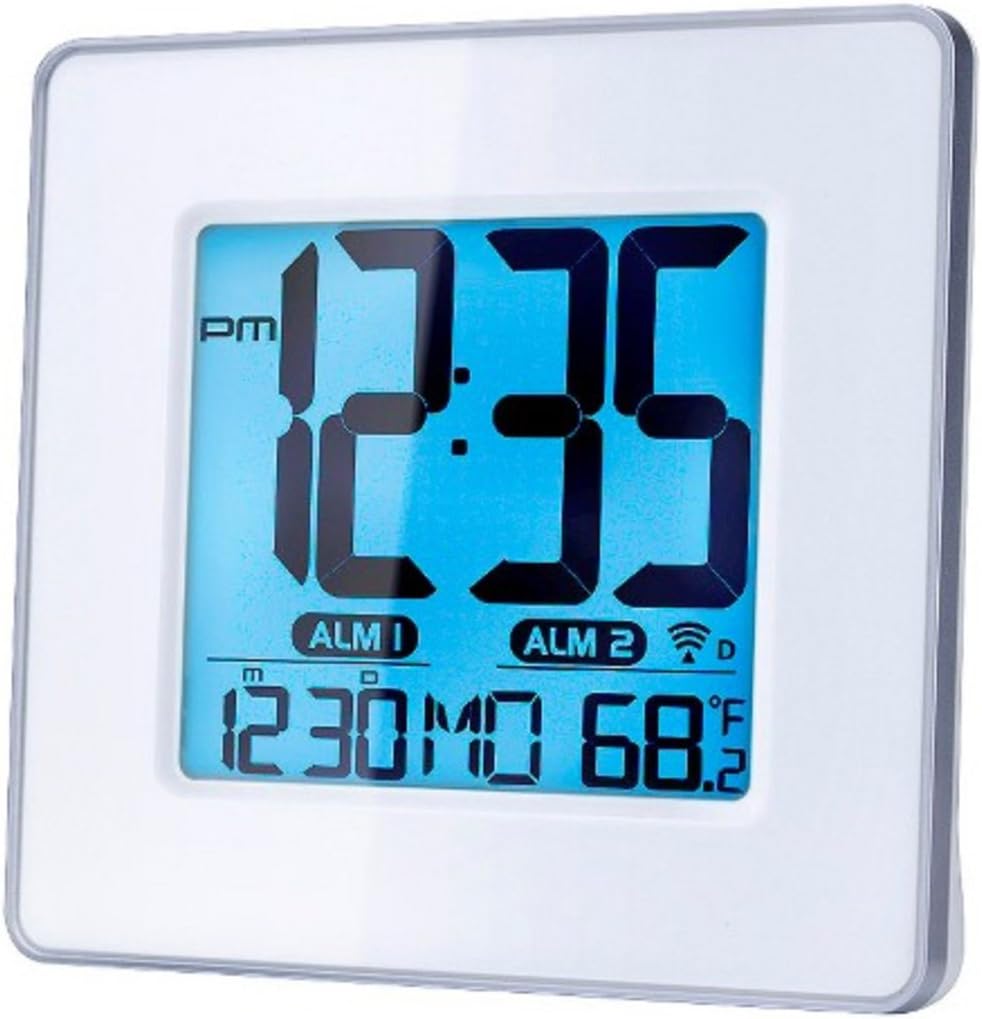
Figure 1: Front view of the Capello Self-Setting Atomic Clock. This image displays the clock's digital screen, showing the time (12:35 PM), two alarm indicators (ALM 1, ALM 2), the date (12:30 MO), and the indoor temperature (68.2°F). The clock has a white frame and a blue-tinted digital display.
2. Initial Power-On and Atomic Signal Reception
Upon battery installation, the clock will automatically attempt to receive the WWVB atomic time signal. This process may take several minutes to several hours, especially during initial setup. For best reception, place the clock near a window and away from electronic devices that may cause interference. The atomic signal is typically stronger at night.

Figure 2: Close-up front view of the Capello Self-Setting Atomic Clock. This image highlights the clear digital display, which shows the time, date, and temperature. The white frame of the clock is visible, emphasizing its clean design.
A signal strength indicator (often a tower icon with waves) will appear on the display once a successful signal is received. If the signal is not received immediately, the clock will default to a manual time setting. You can manually initiate a signal search by holding the "WAVE" button (if present) on the back of the clock for a few seconds.
Operating Instructions
1. Manual Time and Date Setting
In case the atomic signal is not available or for manual adjustment:
- Press and hold the SET button (or similar, refer to back panel buttons) for a few seconds until the display flashes.
- Use the UP and DOWN buttons to adjust the flashing value (e.g., hour, minute, year, month, day).
- Press SET again to confirm the selection and move to the next setting.
- Repeat until all desired settings are configured.
2. Alarm Settings
The clock features two independent alarms (ALM 1 and ALM 2).
- Press the ALARM button (or ALM 1/ALM 2 button) to select the alarm you wish to set.
- Press and hold the ALARM SET button (or similar) until the alarm time flashes.
- Use the UP and DOWN buttons to adjust the alarm hour and minute.
- Press ALARM SET to confirm.
- To activate/deactivate an alarm, press the corresponding ALARM ON/OFF button. An alarm icon will appear on the display when active.
3. Temperature Display
The clock displays indoor temperature. To switch between Fahrenheit (°F) and Celsius (°C), locate the °F/°C button on the back of the unit and press it.

Figure 3: Angled view of the Capello Self-Setting Atomic Clock. This perspective shows the clock's depth and the sleek design of its white frame, along with the clear digital display from a side angle.
Maintenance
Cleaning
Wipe the clock with a soft, dry cloth. Do not use abrasive cleaners or solvents, as they may damage the display or casing.
Battery Replacement
When the display dims or the clock stops functioning, replace the AAA batteries. Always replace all batteries at the same time with new ones. Dispose of old batteries responsibly according to local regulations.
Troubleshooting
| Problem | Possible Cause | Solution |
|---|---|---|
| Clock not setting automatically. | Weak or no atomic signal reception. Interference from other electronics. Incorrect time zone setting. | Relocate the clock closer to a window, away from electronic devices (TVs, computers, microwaves). Try initiating a manual signal search (WAVE button). Ensure correct time zone is set if applicable. Note that the signal is often stronger at night. |
| Display is dim or blank. | Low batteries. | Replace all AAA batteries with new ones. |
| Time is incorrect after Daylight Saving Time change. | Atomic clock may take up to 24 hours to adjust or requires manual adjustment for DST. | Allow up to 24 hours for automatic adjustment. If it doesn't adjust, manually set the time. Some atomic clocks may not automatically adjust for DST and require manual intervention. |
| Alarm not sounding. | Alarm not activated. Alarm volume too low (if adjustable). | Ensure the alarm icon is visible on the display. Check alarm settings and ensure the time is correctly set. |
Specifications
| Feature | Detail |
|---|---|
| Brand | Capello |
| Model | B0170ZSMGG |
| Display Type | Digital |
| Power Source | Battery Powered (3 x AAA, not included) |
| Special Feature | Atomic, Alarm, Calendar, Indoor Temperature |
| Mounting Type | Tabletop |
| Product Dimensions | 0.71 x 5.79 x 5.35 inches |
| Item Weight | 9.6 ounces |
| Frame Material | Polyurethane |
| Color | White (Frame), Black (Dial) |
Warranty and Support
For warranty information or technical support, please refer to the contact details provided with your purchase or visit the official Capello website. Keep your purchase receipt as proof of purchase.
For further assistance, you may contact Capello customer service through their official channels. Please have your model number (B0170ZSMGG) ready when contacting support.


