Introduction
Thank you for choosing the Berdsen BR-68W Mini Dehumidifier. This manual provides essential information for the safe and efficient operation, maintenance, and troubleshooting of your new appliance. Please read this manual thoroughly before use and keep it for future reference.
The Berdsen BR-68W Mini Dehumidifier is designed to maintain optimal humidity levels in your home, ensuring healthy and clean indoor air. It effectively addresses humidity problems and reduces the risk of mold, bacteria, and dust mite growth. Featuring efficient Peltier technology, it operates quietly and includes an intelligent automatic circuit to prevent water tank overflow, ensuring safe and hassle-free use.
Safety Instructions
To reduce the risk of fire, electric shock, or injury, please observe the following safety precautions:
- Always use the dehumidifier on a stable, level surface.
- Do not immerse the unit, power cord, or plug in water or other liquids.
- Ensure the power supply matches the voltage specified on the rating label.
- Keep the appliance away from heat sources, direct sunlight, and flammable materials.
- Do not block the air inlet or outlet. Maintain at least 10 cm clearance around the unit.
- Unplug the dehumidifier before cleaning, maintenance, or when not in use.
- Do not operate the unit with a damaged cord or plug. Contact qualified service personnel for repair.
- This appliance is for indoor household use only.
- Keep out of reach of children and pets.
- Do not attempt to repair or disassemble the unit yourself.
Package Contents
Please check the package contents upon unpacking. If any items are missing or damaged, contact your retailer.
- Berdsen BR-68W Mini Dehumidifier Unit
- Power Adapter
- Instruction Manual (this document)
Product Overview
Familiarize yourself with the components of your Berdsen BR-68W Mini Dehumidifier.

Figure 1: Front view of the Berdsen BR-68W Mini Dehumidifier. The control panel is visible at the top, featuring an ON/OFF switch and indicator lights for power and full water tank. The transparent water tank is located at the bottom.
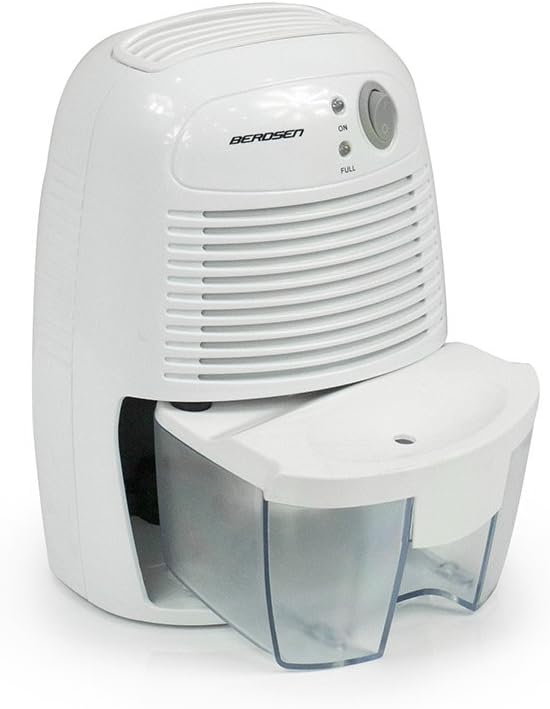
Figure 2: Side view of the dehumidifier, illustrating the water tank partially slid out from its housing for removal or emptying.

Figure 3: The power adapter, which connects the dehumidifier to an electrical outlet.

Figure 4: A diagram explaining Peltier technology. Moist air passes over a cold surface (KALT), causing water to condense into the water tank (WASSERTANK). The now dry air (TROCKENE LUFT) is then expelled. The Peltier module has a warm (WARM) and cold side.
Setup
- Unpack the Dehumidifier: Carefully remove the dehumidifier and all accessories from the packaging. Retain the packaging for future storage or transport.
- Choose a Location: Place the dehumidifier on a firm, level surface in the desired room. Ensure there is at least 10 cm (4 inches) of clear space around the air inlet and outlet to allow for proper airflow. Avoid placing it near heat sources or in direct sunlight.
- Connect Power: Insert the small end of the power adapter into the DC input port on the back of the dehumidifier. Plug the other end of the power adapter into a suitable electrical outlet.
- Initial Check: Ensure the water tank is correctly seated in the unit.
Operating Instructions
- Power On: Press the ON/OFF switch located on the control panel. The "ON" indicator light will illuminate, indicating the dehumidifier is operating.
- Dehumidification Process: The unit will begin to draw in moist air, condense the water vapor using Peltier technology, and collect the water in the transparent tank. Dry air will be expelled from the top vent.
- Water Tank Full: When the water tank is full, the "FULL" indicator light will illuminate, and the dehumidifier will automatically shut off to prevent overflow.
- Emptying the Water Tank:
- Turn off the dehumidifier by pressing the ON/OFF switch and unplug it from the power outlet.
- Carefully slide out the water tank from the front of the unit.
- Empty the collected water into a sink or drain.
- Rinse the water tank with clean water if necessary. Do not use harsh detergents.
- Slide the empty water tank back into the dehumidifier until it clicks securely into place.
- Resume Operation: Once the water tank is emptied and reinserted, you can restart the dehumidifier by pressing the ON/OFF switch again.
- Power Off: To turn off the dehumidifier, press the ON/OFF switch. The "ON" indicator light will turn off. Unplug the unit if it will not be used for an extended period.
Maintenance
Regular maintenance ensures optimal performance and extends the lifespan of your dehumidifier.
- Cleaning the Exterior: Wipe the exterior of the unit with a soft, damp cloth. Do not use abrasive cleaners or solvents.
- Cleaning the Water Tank: Empty and rinse the water tank regularly (as described in "Operating Instructions"). If mold or mildew appears, clean the tank with a mild detergent and warm water, then rinse thoroughly.
- Air Inlet/Outlet: Periodically check the air inlet and outlet for dust or obstructions. Use a soft brush or vacuum cleaner to gently remove any debris. Do not insert objects into the vents.
- Storage: If storing the dehumidifier for an extended period, ensure the water tank is empty and clean. Unplug the unit and store it in a cool, dry place, preferably in its original packaging.
Troubleshooting
Before contacting customer support, please refer to the following troubleshooting guide for common issues.
| Problem | Possible Cause | Solution |
|---|---|---|
| Dehumidifier does not turn on. |
|
|
| Dehumidifier is running but not collecting water. |
|
|
| "FULL" indicator light is on, but tank is not full. |
|
|
| Unit is noisy. |
|
|
Specifications
| Feature | Specification |
|---|---|
| Brand | Berdsen |
| Model Number | BR-68W |
| Color | White |
| Product Dimensions (L x W x H) | 13 x 15.4 x 21.8 cm |
| Item Weight | 1.12 Kilograms |
| Power | 23 Watts |
| Water Tank Volume | 500 Milliliters |
| Material | Plastic |
| Number of Speeds | 2 |
| Features | Water level indicator, Automatic shut-off |
| Floor Area Coverage | Up to 20 square meters (20-25 m3 rooms) |
| Recommended Use | Domestic |
| Included Components | Dehumidifier, Water Tank, Power Adapter |
Warranty Information
Berdsen products are manufactured to the highest quality standards. This product comes with a standard manufacturer's warranty against defects in materials and workmanship. The specific warranty period may vary by region and retailer. Please retain your proof of purchase for warranty claims.
The warranty does not cover damage caused by:
- Improper use or installation.
- Accidental damage, abuse, or neglect.
- Unauthorized repairs or modifications.
- Normal wear and tear.
For detailed warranty terms and conditions, please refer to the documentation provided at the time of purchase or contact your retailer.
Support
If you encounter any issues not covered in the troubleshooting section or require further assistance, please contact Berdsen customer support or your retailer.
Please have your model number (BR-68W) and proof of purchase ready when contacting support.
Online Resources: For additional information, FAQs, or product registration, please visit the official Berdsen website (if available).


