
Nikon 13493
Nikon D3200 Digital SLR Camera User Manual
Model: 13493
Product Overview
The Nikon D3200 is a 24.2 MP DX-format CMOS Digital SLR Camera designed for both beginner and enthusiast photographers. This bundle includes the camera body, an AF-S DX Zoom-NIKKOR 18-55mm VR lens, and an AF-S DX VR Zoom-NIKKOR 55-200mm lens, providing versatile focal lengths for various shooting scenarios.

Image: Nikon D3200 camera body with the 18-55mm VR DX Zoom lens attached, and the 55-200mm VR DX Zoom lens positioned to its right. This illustrates the complete camera bundle.
Components Included
Your Nikon D3200 bundle comes with the following essential components:
- Nikon D3200 Camera Body
- AF-S DX Zoom-NIKKOR 18-55mm f/3.5-5.6G VR Lens
- AF-S DX VR Zoom-NIKKOR 55-200mm f/4-5.6G IF-ED Lens
- Rechargeable Li-ion Battery (EN-EL14)
- Battery Charger (MH-24)
- Strap
- Body Cap
- Eyepiece Cap
- ViewNX 2 CD-ROM

Image: A comprehensive view of all items included in the Nikon D3200 bundle, including the camera body, two lenses, battery, charger, strap, and software CD, arranged on a flat surface.
Setup Guide
1. Charging the Battery
Insert the supplied EN-EL14 Li-ion battery into the MH-24 battery charger. Plug the charger into a power outlet. The charge lamp will blink while charging and turn off when charging is complete. A full charge typically takes approximately 1.5 hours.
2. Inserting the Battery and Memory Card
Ensure the camera is turned off. Open the battery chamber cover on the bottom of the camera. Insert the charged battery with the orange lock facing up until it clicks into place. Next, open the memory card slot cover on the side of the camera. Insert an SD (Secure Digital) memory card with the label facing the back of the camera until it clicks. Close both covers securely.
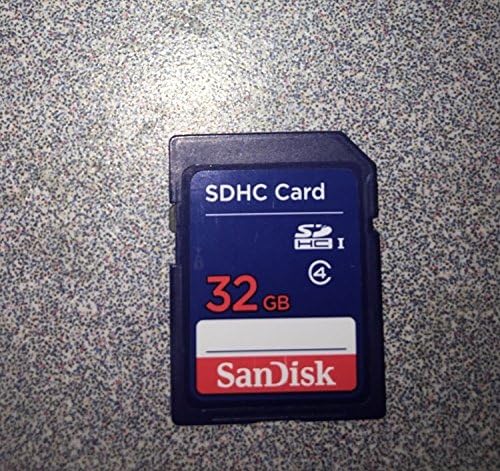
Image: A SanDisk 32GB SDHC memory card, essential for storing photos and videos on the camera.
3. Attaching a Lens
Remove the body cap from the camera and the rear lens cap from the lens. Align the mounting mark on the lens (a white dot) with the mounting mark on the camera body (a white dot). Rotate the lens counter-clockwise until it clicks into place. To remove, press the lens release button on the camera body and rotate the lens clockwise.
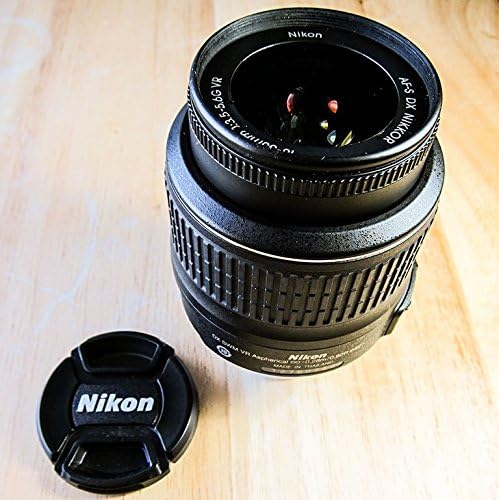
Image: The Nikon AF-S DX NIKKOR 18-55mm f/3.5-5.6G VR lens, showing its front element and barrel markings. This is one of the two lenses included in the bundle.
4. Initial Settings
Turn the camera on using the power switch. The first time you power on, you will be prompted to set the language, date, and time. Follow the on-screen instructions using the multi-selector and OK button.
Operating the Camera
Shooting Modes
The mode dial on top of the camera allows you to select various shooting modes:
- AUTO: Fully automatic mode for simple point-and-shoot operation.
- P (Programmed Auto): Camera sets shutter speed and aperture for optimal exposure.
- S (Shutter-Priority Auto): You set shutter speed, camera sets aperture. Ideal for controlling motion.
- A (Aperture-Priority Auto): You set aperture, camera sets shutter speed. Ideal for controlling depth of field.
- M (Manual): You control both shutter speed and aperture.
- GUIDE: Provides step-by-step assistance for various shooting situations.
- SCENE: Select from various scene modes (e.g., Portrait, Landscape, Sports) for optimized settings.
Taking Pictures
- Select your desired shooting mode using the mode dial.
- Look through the viewfinder or use Live View (press the Lv button) to compose your shot.
- Press the shutter-release button halfway down to focus. The camera will beep when focus is achieved.
- Press the shutter-release button all the way down to take the picture.
Recording Movies
The D3200 supports Full HD 1080p movie recording with stereo sound.
- Switch to Live View mode by pressing the Lv button.
- Press the movie-record button (red dot) to start recording.
- Press the movie-record button again to stop recording.
Playback
To view your photos and videos, press the playback button (triangle icon). Use the multi-selector to navigate through images. Press the zoom in/out buttons to enlarge or view multiple images.
Maintenance
Cleaning the Camera and Lenses
- Camera Body: Use a soft, dry cloth to wipe the camera body. For stubborn dirt, use a cloth lightly dampened with water.
- Lenses: Use a lens brush to remove dust, then gently wipe with a clean microfiber lens cloth. For smudges, use a specialized lens cleaning solution applied to the cloth, not directly to the lens.
- Image Sensor: If dust spots appear on your images, the image sensor may need cleaning. This is a delicate procedure; refer to the camera's on-screen cleaning function or consult a professional service.
Battery Care
- Store batteries in a cool, dry place when not in use.
- Avoid fully discharging the battery frequently to prolong its lifespan.
- Remove the battery from the camera if it will not be used for an extended period.
Storage
When storing the camera for long periods, remove the battery and memory card. Store the camera and lenses in a dry, well-ventilated area, preferably in a camera bag with desiccant packs to prevent mold and mildew.
Troubleshooting
| Problem | Possible Cause / Solution |
|---|---|
| Camera won't turn on. | Battery is dead or incorrectly inserted. Ensure battery is charged and inserted correctly. |
| Images are blurry. | Lens is not focused. Ensure autofocus is engaged or focus manually. Shutter speed too slow; increase ISO or use a tripod. Lens or sensor may be dirty. |
| "Memory card error" displayed. | Memory card is full, corrupted, or incorrectly inserted. Try reinserting the card, using a different card, or formatting the card (note: formatting deletes all data). |
| Flash does not fire. | Flash mode is set to off or camera is in a mode where flash is disabled (e.g., Silent mode). Battery level may be too low. |
| No image displayed on LCD. | LCD monitor may be turned off. Check the display settings. If in Live View, ensure the lens cap is off. |
Specifications
| Feature | Detail |
|---|---|
| Sensor Type | 24.2 MP DX-format CMOS |
| Image Processor | EXPEED 3 |
| ISO Sensitivity | 100-6400 (expandable to 12800 equivalent) |
| Autofocus System | 11 AF points (with 3D tracking) |
| Continuous Shooting Speed | Up to 4 frames per second |
| Video Recording | Full HD 1080p (1920 x 1080) at 30p/25p/24p |
| Display Screen | 3.0-inch TFT LCD (921k-dot) |
| Compatible Mountings | Nikon F-mount |
| Dimensions (Camera Body) | Approx. 125 x 96 x 76.5 mm (4.9 x 3.8 x 3.0 in.) |
| Weight (Camera Body) | Approx. 455 g (1 lb) (with battery and memory card, without body cap) |
| Battery Type | EN-EL14 Rechargeable Li-ion Battery |
Warranty and Support
For detailed warranty information, please refer to the warranty card included with your product or visit the official Nikon website. If you encounter any issues not covered in this manual or require technical assistance, please contact Nikon customer support.
Nikon Support Website: www.nikonusa.com/en/service-and-support/index.page
Please note that warranty terms and support availability may vary by region.
Related documents13493


Ask a question about this manual
Ask about setup, troubleshooting, compatibility, parts, safety, or missing instructions. Manuals+ will review the question and use this page’s manual context to help answer it.