1. Introduction
The KEYESTUDIO 37-in-1 Sensor Module Starter Kit is designed for beginners interested in programming and electronics. This kit provides a diverse collection of 37 basic sensor modules, enabling users to explore various electronic concepts and build numerous projects. It is compatible with popular development platforms such as Arduino R3, MEGA 2560, NANO, and Raspberry Pi.
Please note that the main controller board (e.g., Arduino or Raspberry Pi) is not included in this kit and must be acquired separately.
2. Kit Contents
This kit includes 37 distinct sensor modules, each individually packaged for protection. The modules are designed for easy integration into projects using solderless breadboards and Dupont wires.

Image 2.1: Overview of the KEYESTUDIO 37-in-1 Sensor Kit components and packaging.
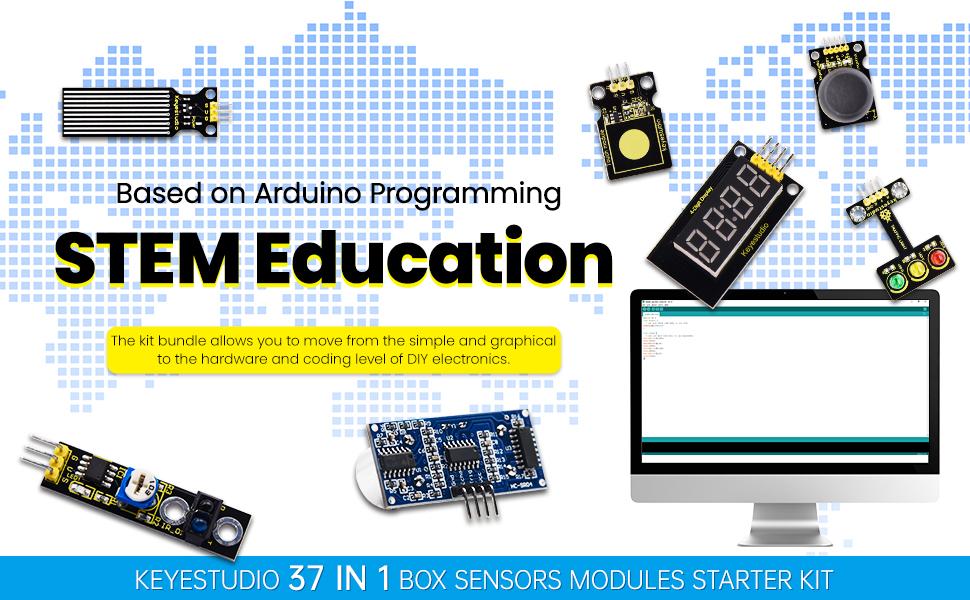
Image 2.2: Detailed list of the 37 sensor modules included in the KEYESTUDIO kit.
The kit typically contains modules such as:
- White LED Module
- RGB LED Module
- Traffic Light Module
- Buzzer Beeping Module
- Passive Buzzer Module
- Motor Module
- Digital Push Button Module
- Collision Sensor Module
- Line Tracking Module
- Infrared Obstacle Avoidance Module
- Photo Interrupter Module
- Hall Magnetic Module
- Knock Sensor Module
- Digital Tilt Sensor Module
- Capacitive Touch Module
- Flame Alarm Module
- Reed Switch Module
- PIR Motion Sensor Module
- Analog Rotation Module
- Photocell Module
- Active Buzzer Module
- Water Level Module
- Digital IR Receiver Module
- Digital IR Transmitter Module
- Analog Temperature Module
- Analog Sound Module
- Analog Ceramic Vibration Module
- Ultrasonic Ranger Module
- Rotary Encoder Module
- Hall Sensor Module
- Temperature and Humidity Display Module
- Photo Interrupter Module
- Steam Moisture Module
- Pulse Rate Monitor Module
- Single Relay Module
- 4-Digit LED Display Module
- Voltage Detection Module
- RGB LED Module
3. Setup
To begin using the sensor modules, you will need a compatible main controller board (e.g., Arduino Uno, Mega 2560, or Raspberry Pi). Each module features 3-4 pins for easy connection.
3.1 Connecting Modules
- Identify Pins: Each sensor module has clearly labeled pins, typically for Power (VCC), Ground (GND), and Signal (SIG). Refer to the individual module's documentation for specific pinouts.
- Power Supply: Connect the VCC pin of the module to the 5V or 3.3V output of your controller board, and the GND pin to the Ground pin of the controller board. Ensure correct voltage to avoid damage.
- Signal Connection: Connect the SIG pin of the module to an appropriate digital or analog input/output pin on your controller board. The specific pin will depend on the module and your project requirements.
- Breadboard Usage: For prototyping, use a solderless breadboard to make connections between the modules and the controller board. Dupont wires are recommended for this purpose.

Image 3.1: Example of a sensor module connected to a development board and laptop for project setup.

Image 3.2: Another perspective of a sensor module connected to a development board, illustrating readiness for programming.
4. Operating Instructions
The KEYESTUDIO sensor kit is designed to facilitate learning and experimentation. Detailed tutorials are provided to guide you through various projects.
4.1 Accessing Tutorials
The kit includes comprehensive tutorials with pictures and code examples for 37 projects. These tutorials are primarily designed for the Arduino platform. While the modules can be used with Raspberry Pi, specific Raspberry Pi tutorials are not included in the provided documentation.

Image 4.1: Sample tutorial pages illustrating step-by-step instructions and code for sensor modules.
4.2 Project Examples
The tutorials explain each project step-by-step, covering wiring diagrams, code, and expected outcomes. Examples include controlling LEDs, reading sensor data (e.g., temperature, light, sound), and implementing basic automation.
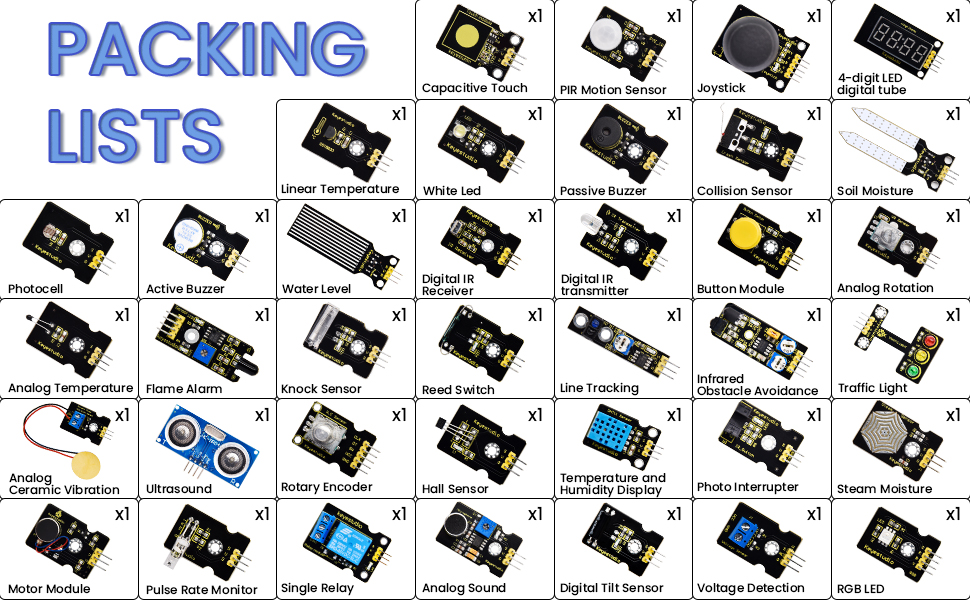
Image 4.2: Visual representation of various experiments and projects achievable with the sensor kit.
4.3 Video Demonstrations
For a visual guide on the kit's capabilities and project implementation, refer to the official product video:
Video 4.1: A detailed demonstration of the KEYESTUDIO 37-in-1 Sensor Kit, showcasing various modules and project setups for Arduino and Raspberry Pi.
5. Maintenance
Proper care of your sensor modules will ensure their longevity and reliable performance:
- Storage: Store modules in a dry, anti-static environment, preferably in their original packaging or a dedicated component box, to prevent damage from static discharge or moisture.
- Handling: Handle modules by their edges to avoid touching sensitive components. Static electricity can damage electronic parts.
- Cleaning: If necessary, gently clean modules with a soft, dry brush or a lint-free cloth. Avoid using liquids or abrasive materials.
- Power: Always ensure correct voltage and polarity when connecting modules to a power source. Incorrect connections can lead to permanent damage.
6. Troubleshooting
If you encounter issues while using the sensor kit, consider the following troubleshooting steps:
- Check Connections: Verify that all wires are securely connected to the correct pins on both the module and the controller board. Loose or incorrect connections are a common cause of problems.
- Power Supply: Ensure your controller board and modules are receiving adequate power. Check power indicators on the board if available.
- Code Verification: Double-check your code against the provided tutorial examples. Small typos or logical errors can prevent proper operation.
- Module Functionality: If a specific module is not working, try testing it with a known working example from the tutorials to isolate whether the issue is with the module itself or your custom setup.
- Controller Board: Confirm that your Arduino or Raspberry Pi board is functioning correctly by running a simple test sketch (e.g., blinking an onboard LED).
7. Specifications
| Feature | Detail |
|---|---|
| Brand | KEYESTUDIO |
| Product Dimensions | 11.42 x 6.93 x 1.77 inches |
| Item Weight | 7 ounces |
| Manufacturer | keyes |
| Connectivity Technology | GPIO |
| Operating System Compatibility | Arduino IDE, Linux |
8. Warranty and Support
KEYESTUDIO is committed to providing quality products and support. While specific warranty details are not provided in this manual, general support and resources are available to assist users.
8.1 Online Resources
Detailed step-by-step instructions, including a WIKI, downloadable PDFs, and videos related to each module, are available on the official KEYESTUDIO website. These resources are invaluable for learning how to configure and use each module effectively.
For further assistance, please visit the official KEYESTUDIO website or contact their customer support team. They are dedicated to addressing any questions or feedback regarding their products.