
Robertshaw 4350-027 Gas Cooking Control Thermostat Kit User Manual
Model: 4350-027
1. Introduction
The Robertshaw 4350-027 Gas Cooking Control Thermostat Kit is designed for use in various oven ranges and griddles. This control is a combination gas cock and bypass-type thermostat, featuring both bypass and pilot adjustments. It allows for the gas to be turned on and the temperature to be set with a single turn of the dial. This manual provides essential information for the safe and proper installation, operation, and maintenance of your thermostat kit.
2. Safety Information
WARNING: Improper installation, adjustment, alteration, service, or maintenance can cause property damage, injury, or death. Read the installation, operating, and maintenance instructions thoroughly before installing or servicing this equipment.
- Always disconnect power and gas supply to the appliance before attempting any installation, maintenance, or service.
- Installation and service must be performed by a qualified installer, service agency, or gas supplier.
- Ensure all gas connections are properly sealed and tested for leaks after installation.
- Do not bypass any safety features of the thermostat or the appliance.
- Wear appropriate personal protective equipment (PPE) during installation and service.
3. Package Contents
The Robertshaw 4350-027 kit typically includes the following components:
- Gas Cooking Control Thermostat (main body with capillary tube and sensing bulb)
- Control Dial/Knob
- Mounting hardware (screws, nuts, washers)
- Various adapters and shafts for different oven models
- Installation accessories (e.g., gaskets, sleeves)

Image: Various components included in the Robertshaw 4350-027 Gas Cooking Control Thermostat Kit, including the control dial, mounting hardware, and adapters.
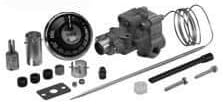
Image: An overview of the Robertshaw 4350-027 thermostat kit, showing the main control unit, capillary tube, sensing bulb, and various accessory parts.
4. Setup and Installation
Installation of this gas control thermostat should only be performed by a qualified technician due to the involvement of gas and electrical connections. The following steps are general guidelines; always refer to the specific appliance service manual for detailed instructions.
- Preparation: Disconnect all power and gas supplies to the oven or griddle. Allow the appliance to cool completely.
- Access Old Thermostat: Locate and carefully remove the existing thermostat. This may involve removing control panels, oven walls, or other access covers. Note the routing of the capillary tube and wiring.
- Remove Old Thermostat: Disconnect the gas lines, electrical connections, and mounting hardware from the old thermostat. Carefully remove the capillary tube and sensing bulb from their position within the oven cavity.
- Install New Thermostat:
- Mount the new Robertshaw 4350-027 thermostat using the provided mounting hardware. It can be mounted via a flange nipple, either above or below the manifold, depending on the appliance design.
- Carefully route the new capillary tube and position the sensing bulb in the same location as the original. Avoid kinking or damaging the capillary tube.
- Connect the gas lines to the thermostat. Ensure all connections are tight and use appropriate thread sealant for gas fittings.
- Connect any electrical wiring as per the appliance's wiring diagram.
- Adjustments: The thermostat features front adjustments for both pilot and bypass settings. These adjustments should be made by a qualified technician according to the appliance manufacturer's specifications.
- Leak Test: After all connections are made, restore the gas supply and perform a leak test on all gas connections using a suitable leak detection solution. Do not use an open flame.
- Restore Power and Test: Restore electrical power to the appliance. Test the thermostat's operation across its temperature range to ensure proper function.

Image: The main body of the Robertshaw 4350-027 gas control thermostat, showing the capillary tube and sensing bulb, which are critical for temperature regulation.

Image: A view of the Robertshaw 4350-027 thermostat, highlighting the gas inlet and outlet connections, and the coiled capillary tube.
5. Operating Instructions
The Robertshaw 4350-027 thermostat simplifies oven operation with its integrated design.
- Setting Temperature: With a single turn of the control dial, the gas supply is initiated, and the desired oven temperature is set. Rotate the dial to the desired temperature marking.
- Temperature Control: The thermostat utilizes a modulating seat action to maintain the set temperature within the oven cavity. This ensures consistent heat delivery for cooking.
- Pilot and Bypass: The thermostat includes provisions for pilot and bypass adjustments, which are typically set during installation by a qualified technician to ensure optimal performance and safety.
6. Maintenance
Regular maintenance helps ensure the longevity and proper function of your thermostat.
- Cleaning: Periodically clean the exterior of the control dial and surrounding area with a soft, damp cloth. Avoid using abrasive cleaners or solvents.
- Inspection: Annually, or as recommended by the appliance manufacturer, have a qualified technician inspect the thermostat and its connections for any signs of wear, damage, or gas leaks.
- Capillary Tube: Ensure the capillary tube and sensing bulb remain securely in place and are not damaged or kinked.
7. Troubleshooting
If you experience issues with your oven's temperature control, consider the following common troubleshooting steps. For complex issues, always contact a qualified service technician.
| Problem | Possible Cause | Solution |
|---|---|---|
| Oven not heating | No gas supply, pilot light out, faulty igniter, thermostat malfunction. | Check gas supply. Relight pilot if applicable. Consult a technician for igniter or thermostat issues. |
| Inconsistent oven temperature | Sensing bulb dislodged or damaged, thermostat calibration issue, oven door seal leak. | Ensure sensing bulb is correctly positioned. Contact a technician for calibration or thermostat replacement. Check oven door seal. |
| Gas odor | Gas leak. | IMMEDIATELY shut off gas supply, ventilate area, and contact gas company or qualified technician. Do not operate electrical switches. |
8. Specifications
| Feature | Specification |
|---|---|
| Brand | Robertshaw |
| Model Number | 4350-027 |
| Controller Type | Mechanical knob |
| Specific Uses For Product | Gas Oven Control |
| Temperature Control Type | Manual |
| Power Source | Battery Powered (Note: This specification may refer to an auxiliary function or be a general listing. The primary gas control does not typically require battery power.) |
| Voltage | 230 Volts (Note: This specification may refer to an auxiliary function or be a general listing. Verify compatibility with your appliance's requirements.) |
| Display Type | Analog |
| Control Type | Dial Control |
| Mounting Type | Wall Mount (Note: This specification may refer to a general thermostat category. For oven applications, it mounts within the appliance structure.) |
| Item Weight | 1.35 Pounds |
| Included Components | Mounting hardware, installation accessories |
9. Warranty and Support
For information regarding the warranty of your Robertshaw 4350-027 Gas Cooking Control Thermostat Kit, please refer to the documentation provided with your purchase or contact Robertshaw customer support directly. Keep your proof of purchase for warranty claims.
For technical assistance or service, it is recommended to contact a qualified appliance technician or the Robertshaw customer service department. You can often find contact information on the manufacturer's official website or through your original point of purchase.


