1. Product Overview
The LuvLap Sunshine Baby Stroller is designed to provide a safe, comfortable, and convenient experience for both parent and child. This manual provides essential information for the correct assembly, operation, and maintenance of your stroller.

Image 1: LuvLap Sunshine Baby Stroller. This image displays the fully assembled stroller from the front-side angle, highlighting its blue and black color scheme and overall design.

Image 2: Key Features. This image highlights various components of the stroller including the reversible handlebar, extendable canopy, rear wheels, big storage basket, 360° front swivel wheel with lock, adjustable leg rest, 5-point safety harness, cushioned handle, washable soft cushioned seat, and looking window.
2. Contents in the Box
Before assembly, please ensure all parts are present and undamaged. The box should contain the following:
- Stroller Frame (pre-assembled with seat fabric and canopy)
- 2 Rear Wheels
- 2 Front Wheels
- Shopping Basket
- Footrest Rod
- Mosquito Net
- Instruction Manual
Video 1: Contents in the Box & Assembly. This video demonstrates the unboxing and assembly process of the LuvLap Sunshine Stroller, showing all included components and step-by-step instructions.
3. Assembly Instructions
3.1. Unfolding the Stroller
- Locate the frame holder/lock on the side of the folded stroller.
- Unhook the frame holder.
- Grasp the handlebar and the front stroller frame. Push open the stroller until a "click" sound is heard, indicating the frame is locked in the open position.
3.2. Installing Wheels
- Front Wheels: Pull the lever up on the front wheel assembly. Insert the wheel into the sockets provided in the front of the stroller frame. Ensure the red locks are facing forward. Push until an audible click is heard, confirming secure locking.
- Rear Wheels: Push the rear wheels up into the sockets on the rear frame. Align the wheel with the lock provided with the socket until an audible click is heard, ensuring secure locking.
3.3. Installing Footrest Rod
- Insert the footrest rod into the slots provided on the sides below the footrest area.
3.4. Installing Shopping Basket
- Attach the shopping basket to the rods provided below the seat, near the front and rear wheels.
- Secure the basket using the buttons or fasteners provided on the basket itself.
3.5. Installing Mosquito Net
- Pull down the canopy.
- Attach the mosquito net to the poles on either side of the stroller.
- Pull the net down in the forward direction to cover the seat area completely.
Once all components are assembled, secure the entire stroller frame using the security locks on the side to ensure stability before placing your child in it.
4. Operating Instructions
4.1. Folding the Stroller
- Ensure the child is removed from the stroller.
- Locate the folding mechanism, typically a lever or button on the handlebar or side frame.
- Activate the mechanism and push the stroller frame downwards to fold it compactly.
- Secure the folded stroller with the frame holder/lock.

Image 3: Compact & Easy to Use. This image illustrates the stroller in its open and folded states, highlighting the locking mechanism for compact storage.
4.2. Reversible Handlebar
The reversible handlebar allows you to change the direction your child faces, enabling face-to-face interaction or forward-facing views.
- Locate the levers on both sides of the handlebar.
- Pull both levers simultaneously and rotate the handlebar over the canopy to the desired position.
- Ensure the handlebar locks securely into place before use.
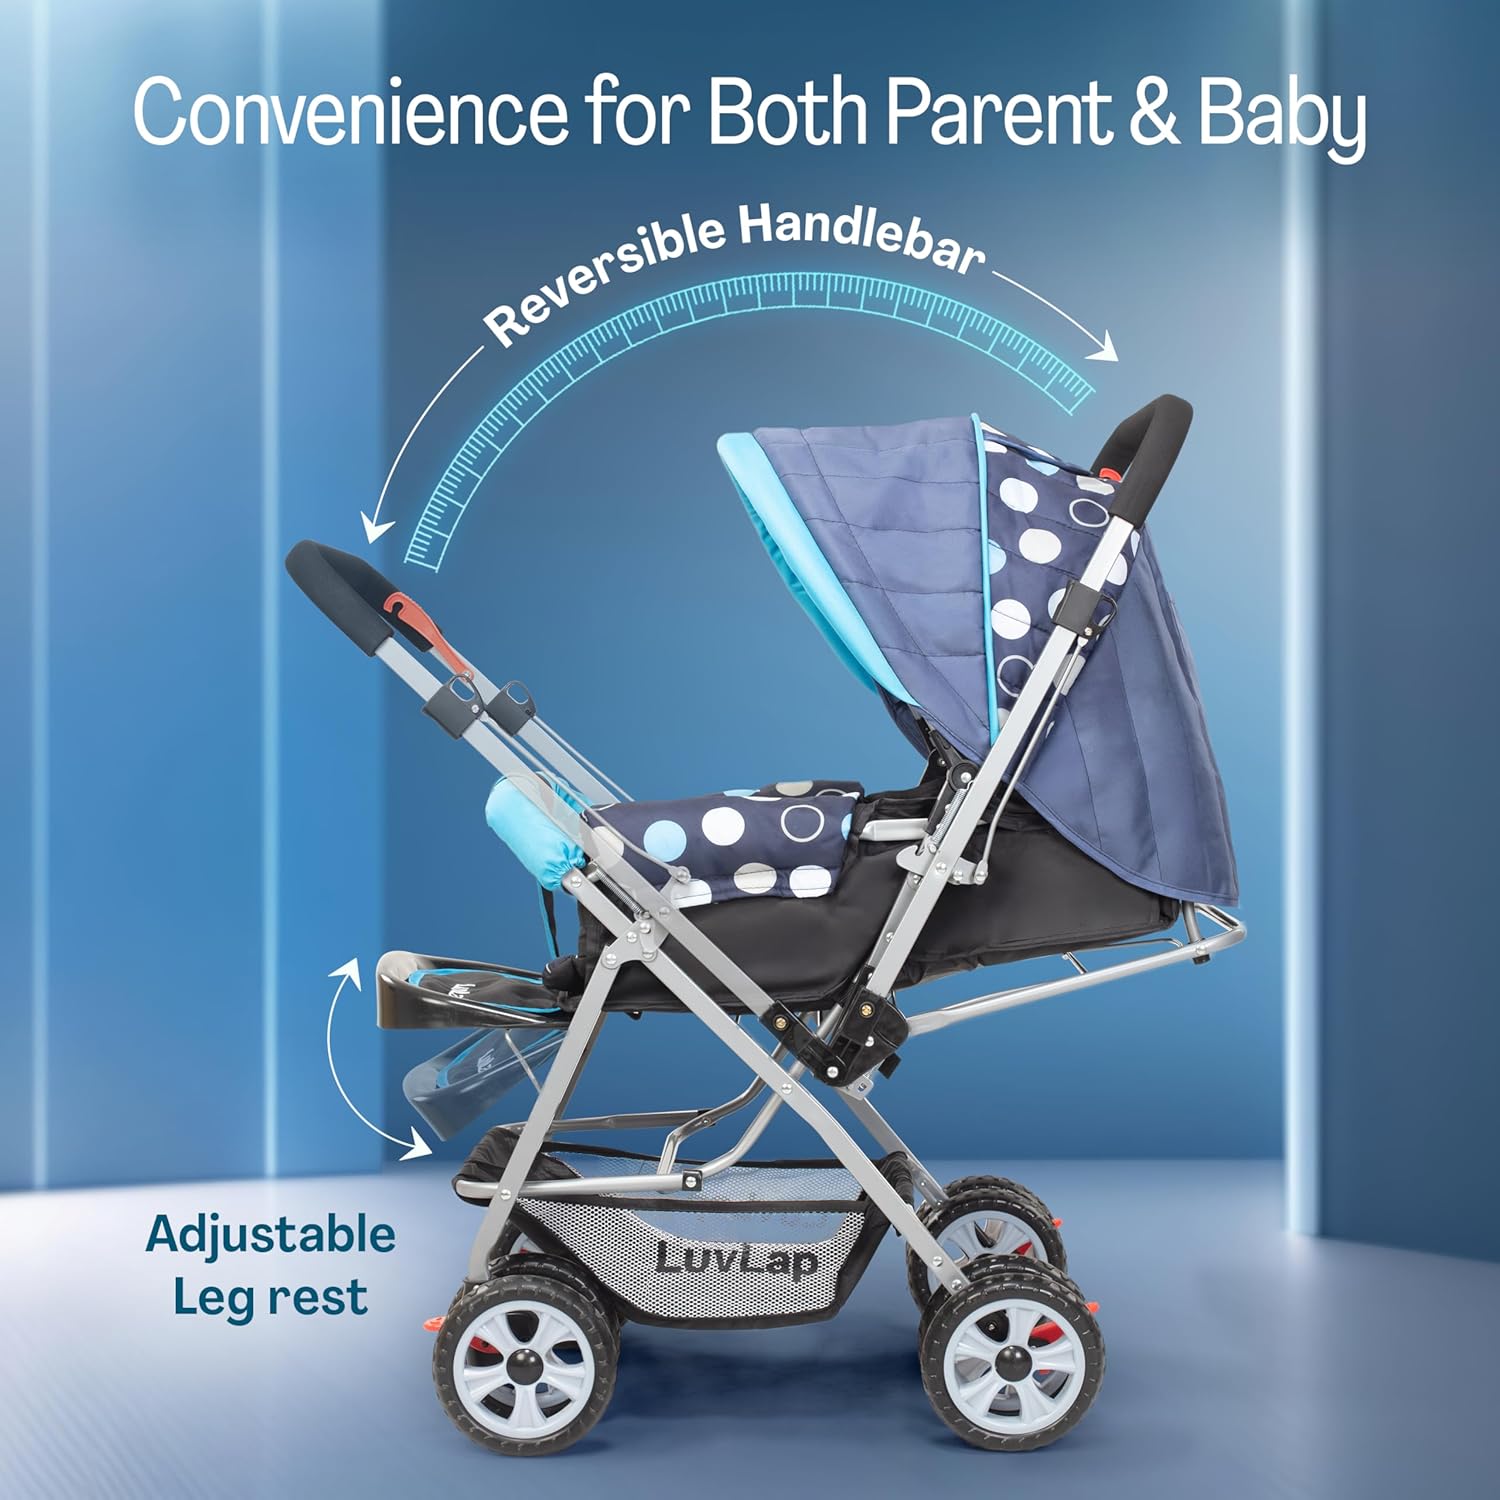
Image 4: Reversible Handlebar. This image demonstrates the reversible handlebar feature, showing how it can be adjusted to allow the baby to face either forward or towards the parent.
4.3. 5-Point Safety Harness
Always secure your child with the 5-point safety harness to prevent accidental falls.
- Place your child in the seat.
- Bring the shoulder straps over your child's shoulders and the waist straps around their waist.
- Connect the shoulder and waist straps to the central buckle. Ensure all straps are securely fastened and adjusted snugly without being too tight.

Image 5: 5-Point Safety Harness. This close-up image shows the 5-point safety harness buckle, emphasizing its role in securing the child safely within the stroller.
4.4. 3-Position Seat Recline
The stroller offers three recline positions for your child's comfort, allowing them to sit, relax, or sleep.
- Locate the recline adjustment mechanism, typically a lever or strap at the back of the seat.
- Adjust the seat to one of the three available positions: upright, semi-recline, or full recline.
- Ensure the seat is securely locked in the chosen position.

Image 6: 3-Position Seat Recline. This image illustrates the three adjustable recline positions of the stroller seat, providing options for sitting, relaxing, or sleeping.
4.5. Wheel Operation (Swivel, Lock, Brakes)
The stroller features 360° swivel front wheels with a lock and rear wheel brakes for enhanced maneuverability and safety.
- Front Wheel Swivel Lock: To lock the front wheels for straight-line strolling, push down the small lever or knob located above each front wheel. To unlock for 360° swivel, pull the lever up.
- Rear Wheel Brakes: To engage the brakes, press down on the red brake pedals located near the rear wheels. Ensure both brakes are engaged when parking the stroller. To release the brakes, lift the pedals upwards.

Image 7: Front Swivel Wheel and Rear Wheel Brakes. This image details the 360° front swivel wheels with their locking mechanism and the rear wheel brakes for secure parking.
4.6. Adjustable Footrest
The footrest can be adjusted to provide optimal leg support for your growing child.
- Locate the adjustment mechanism under the footrest.
- Press the buttons or levers and move the footrest up or down to the desired position.
- Ensure it locks securely.
4.7. Extendable Canopy
The extendable canopy provides protection from sun and wind.
- Pull the canopy forward to extend it for maximum coverage.
- Push it back to retract.
4.8. Peek-a-boo Window
The peek-a-boo window on the canopy allows you to check on your child without disturbing them.
- Lift the flap on the canopy to reveal the transparent window.
- Close the flap when not in use.
5. Maintenance
5.1. Cleaning
Regular cleaning helps maintain the stroller's hygiene and appearance.
- Seat Cushions: The seat cushions are detachable and washable. Unhook the harness points and velcro fasteners to remove the cushions. Hand wash with mild detergent and air dry.
- Frame: Wipe the metal frame with a damp cloth and mild soap. Dry thoroughly.
- Wheels: Periodically clean debris from the wheels and lubricate moving parts if necessary.
5.2. Storage
When not in use, fold the stroller compactly and store it in a dry, safe place away from direct sunlight and extreme temperatures.
6. Specifications
| Feature | Specification |
|---|---|
| Model Number | 18155 |
| Maximum Weight Recommendation | 15 Kilograms |
| Manufacturer Recommended Age | 0 - 3 years |
| Material | Alloy Steel (Frame: Aluminium) |
| Harness Type | 5 Point |
| Product Dimensions (LxWxH) | 29.4 x 29.4 x 8 Centimeters |
| Item Weight | 8.4 Kilograms |
| Folded Size | 28.34 x 19.68 x 10.23 inches |
| Additional Features | Back pocket, Looking window, Shopping basket |
7. Troubleshooting
If you encounter any issues with your LuvLap Sunshine Stroller, please refer to the following common troubleshooting tips:
- Stroller not unfolding/folding smoothly: Ensure all locks and levers are disengaged/engaged correctly. Check for any obstructions in the folding mechanism.
- Wheels not moving freely: Check for debris (e.g., hair, dirt) caught in the wheel axles. Clean and lubricate if necessary. Ensure wheel locks are disengaged.
- Brakes not engaging/disengaging: Verify that the brake pedals are fully pressed down or lifted. Check for any obstructions preventing full movement of the brake mechanism.
- Stroller feels unstable: Ensure all frame locks are securely engaged after unfolding. Check that wheels are properly installed and locked.
For persistent issues or concerns not addressed here, please contact customer support.
8. Warranty and Support
For warranty information, product registration, or customer support, please refer to the contact details provided with your purchase documentation or visit the official LuvLap website.
Manufacturer: Universal Corporation Limited
Country of Origin: China


