
CLY GL-19023
CLY Solar Lights Outdoor Security Flood Light User Manual
Model: GL-19023
1. Introduction
The CLY Solar Lights Outdoor Security Flood Light is designed to provide efficient and eco-friendly illumination for various outdoor spaces. Featuring a durable, waterproof design and multiple lighting modes, this floodlight automatically charges during the day and illuminates at night, offering reliable security and landscape lighting.
2. Product Features
- High Brightness & Wide Coverage: Equipped with 14 super bright spherical LED lamp beads, delivering 400 lumens with a 120-degree beam angle, providing effective lighting up to 5-6 meters (16.4-19.7 feet).
- Efficient Solar Charging: Features a 4W/6V solar panel for maximum illumination, eliminating the need for external electricity and promoting environmental friendliness.
- Adjustable Color Temperature: Offers three color temperature options: Warm White (3000K), Natural White (4500K), and Daylight White (6000K) to suit different preferences and applications.
- Dual Brightness Modes: Includes a Highlight mode for 6 hours of illumination and a Lowlight mode for 12 hours, with a power display on the switch box for convenience.
- Versatile Installation: Can be installed as a wall-mounted security light using the adjustable bracket or as a landscape light with the included ground pile.
- All-Weather Durability: IP66 waterproof rating ensures reliable operation in various weather conditions, including rain, sleet, and snow.
- Automatic Dusk-to-Dawn Operation: Integrated light sensor automatically turns the floodlight on at dusk and off at dawn, providing hassle-free operation.
3. Package Contents
Please check the package to ensure all components are present and in good condition.
- CLY Solar Flood Light (1 unit)
- Solar Panel (1 unit)
- Control Box / Switch Box (1 unit)
- Adjustable Wall Mount Bracket (1 unit)
- Ground Pile / Stake (1 unit)
- Mounting Hardware (screws, anchors)
- User Manual (this document)
4. Specifications
| Brand | CLY |
| Model Number | GL-19023 |
| Light Source | 14 LED Lamp Beads |
| Brightness | 400 Lumens |
| Beam Angle | 120 Degrees |
| Lighting Distance | 5-6 meters (16.4-19.7 feet) |
| Solar Panel | 4W/6V |
| Color Temperatures | Warm White (3000K), Natural White (4500K), Daylight White (6000K) |
| Brightness Modes | Highlight (6 hours), Lowlight (12 hours) |
| Waterproof Rating | IP66 |
| Power Source | Solar Powered, Lithium Ion Battery (included) |
| Product Dimensions | 7.75"L x 3.5"W x 6.5"H |
| Item Weight | 2.14 pounds |
| Material | Glass, Metal |
5. Safety Information
- Ensure the solar panel is installed in a location that receives direct sunlight for at least 6-8 hours daily to ensure optimal charging.
- Do not disassemble or modify the product. Unauthorized modifications may cause damage and void the warranty.
- Keep the product away from fire or extreme heat sources.
- Avoid direct eye exposure to the LED light, as it can be very bright.
- Clean the solar panel regularly to remove dust and debris, which can affect charging efficiency.
- Dispose of batteries according to local regulations.
6. Setup and Installation
The CLY Solar Flood Light offers two primary installation methods: ground mounting and wall mounting.
6.1 Choosing an Installation Location
Select a location for the solar panel that receives maximum direct sunlight throughout the day, free from obstructions like trees or buildings. The floodlight itself can be positioned to illuminate the desired area.
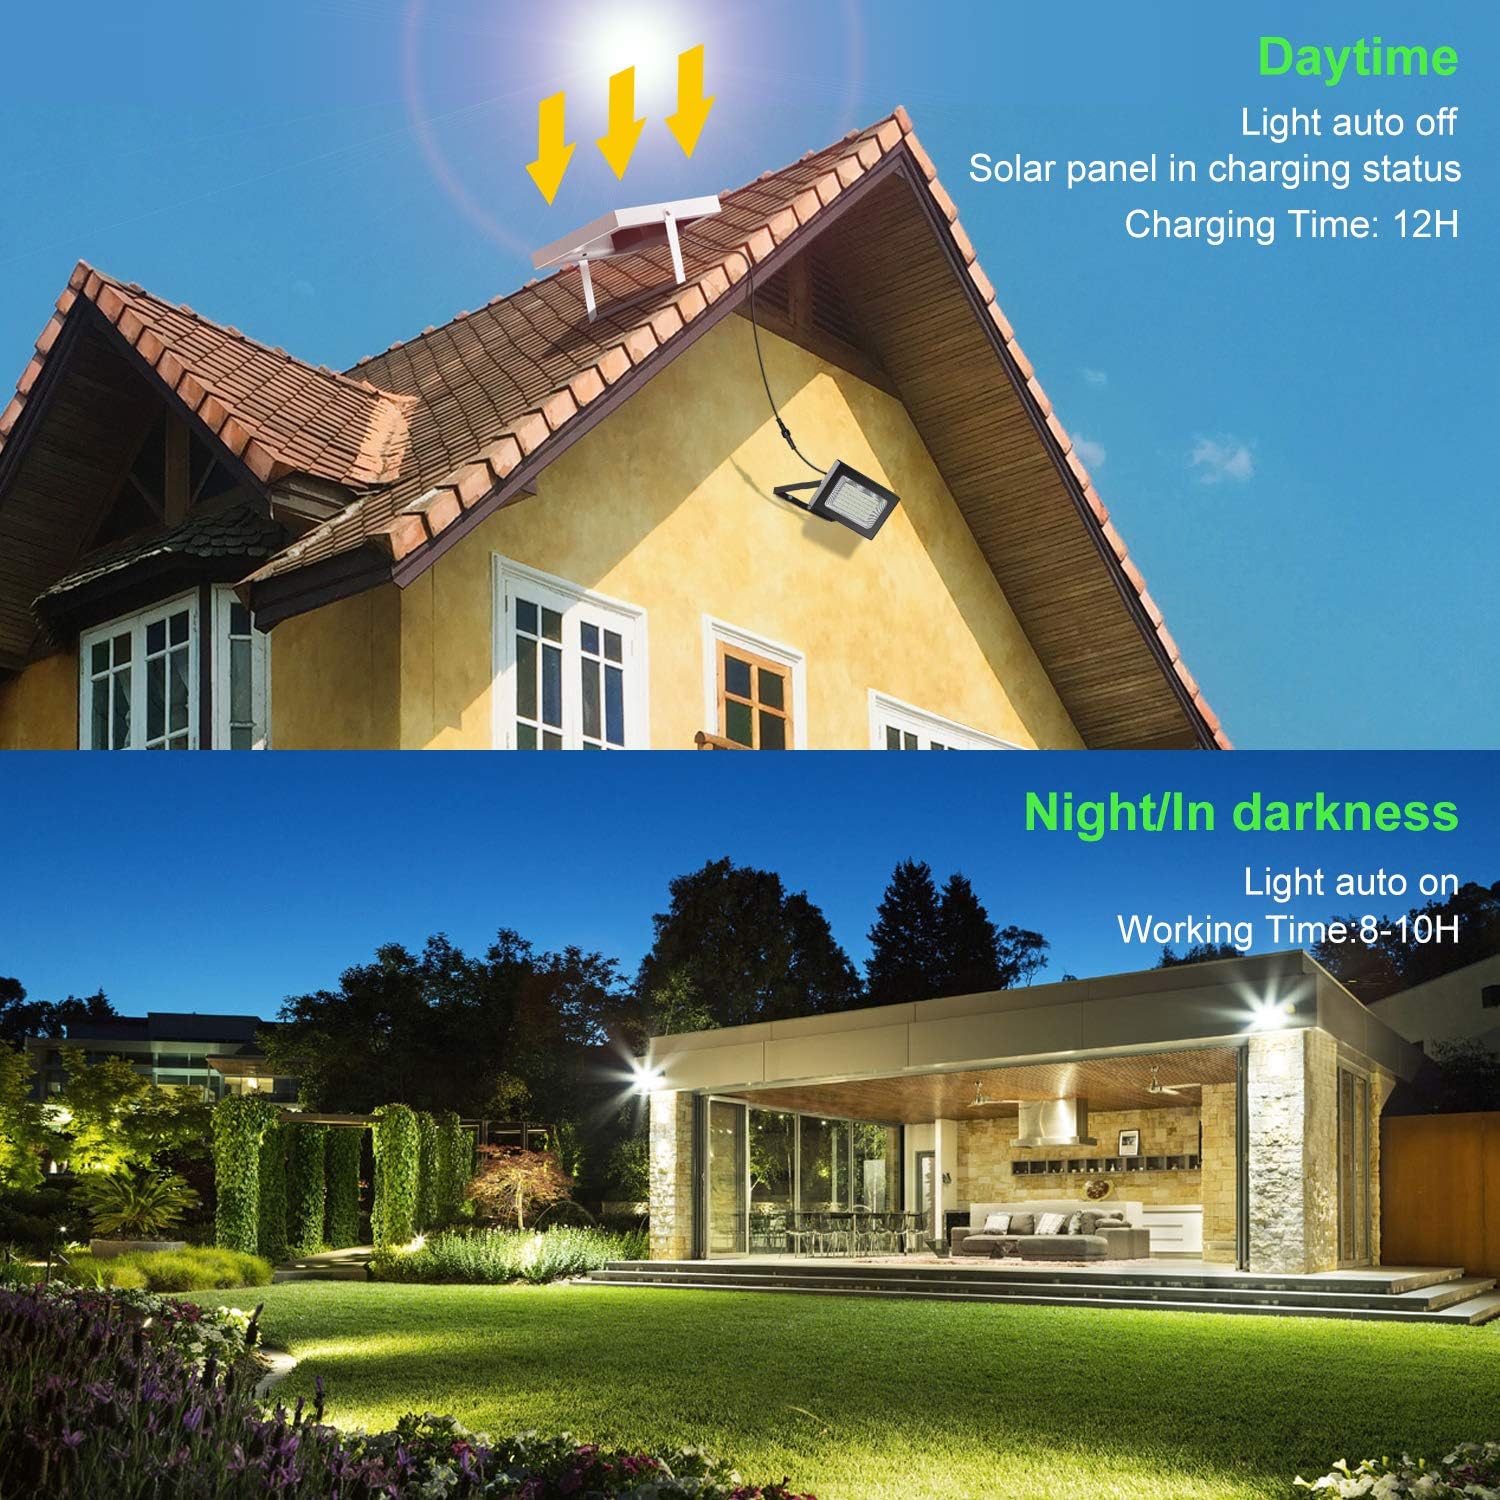
Image: Illustration of solar panel placement for optimal daytime charging and floodlight operation at night.
6.2 Ground Mounting (Landscape Light)
- Attach the ground pile to the bottom of the solar panel bracket.
- Insert the ground pile firmly into the soil in your chosen sunny location.
- Adjust the angle of the solar panel to face the sun for optimal charging.
- Connect the solar panel cable to the control box.
- Connect the floodlight cable to the control box.
- Position the floodlight in the desired area, using its integrated stand to angle it as needed.

Image: The main components of the CLY Solar Flood Light, showing the solar panel, control box, and floodlight, ready for assembly.
6.3 Wall Mounting (Security Light)
- Using the adjustable wall mount bracket, mark the drilling points on the wall for both the solar panel and the floodlight.
- Drill holes and insert wall anchors if necessary.
- Securely attach the solar panel bracket and the floodlight bracket to the wall using the provided screws.
- Adjust the angle of the solar panel to maximize sun exposure.
- Connect the solar panel cable to the control box.
- Connect the floodlight cable to the control box.
- Ensure all connections are secure and waterproof.
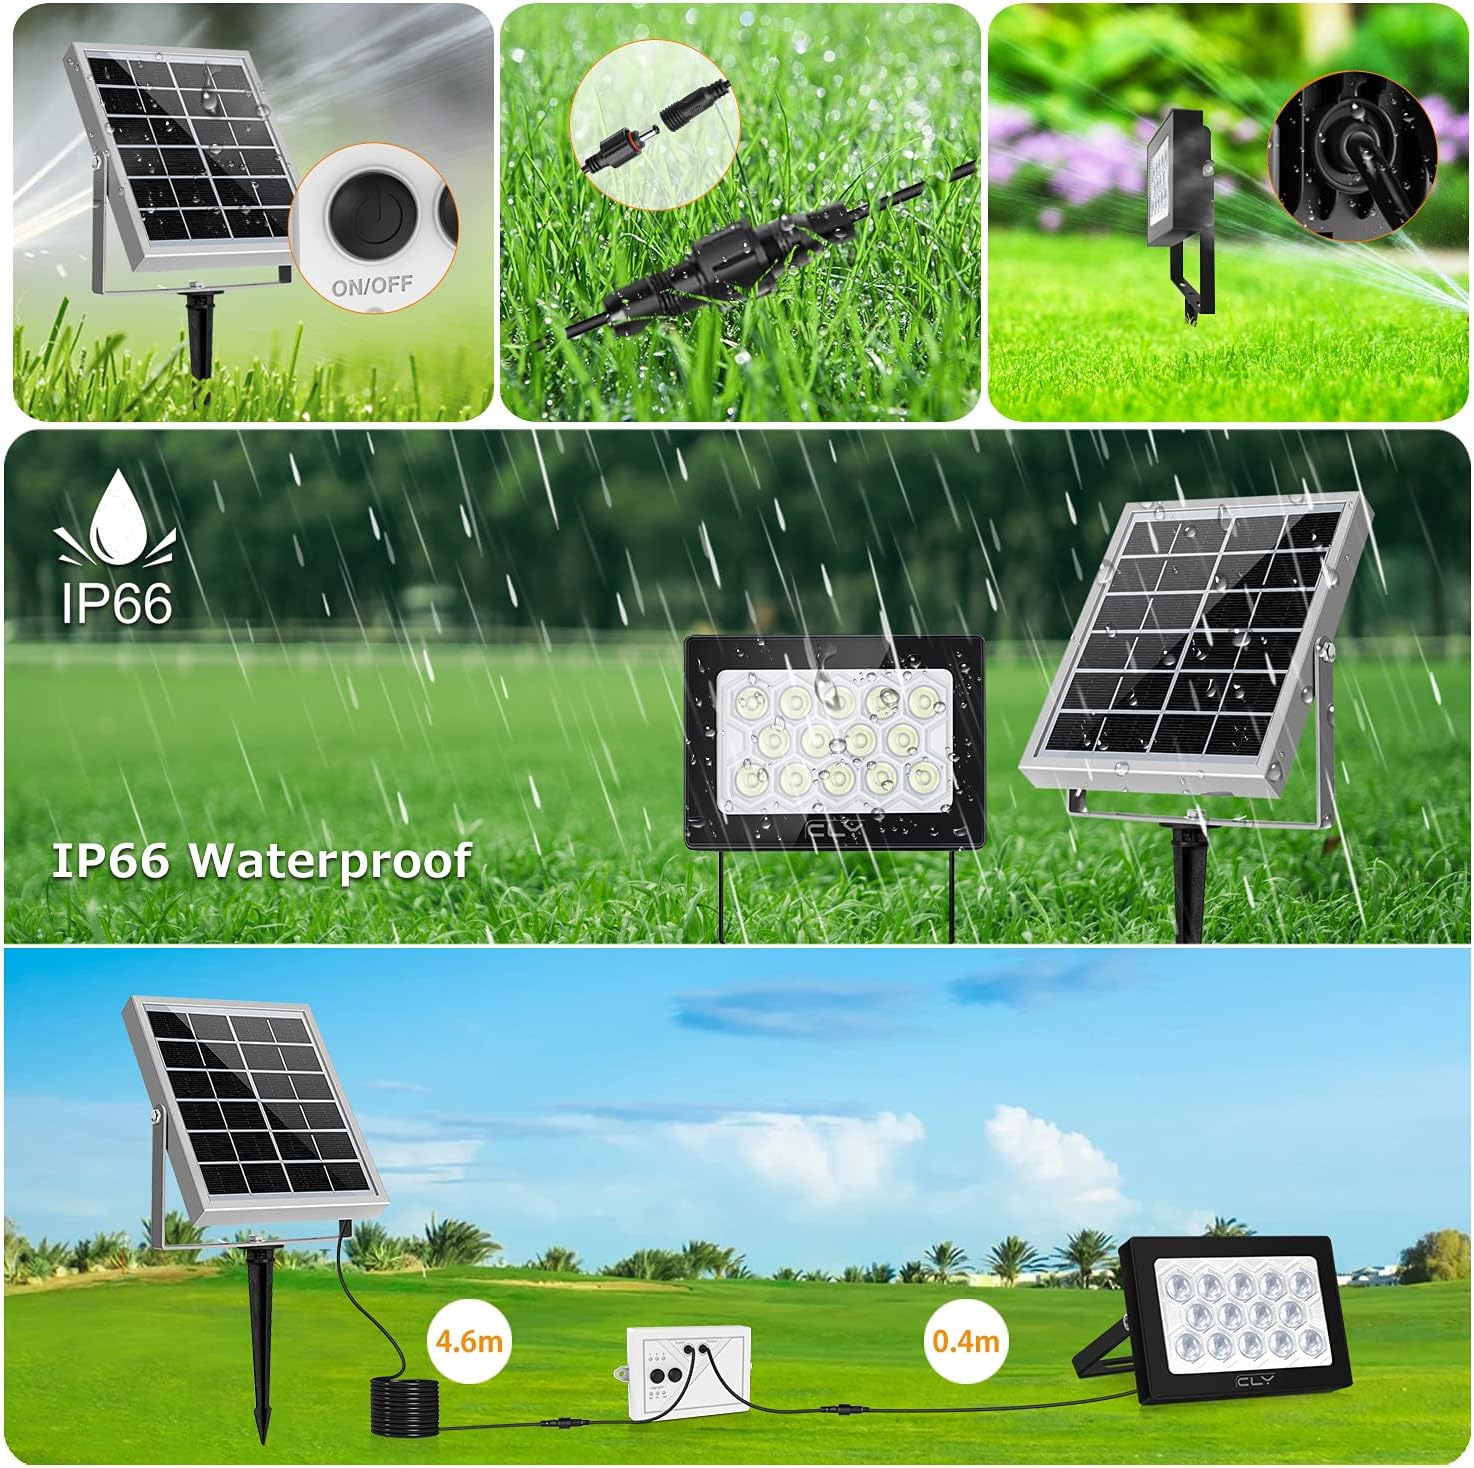
Image: Visual representation of the IP66 waterproof feature, secure cable connections, and both ground stake and wall mount installation methods.
7. Operating Instructions
The CLY Solar Flood Light is designed for automatic operation, but offers customizable settings via its control box.
7.1 Initial Activation
After installation, ensure the solar panel has received sufficient sunlight for initial charging. The light will automatically activate at dusk.
7.2 Using the Control Box
The control box allows you to select color temperature and brightness modes.
- Color Temperature Selection: Use the dedicated button on the switch box to cycle through Warm White (3000K), Natural White (4500K), and Daylight White (6000K).
- Brightness Mode Selection: Use the dedicated button to switch between:
- Highlight Mode: Provides maximum brightness for approximately 6 hours.
- Lowlight Mode: Provides reduced brightness for approximately 12 hours.
- Power Display: The switch box includes an indicator for the current power level.

Image: Demonstrates the visual difference between Warm, Natural, and Daylight White light settings, and illustrates the effective lighting distance of the CLY floodlight compared to other brands.
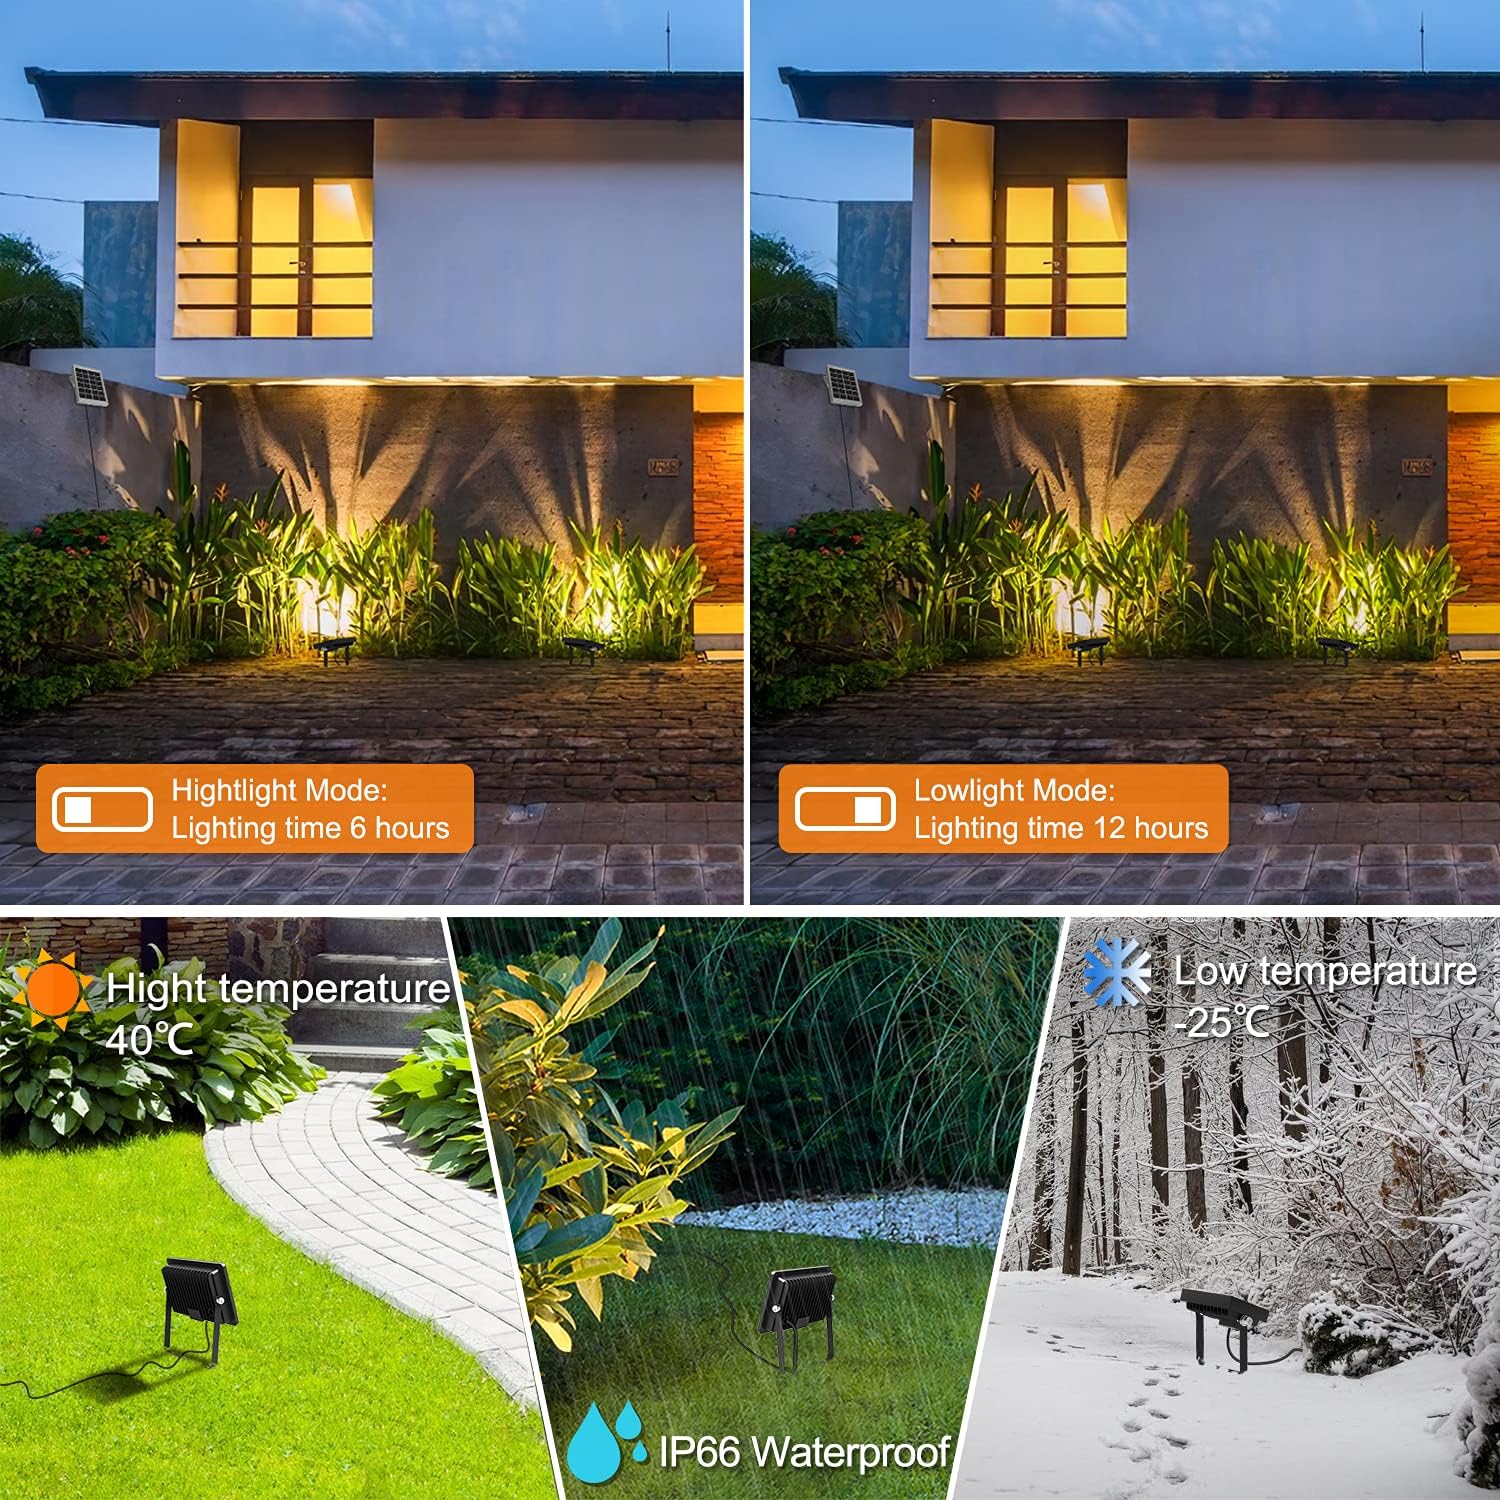
Image: Shows the visual effect of Highlight and Lowlight modes, along with icons indicating the product's resilience to high temperatures, rain, and low temperatures.
7.3 Automatic Dusk-to-Dawn Function
The integrated light sensor ensures the floodlight automatically turns on when ambient light levels drop (dusk) and turns off when light levels increase (dawn), conserving battery life.

Image: Depicts the automatic light sensor function, showing the light turning off during the day for charging and turning on automatically at night.
8. Maintenance
- Cleaning the Solar Panel: Regularly wipe the surface of the solar panel with a soft, damp cloth to remove dust, dirt, or debris. A clean panel ensures maximum sunlight absorption and charging efficiency.
- Checking Connections: Periodically inspect all cable connections between the solar panel, control box, and floodlight to ensure they remain secure and free from corrosion.
- Seasonal Adjustments: In regions with significant seasonal changes, consider adjusting the angle of the solar panel to optimize sun exposure during winter months when the sun's path is lower.
- Battery Longevity: The integrated Lithium Ion battery is designed for long-term use. Avoid prolonged periods of complete discharge to maximize battery lifespan.
9. Troubleshooting
| Problem | Possible Cause | Solution |
|---|---|---|
| Light does not turn on at night. | Insufficient solar panel charging. | Ensure the solar panel is in a location that receives direct sunlight for 6-8 hours daily. Clean the solar panel surface. |
| Light duration is shorter than expected. | Inadequate charging or low battery. | Verify solar panel placement and cleanliness. Ensure the light is set to Lowlight mode for longer duration if needed. Battery may be nearing end of life. |
| Light flickers or is dim. | Low battery charge or loose connection. | Allow the solar panel to charge fully. Check all cable connections for tightness. |
| Light stays on during the day. | Light sensor obstructed or faulty. | Ensure no objects are covering the light sensor on the solar panel or floodlight. If problem persists, contact support. |
10. Warranty and Support
For warranty information and technical support, please refer to the product packaging or contact CLY customer service directly. Keep your purchase receipt as proof of purchase for any warranty claims.
You can visit the official CLY store for more information and product updates: CLY Official Store
Ask a question about this manual
Ask about setup, troubleshooting, compatibility, parts, safety, or missing instructions. Manuals+ will review the question and use this page’s manual context to help answer it.