1. Introduction
Thank you for choosing the REDMOND RMC-PM4506A Pressure Multi Cooker. This appliance is designed to provide versatile and efficient cooking, combining the functions of a pressure cooker and a multi-cooker. It features a 5-quart non-stick ceramic coated bowl, 4-level safety protection, a Time Delay function up to 24 hours, and an Automatic Keep Warm function up to 8 hours. Please read this manual thoroughly before first use to ensure safe and optimal operation.
This manual provides essential information on setup, operation, maintenance, and troubleshooting for your REDMOND RMC-PM4506A.
2. Important Safety Information
When using electrical appliances, basic safety precautions should always be followed to reduce the risk of fire, electric shock, and/or injury to persons, including the following:
- Read all instructions carefully before operating the appliance.
- Do not touch hot surfaces. Use handles or knobs.
- To protect against electrical shock, do not immerse cord, plugs, or the main unit in water or other liquid.
- Close supervision is necessary when any appliance is used by or near children.
- Unplug from outlet when not in use and before cleaning. Allow to cool before putting on or taking off parts.
- Do not operate any appliance with a damaged cord or plug, or after the appliance malfunctions or has been damaged in any manner.
- Do not use outdoors.
- Do not let cord hang over edge of table or counter, or touch hot surfaces.
- Do not place on or near a hot gas or electric burner, or in a heated oven.
- Extreme caution must be used when moving an appliance containing hot oil or other hot liquids.
- Always attach plug to appliance first, then plug cord into the wall outlet. To disconnect, turn any control to "off", then remove plug from wall outlet.
- Do not use appliance for other than intended use.
- This appliance cooks under pressure. Improper use may result in scalding injury. Make certain unit is properly closed before operating.
- Never force open the pressure cooker. Do not open until unit has cooled and internal pressure has been released.
- Do not fill the unit above 2/3 full. When cooking foods that expand during cooking, such as rice or dried vegetables, do not fill the unit above 1/2 full.
- Always check the pressure release valve and float valve for clogging before use.
3. Product Components
Familiarize yourself with the parts of your REDMOND RMC-PM4506A Pressure Multi Cooker.
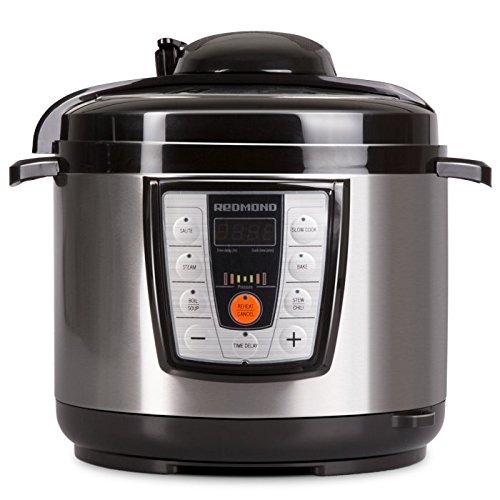
Image 1: The REDMOND RMC-PM4506A Pressure Multi Cooker, featuring a black and stainless steel exterior with a control panel on the front. This image shows the overall design of the appliance.
- Main Unit: The exterior housing containing the heating element and control panel.
- Inner Pot: 5-quart removable bowl with non-stick ceramic coating.
- Lid: Pressure cooking lid with sealing gasket, pressure release valve, and float valve.
- Condensation Collector: Small cup attached to the side/back to collect condensation.
- Power Cord: Detachable power cord.
- Measuring Cup & Spoon: For accurate ingredient measurement.
4. Setup and First Use
4.1 Unpacking
- Remove all packaging materials, stickers, and labels from the appliance.
- Check that all listed components are present.
4.2 Cleaning Before First Use
- Wash the inner pot, lid (including sealing gasket, pressure release valve, and float valve), measuring cup, and spoon with warm, soapy water. Rinse thoroughly and dry completely.
- Wipe the exterior of the main unit with a damp cloth. Do not immerse the main unit in water.
4.3 Initial Setup
- Place the multi cooker on a stable, level, heat-resistant surface, away from heat sources and water.
- Ensure the condensation collector is properly installed on the back or side of the unit.
- Insert the inner pot into the main unit. Ensure it sits correctly and is not tilted.
- Connect the power cord to the appliance, then plug it into a 120V electrical outlet.
5. Operating Instructions
5.1 Basic Operation
- Add ingredients to the inner pot. Ensure liquid levels are within the minimum and maximum fill lines.
- Place the lid on the multi cooker, aligning the arrow on the lid with the arrow on the base. Rotate the lid clockwise until it locks into place.
- Ensure the pressure release valve is set to the "Sealing" position for pressure cooking.
- Plug in the appliance. The display will show "OFF".
- Select your desired cooking program using the control panel. The appliance offers various preset functions.
- Adjust cooking time if necessary using the "+" and "-" buttons.
- Press "Start" or wait a few seconds for the program to begin automatically.
- Once cooking is complete, the appliance will beep and automatically switch to the "Keep Warm" function (up to 8 hours).
5.2 Releasing Pressure
There are two methods for releasing pressure:
- Natural Release: Allow the cooker to cool down naturally. The pressure will dissipate gradually. This method is recommended for foamy foods or large cuts of meat.
- Quick Release: Carefully turn the pressure release valve to the "Venting" position. Steam will rapidly escape. Keep hands and face away from the steam. Use a utensil to turn the valve to avoid direct contact.
The lid can only be opened once the float valve has dropped down, indicating that all pressure has been released.
5.3 Time Delay Function
The Time Delay function allows you to program the cooker to start at a later time, up to 24 hours.
- Prepare your ingredients and place them in the inner pot.
- Select your desired cooking program and adjust the cooking time.
- Press the "Delay Start" button.
- Use the "+" and "-" buttons to set the desired delay time (in hours).
- Press "Start" to confirm. The display will count down the delay time, then automatically begin the cooking program.
6. Care and Maintenance
6.1 Cleaning
Regular cleaning ensures optimal performance and extends the life of your appliance.
- Always unplug the multi cooker and allow it to cool completely before cleaning.
- Inner Pot: The 5-quart inner pot is dishwasher safe. For hand washing, use warm, soapy water and a non-abrasive sponge. Rinse thoroughly.
- Lid: Disassemble the lid components (sealing gasket, pressure release valve, float valve) and wash them with warm, soapy water. Ensure all parts are clean and free of food debris. Reassemble correctly before next use.
- Main Unit: Wipe the exterior with a damp cloth. Do not use abrasive cleaners or immerse the main unit in water.
- Condensation Collector: Empty and wash the condensation collector after each use.
6.2 Storage
Store the appliance in a dry place, away from direct sunlight and out of reach of children. Ensure all parts are clean and dry before storage.
7. Troubleshooting
If you encounter issues with your REDMOND RMC-PM4506A, refer to the following common problems and solutions:
| Problem | Possible Cause | Solution |
|---|---|---|
| Cooker not building pressure. | Lid not properly closed; pressure release valve in "Venting" position; sealing gasket not installed or damaged; insufficient liquid. | Ensure lid is locked; turn valve to "Sealing"; check/reinstall/replace gasket; add more liquid. |
| Lid cannot be opened after cooking. | Internal pressure has not been fully released. | Ensure float valve has dropped. If not, perform quick release or wait for natural release. Do not force open. |
| Food is undercooked. | Insufficient cooking time; incorrect program selected. | Increase cooking time; select appropriate program. |
| Error code displayed. | Specific internal malfunction. | Refer to the specific error code in the full manual (if available) or contact customer support. |
If the problem persists after attempting these solutions, please contact REDMOND customer support.
8. Specifications
| Model: | RMC-PM4506A |
| Voltage: | 120 Volts |
| Wattage: | 900 watts |
| Capacity: | 5 Quarts |
| Material: | Metal, Plastic |
| Color: | Black + Stainless steel |
| Product Dimensions: | 12 x 12 x 13 inches |
| Item Weight: | 12.52 pounds |
| Special Features: | Automatic Shut-Off, Countdown Timer, Dishwasher Safe (inner pot), Programmable, Time Delay (up to 24 hours), Automatic Keep Warm (up to 8 hours), 4 Level safety protection. |
| Control Method: | Touch |
| UPC: | 812673020069 |
9. Warranty and Support
9.1 Warranty Information
The REDMOND RMC-PM4506A Pressure Multi Cooker comes with a 24-month warranty from the date of purchase. This warranty covers defects in materials and workmanship under normal use. It does not cover damage resulting from misuse, accident, alteration, neglect, or unauthorized repair.
Please retain your proof of purchase for warranty claims.
9.2 Customer Support
For technical assistance, warranty service, or general inquiries, please contact REDMOND customer support. Contact details can typically be found on the official REDMOND website or on the product packaging.
When contacting support, please have your model number (RMC-PM4506A) and purchase date available.


