
Ubiquiti Networks LBE-M5-23
Contents
Ubiquiti LiteBeam M5 Network Antenna User Manual
Model: LBE-M5-23
1. Introduction
The Ubiquiti LiteBeam M5 is a lightweight and compact outdoor wireless broadband product designed for long-distance, wireless broadband bridging. Operating in the license-free 5 GHz frequency range, it delivers high-performance speeds for various networking applications.
This device integrates the entire radio system into the antenna feed using Ubiquiti's proprietary InnerFeed technology. It utilizes the revolutionary airMAX Time Division Multiple Access (TDMA) protocol, which enhances network performance and scalability by managing time slots for data transmission, thereby eliminating hidden node collisions and maximizing airtime efficiency. The LiteBeam M5 is capable of establishing high-speed links over distances exceeding 30 kilometers.
2. Safety Information
Please read, follow, and keep these instructions. Heed all warnings. Only use attachments/accessories specified by the manufacturer.
- Proper Installation: Ensure the device is installed by qualified personnel. Follow local electrical codes and regulations.
- Mounting: Mount the device securely to a stable structure. Avoid mounting during adverse weather conditions.
- Power Supply: Use only the power adapter provided by Ubiquiti Networks. Incorrect power supply can damage the device and void the warranty.
- Environmental Conditions: Do not operate the device in areas with standing water or excessive moisture. Ensure proper ventilation.
- Lightning Protection: For outdoor installations, proper grounding and lightning protection are highly recommended to prevent damage from electrical surges.
- RF Exposure: Maintain a minimum separation distance from the antenna to ensure compliance with RF exposure guidelines. Consult the product datasheet for specific distances.
3. Package Contents
Verify that your package contains the following items:
- LiteBeam M5 Unit (LBE-M5-23)
- Mounting Bracket
- Pole Clamp
- Gigabit PoE Adapter (24V, 0.3A) with Mounting Bracket
- Power Cord
4. Hardware Overview
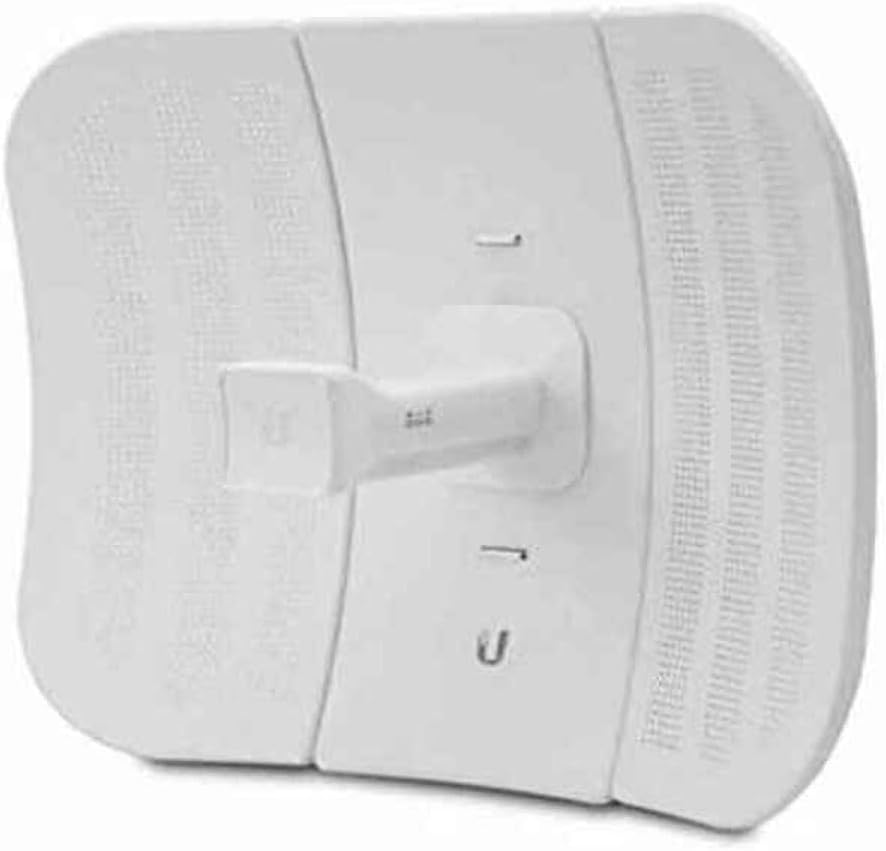
Figure 4.1: Angled view of the LiteBeam M5 Network Antenna, showing its compact design and integrated feed.

Figure 4.2: Top-down view of the LiteBeam M5, highlighting the central feed and antenna panels.

Figure 4.3: The LiteBeam M5 mounted on a pole, demonstrating its outdoor installation capability.
4.1. Ports and Indicators
- Ethernet Port: Used for connecting to your network device (e.g., router, switch) and for Power over Ethernet (PoE) input.
- Reset Button: Located near the Ethernet port. Used to reset the device to factory defaults (press and hold for approximately 10 seconds while powered on).
- LED Indicators:
- Power LED: Indicates power status.
- Ethernet LED: Indicates Ethernet connection activity.
- Signal Strength LEDs: Multiple LEDs indicate the strength of the wireless signal, aiding in antenna alignment.
5. Setup and Installation
5.1. Assembly
- Attach the mounting bracket to the LiteBeam M5 unit.
- Secure the pole clamp to the mounting bracket.
5.2. Mounting
The LiteBeam M5 is designed for pole mounting. Choose a mounting location that provides a clear line of sight to the other wireless device for optimal performance.
- Securely attach the assembled LiteBeam M5 to a pole using the pole clamp. Ensure the unit is stable and cannot be easily dislodged by wind.
- Adjust the tilt and swivel of the antenna for initial alignment.
5.3. Connecting Power and Data
- Connect an Ethernet cable from the LiteBeam M5's Ethernet port to the "PoE" port on the Gigabit PoE Adapter.
- Connect another Ethernet cable from the "LAN" port on the Gigabit PoE Adapter to your computer or network switch.
- Connect the power cord to the Gigabit PoE Adapter and then plug it into a power outlet. The Power LED on the LiteBeam M5 should illuminate.
5.4. Initial Configuration Access
To access the device's web-based configuration interface (airOS):
- Ensure your computer's Ethernet adapter is configured to obtain an IP address automatically (DHCP) or set a static IP address in the same subnet as the LiteBeam M5's default IP (e.g., 192.168.1.X, where X is not 20). The default IP address for the LiteBeam M5 is 192.168.1.20.
- Open a web browser and navigate to
https://192.168.1.20. - Enter the default login credentials: Username ubnt, Password ubnt. You will be prompted to change these upon first login for security.
6. Operation and Configuration (airOS)
The LiteBeam M5 runs on Ubiquiti's intuitive airOS firmware, providing advanced features for wireless link management.
6.1. Wireless Link Setup
To establish a wireless bridge:
- Access Point (AP) Mode: Configure one LiteBeam M5 as an Access Point (AP) to broadcast the wireless signal. Set the SSID, frequency, channel width, and security settings.
- Station (STA) Mode: Configure the second LiteBeam M5 as a Station (STA) to connect to the AP. Scan for the AP's SSID and connect using the configured security key.
- Network Settings: Configure IP addresses, subnet masks, and gateway settings for both devices to ensure proper network communication.
6.2. Antenna Alignment
Precise antenna alignment is crucial for maximizing throughput and link stability, especially over long distances.
- Use the signal strength LEDs on the device or the alignment tools within the airOS interface to fine-tune the antenna's direction.
- Adjust both horizontal (azimuth) and vertical (elevation) angles incrementally until the highest possible signal strength is achieved.
- Secure all mounting hardware once optimal alignment is confirmed.
7. Maintenance
- Firmware Updates: Regularly check the Ubiquiti Networks website for the latest firmware updates. Updating firmware can improve performance, add features, and address security vulnerabilities.
- Physical Inspection: Periodically inspect the device and mounting hardware for any signs of wear, corrosion, or damage, especially after severe weather.
- Cleaning: Keep the antenna surfaces clean from dirt, dust, and debris to ensure optimal signal transmission. Use a soft, damp cloth for cleaning.
8. Troubleshooting
8.1. No Power
- Ensure the PoE adapter is properly connected to a working power outlet.
- Verify that the Ethernet cable from the LiteBeam M5 is connected to the "PoE" port on the adapter.
- Check the power cord and adapter for any visible damage.
8.2. No Network Connectivity
- Confirm that the Ethernet LED on the LiteBeam M5 is active.
- Check Ethernet cable connections between the device, PoE adapter, and your network.
- Verify IP address settings on your computer and the LiteBeam M5.
- Try pinging the device's IP address (default 192.168.1.20).
8.3. Poor Wireless Performance / Low Throughput
- Antenna Alignment: Re-align the antennas carefully using the signal strength LEDs or airOS tools. Even slight misalignments can significantly impact performance.
- Line of Sight: Ensure there are no obstructions (trees, buildings, etc.) between the two antennas.
- Interference: Check for potential interference from other 5 GHz devices in the area. Use the airOS Spectrum Analyzer tool to identify clear channels.
- Firmware: Ensure both devices are running the latest stable firmware.
9. Specifications
| Feature | Specification |
|---|---|
| Brand | Ubiquiti Networks |
| Model | LBE-M5-23 |
| Operating Frequency | 5 GHz |
| Dimensions (L x W x H) | 10.51 x 14.25 x 7.24 inches |
| Weight | 1.65 pounds |
| Max Range (Link) | 30+ km (typical for high-speed links) |
| Power Method | Passive PoE (24V, 0.3A) |
| Networking Interface | (1) 10/100 Ethernet Port |
| UPC | 810354022326 |
10. Warranty and Support
For detailed warranty information, please refer to the official Ubiquiti Networks website or the warranty card included with your product. Warranty terms and conditions may vary by region.
For technical support, firmware downloads, and additional resources, visit the Ubiquiti Networks support website: www.ui.com/support. You can also find community forums and knowledge base articles for common issues and advanced configurations.
Ask a question about this manual
Ask about setup, troubleshooting, compatibility, parts, safety, or missing instructions. Manuals+ will review the question and use this page’s manual context to help answer it.