1. Introduction
Welcome to your new OMEGA OWLR151U 150 Mbps Wi-Fi Router. This device is designed to provide a reliable and efficient wireless network for your home or small office. It integrates the functions of a router, wireless access point, 4-port switch, and firewall into a single unit. This manual will guide you through the installation, configuration, and maintenance of your router to ensure optimal performance.
2. Product Overview
The OMEGA OWLR151U router supports the IEEE 802.11n wireless standard, offering wireless speeds of up to 150 Mbps on the 2.4 GHz frequency band. It features one WAN port for internet connection and four LAN ports for wired devices, along with a fixed 5 dBi antenna for enhanced signal coverage. The integrated firewall provides basic network security.

Figure 2.1: Front view of the OMEGA OWLR151U Wi-Fi Router, showing its compact design and single antenna.
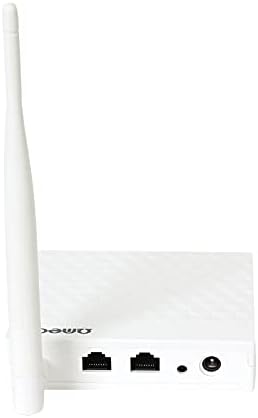
Figure 2.2: Rear view of the OMEGA OWLR151U Wi-Fi Router, highlighting the WAN port, LAN ports, and power input.
3. Setup
3.1 Package Contents
- OMEGA OWLR151U Wi-Fi Router
- Power Adapter
- Ethernet Cable
- Quick Installation Guide (if included)
3.2 Hardware Connection
- Power Connection: Connect the provided power adapter to the router's power port and then plug it into an electrical outlet. Ensure the power LED on the router illuminates.
- WAN Connection: Connect an Ethernet cable from your modem (or internet service provider's wall jack) to the WAN port on the router.
- LAN Connection (Optional): To connect a computer or other wired device, use an Ethernet cable to connect it to one of the LAN ports on the router.
3.3 Initial Configuration
- Access Router Interface: Open a web browser (e.g., Chrome, Firefox) on a computer or device connected to the router (either via Wi-Fi or Ethernet).
- Enter IP Address: In the browser's address bar, type the router's default IP address (commonly
192.168.1.1or192.168.0.1). Refer to the label on the bottom of your router for the exact IP address and login credentials. - Login: Enter the default username and password (e.g.,
admin/adminoradmin/password). - Follow Setup Wizard: Once logged in, you will typically be guided through a Quick Setup Wizard. Follow the on-screen instructions to configure your internet connection and Wi-Fi settings (SSID and password).
- Save Settings: After configuring, save your settings and restart the router if prompted.
4. Operating
4.1 Connecting Devices
- Wi-Fi Connection: On your wireless device (smartphone, tablet, laptop), search for available Wi-Fi networks. Select the SSID (network name) you configured during setup and enter the Wi-Fi password.
- Ethernet Connection: For wired devices, simply connect an Ethernet cable from the device to any of the router's available LAN ports.
4.2 Accessing Router Settings
To modify advanced settings, such as port forwarding, parental controls, or security options, access the router's web interface using the IP address and login credentials as described in Section 3.3.
5. Maintenance
5.1 Firmware Updates
Periodically check the manufacturer's official website for available firmware updates. Firmware updates can improve performance, add new features, and enhance security. Follow the instructions provided by the manufacturer for the update process.
5.2 Factory Reset
If you encounter persistent issues or forget your login credentials, you can perform a factory reset. With the router powered on, use a paperclip or a thin object to press and hold the reset button (usually a small pinhole on the back or bottom) for approximately 5-10 seconds. The router will restart with its factory default settings.
5.3 Cleaning
Use a soft, dry cloth to clean the exterior of the router. Do not use liquid cleaners, aerosols, or solvents, as these can damage the device.
6. Troubleshooting
6.1 No Internet Access
- Check Connections: Ensure all cables (power, WAN, LAN) are securely connected.
- Restart Devices: Power off your modem and router, wait 30 seconds, then power on the modem first. Once the modem is fully online, power on the router.
- Verify WAN Settings: Log into the router's web interface and check the WAN settings to ensure your internet connection type (e.g., DHCP, PPPoE) is correctly configured.
6.2 Wi-Fi Not Visible or Cannot Connect
- Wi-Fi Enabled: Confirm that the wireless function is enabled in the router's web interface.
- Correct Password: Double-check that you are entering the correct Wi-Fi password (case-sensitive).
- Channel Interference: In the router settings, try changing the Wi-Fi channel to a less congested one (e.g., 1, 6, or 11).
6.3 Slow Connection Speed
- Router Placement: Position the router in a central location, away from obstructions and other electronic devices that may cause interference.
- Firmware: Ensure your router's firmware is up to date.
- Connected Devices: Too many devices connected simultaneously can reduce speed. Consider limiting usage or upgrading your internet plan.
7. Specifications
- Model: OWLR151U
- Wireless Standard: IEEE 802.11n, compatible with 802.11 b/g
- Wireless Speed: Up to 150 Mbps
- Frequency Band: 2.4 GHz
- WAN Port: 1 x 10/100 Mbps
- LAN Ports: 4 x 10/100 Mbps
- Antenna: 1 x 5 dBi fixed antenna
- Security Protocols: WEP (Note: WEP is an older security protocol. For enhanced network security, consider using WPA2 or WPA3 if supported by your devices and network.)
- Special Features: Integrated Router, Wireless Access Point, 4-Port Switch, Firewall
- Compatible Devices: Personal Computer, Tablet, Smart Television
- Operating System: RouterOS (as specified by manufacturer)
8. Warranty Information
Information regarding the product warranty for the OMEGA OWLR151U Wi-Fi Router is not available in the provided details. Please refer to your purchase documentation, the product packaging, or contact the retailer where you purchased the device for specific warranty terms and conditions.
9. Support
For technical assistance, troubleshooting beyond the scope of this manual, or further inquiries, please refer to the contact information provided with your purchase. Specific support contact details for Omega products are not available in the provided information. You may also visit the official Omega product support website if available.


