1. Introduction
The EMOS Digital Timer Socket Model P5521 is designed to automatically switch electrical appliances ON and OFF at pre-set times. This device features 8 programmable settings per day, a battery backup to retain settings during power outages, and enhanced child protection. It is ideal for managing power consumption and automating household or office devices.

Figure 1.1: EMOS Digital Timer Socket in use with a water cooler, demonstrating a practical application for automated power control.
2. Safety Instructions
- Ensure the timer is correctly plugged into a suitable wall socket.
- Do not exceed the maximum load of 230V~/16A (3680W).
- This device is rated IP20, meaning it is protected against solid objects larger than 12.5mm but has no protection against water. Do not use in wet or damp conditions.
- Do not disassemble or attempt to repair the device. Refer all servicing to qualified personnel.
- Keep out of reach of children. The socket features enhanced child protection.
- Unplug the timer from the wall socket before cleaning. Clean only with a dry cloth.
3. Product Overview

Figure 3.1: Front view of the EMOS Digital Timer Socket, highlighting the display and control buttons.
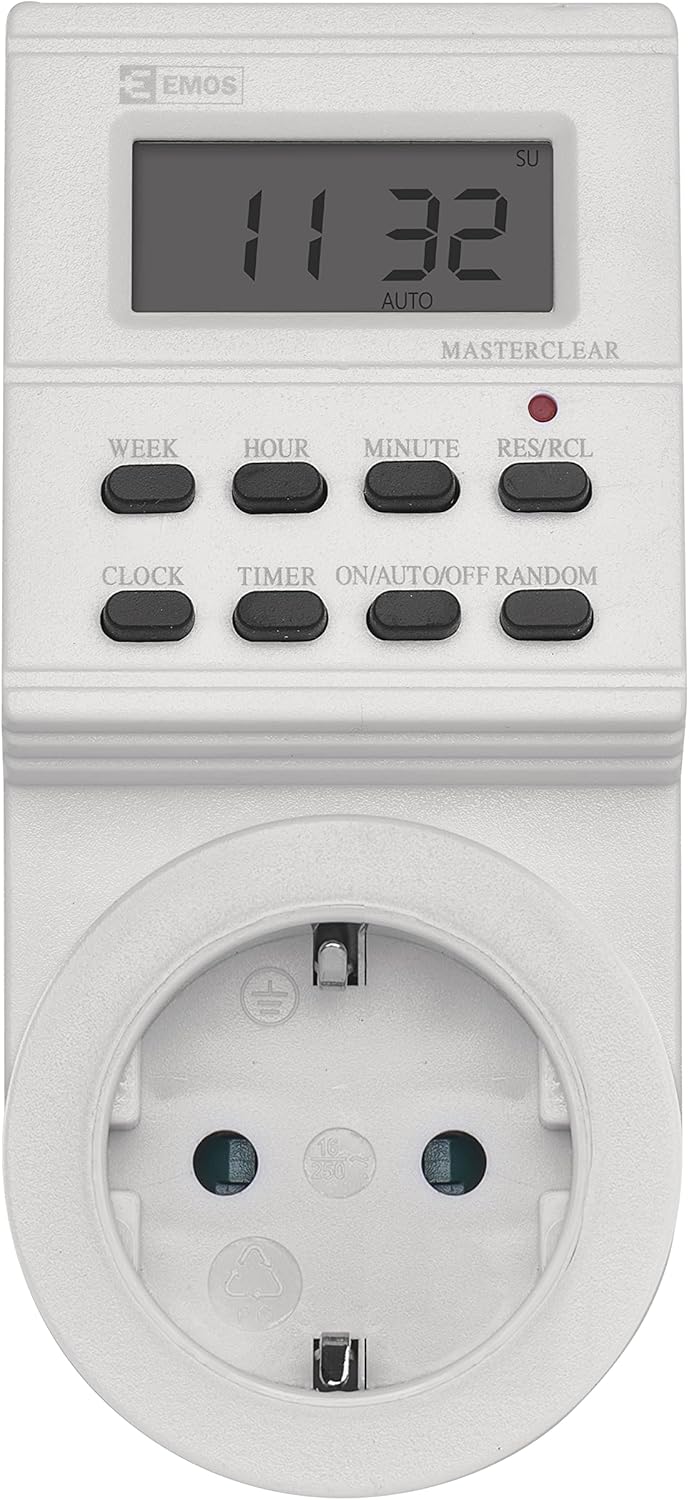
Figure 3.2: Close-up of the timer's display and control panel, showing button labels and screen indicators.
3.1. Buttons and Display
- WEEK: Sets the day of the week.
- HOUR: Sets the hour.
- MINUTE: Sets the minute.
- RES/RCL (Reset/Recall): Resets the device or recalls programmed settings.
- CLOCK: Used to set the current time and day, and to exit programming mode.
- TIMER: Enters and exits timer programming mode.
- ON/AUTO/OFF: Cycles through Manual ON, Automatic, and Manual OFF modes.
- RANDOM: Activates or deactivates the random switching function.
The LCD display shows the current time, day of the week, and operational mode (MANUAL ON, AUTO, MANUAL OFF, RANDOM).
4. Setup
4.1. Initial Use and Reset
Before first use, plug the timer into a wall socket for approximately 10-15 minutes to charge the internal battery backup. This ensures that settings are retained even if the timer is unplugged. After charging, press the RES/RCL button with a pointed object (e.g., a pen tip) to clear all previous settings and reset the device.
4.2. Setting Current Time and Day
- Press and hold the CLOCK button.
- While holding CLOCK, press the WEEK button repeatedly until the correct day of the week is displayed.
- While holding CLOCK, press the HOUR button repeatedly until the correct hour is displayed.
- While holding CLOCK, press the MINUTE button repeatedly until the correct minute is displayed.
- Release the CLOCK button. The current time and day are now set.
5. Operating
5.1. Programming ON/OFF Times
The timer allows for up to 8 ON/OFF programs. Each program can be set for specific days or groups of days.
- Press the TIMER button once. The display will show '1 ON'.
- Press the WEEK button to select the desired day(s) for this program. Options include individual days, weekdays, weekends, or all days.
- Press the HOUR button to set the desired ON hour.
- Press the MINUTE button to set the desired ON minute.
- Press the TIMER button again. The display will show '1 OFF'.
- Repeat steps 2-4 to set the desired OFF time for program 1.
- Continue pressing TIMER to cycle through programs 2 ON, 2 OFF, up to 8 ON, 8 OFF, setting each as required.
- After setting all desired programs, press the CLOCK button to exit programming mode and return to the current time display.
Note: If an ON time is set to occur before 0:00 and end after 0:00, it may require two separate programs (e.g., one ending at 23:59 and another starting at 0:00).
5.2. Manual ON/AUTO/OFF Mode
Press the ON/AUTO/OFF button to cycle through the operating modes:
- MANUAL ON: The connected appliance will remain ON continuously, overriding all programmed settings.
- AUTO: The timer will operate according to the programmed ON/OFF times. This is the standard operating mode for automated control.
- MANUAL OFF: The connected appliance will remain OFF continuously, overriding all programmed settings.
5.3. Random Function
The random function is designed to simulate occupancy by switching the connected appliance ON and OFF at irregular intervals within a specific time window (e.g., 6 PM to 6 AM). This can be useful for security purposes when you are away.
- Ensure the timer is in AUTO mode.
- Press the RANDOM button. The 'RANDOM' indicator will appear on the display.
- To deactivate the random function, press the RANDOM button again. The 'RANDOM' indicator will disappear.
6. Maintenance
6.1. Battery Backup
The EMOS Digital Timer Socket includes an integrated 40 mAh NiMH button cell battery (1.2V) for backup. This battery charges when the timer is plugged into a live socket and ensures that your programmed settings are retained during power outages or when the timer is unplugged. No user maintenance is required for the battery.
6.2. Cleaning
To clean the timer, unplug it from the wall socket. Use a soft, dry cloth to wipe the exterior. Do not use liquid cleaners, abrasive materials, or immerse the device in water.
7. Troubleshooting
- Display is blank or unresponsive: Ensure the timer is plugged into a live socket. If it's a new unit or has been unplugged for a long time, allow it to charge for 10-15 minutes, then perform a reset using the RES/RCL button.
- Appliance does not switch ON/OFF as programmed:
- Check if the timer is in AUTO mode. If it's in MANUAL ON or MANUAL OFF, it will override programs.
- Verify that the programmed ON/OFF times and days are correct.
- Ensure the connected appliance is working correctly and is switched ON.
- Confirm the load does not exceed the maximum rating (3680W).
- Programming seems complicated: Refer to Section 5.1. Programming ON/OFF Times. It may take a few attempts to become familiar with the sequence. Some complex schedules (e.g., spanning midnight) may require splitting into two programs.
- Timer resets unexpectedly: Ensure the internal battery is sufficiently charged. If the issue persists, the internal battery may be faulty, and the device might require replacement.
8. Specifications
| Feature | Specification |
|---|---|
| Model Number | P5521 |
| Voltage | 230 V~ |
| Max. Current | 16 A |
| Max. Power | 3680 W |
| IP Rating | IP20 |
| Programs | 8 ON/OFF programs per day |
| Battery Backup | 40 mAh NiMH (1.2 V) |
| Material | Polycarbonate |
| Dimensions (H x W x D) | 21 x 9 x 9 cm |
| Weight | 180 g |

Figure 8.1: Physical dimensions of the EMOS Digital Timer Socket.
9. Warranty and Support
EMOS products are manufactured to high-quality standards. For warranty information, please refer to the terms and conditions provided at the point of purchase or contact EMOS customer support directly. Keep your proof of purchase for any warranty claims.
For further assistance or technical support, please visit the official EMOS website or contact their customer service department.


