1. Introduction
Thank you for choosing the Scheppach BTS700 Belt and Disc Sander. This manual provides essential information for the safe operation, proper setup, maintenance, and troubleshooting of your machine. Please read this manual thoroughly before operating the sander to ensure safe and efficient use. Keep this manual in a safe place for future reference.
2. General Safety Information
WARNING: Read all safety warnings and instructions. Failure to follow the warnings and instructions may result in electric shock, fire, and/or serious injury.
- Always wear appropriate personal protective equipment (PPE), including safety glasses, hearing protection, and a dust mask.
- Ensure the work area is clean, well-lit, and free from obstructions.
- Keep children and bystanders away while operating the sander.
- Do not operate power tools in explosive atmospheres, such as in the presence of flammable liquids, gases, or dust.
- Always disconnect the power plug from the socket before making any adjustments, changing accessories, or storing the tool.
- Never force the tool. Use the correct tool for your application.
- Maintain tools with care. Keep cutting tools sharp and clean.
- Check for misalignment or binding of moving parts, breakage of parts, and any other condition that may affect the tool's operation.
3. Product Overview
The Scheppach BTS700 is a versatile belt and disc sander designed for detailed work on various materials, including wood, plastics, and similar wood-like materials. Its robust cast iron construction ensures stability and precision.

Figure 3.1: Scheppach BTS700 Belt and Disc Sander, showing both the belt and disc sanding components.
Key Features:
- Dual Functionality: Combines a belt sander and a disc sander for a wide range of applications.
- Powerful Motor: 250W motor provides efficient sanding performance.
- Adjustable Work Table: The support table can be adjusted from 90° to 45° for angled sanding.
- Stable Construction: Solid cast iron base minimizes vibration and enhances precision.
- Compact Design: Space-saving dimensions for workshops with limited space.

Figure 3.2: The Scheppach BTS700 sander, highlighting its compact and sturdy design.
Components:
- Belt Sanding Unit
- Disc Sanding Unit (125 mm diameter)
- Adjustable Work Table (for disc sander)
- Belt Tension Lever
- Power Switch (On/Off)
- Dust Extraction Port
- Angle Adjustment Knob

Figure 3.3: Close-up view of the disc sanding unit and its adjustable work table.

Figure 3.4: Close-up view of the belt sanding unit.
4. Setup
4.1 Unpacking
Carefully remove the sander from its packaging. Inspect all components for any damage that may have occurred during transit. Ensure all parts listed in the packing contents are present. Dispose of packaging materials responsibly.
4.2 Mounting the Sander
For stable operation, it is recommended to secure the sander to a workbench using appropriate bolts or clamps. Ensure the workbench is sturdy and level.
4.3 Connecting to Power
Connect the power cord to a grounded 230V AC outlet. Ensure the power switch is in the 'OFF' position before plugging in the machine.
4.4 Adjusting the Work Table
The work table for the disc sander can be tilted from 90° to 45°. Loosen the angle adjustment knob, set the desired angle using the scale, and then securely tighten the knob. A variable cross stop is also provided for precise angle sanding.

Figure 4.1: The adjustable work table, allowing for angled sanding operations.
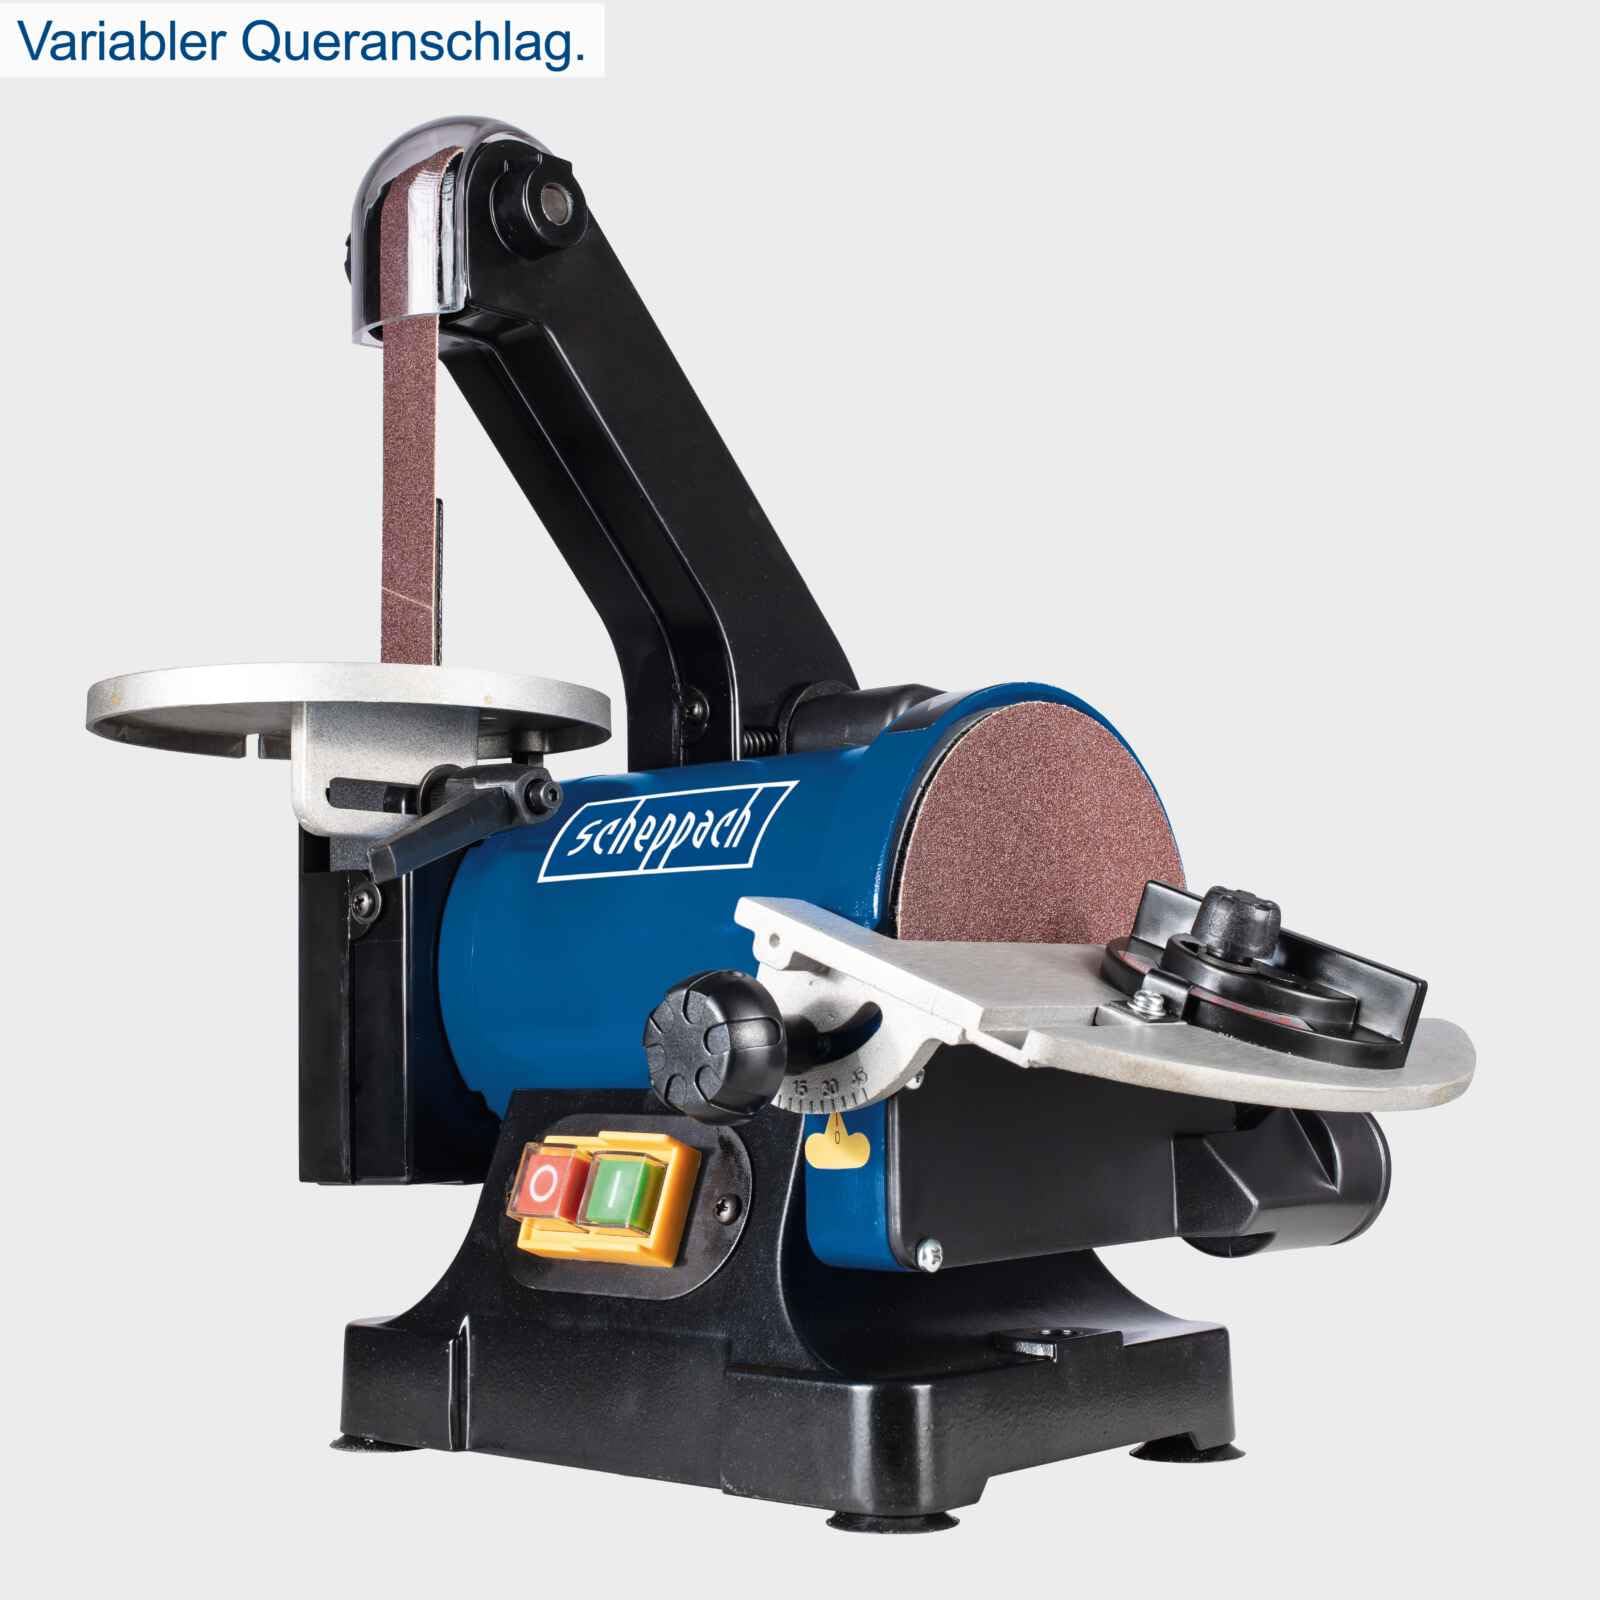
Figure 4.2: The variable cross stop in use for accurate angle sanding on the disc sander.
4.5 Dust Extraction
Connect a suitable dust extraction system to the dust port located at the rear of the machine. This will help keep your workspace clean and improve air quality.

Figure 4.3: Location of the dust extraction port for connecting a vacuum system.
5. Operating Instructions
5.1 Powering On/Off
To turn the sander ON, press the green 'I' button. To turn it OFF, press the red 'O' button.

Figure 5.1: The power switch (green for ON, red for OFF).
5.2 Changing Sanding Belts
- Disconnect the power supply.
- Release the belt tension lever.
- Remove the old sanding belt.
- Install the new belt, ensuring the arrow on the belt matches the direction of rotation indicated on the machine.
- Re-engage the belt tension lever and ensure the belt is centered.
5.3 Changing Sanding Discs
- Disconnect the power supply.
- Peel off the old sanding disc from the hook-and-loop backing.
- Align the new sanding disc with the disc plate and press firmly to secure it.
5.4 Sanding Techniques
The BTS700 is suitable for various sanding tasks, including:
- Rounding Edges: Use the disc sander for smooth curves.
- Sanding Corners: The belt sander is ideal for reaching tight corners and internal curves.
- Chamfering: Adjust the work table to the desired angle for precise chamfers.
- Surface Sanding: Both the belt and disc can be used for general surface preparation.

Figure 5.2: Illustrations of various sanding applications, including rounding, corners, chamfers, and flat surfaces.
Always move the workpiece smoothly and evenly across the abrasive surface. Avoid applying excessive pressure, as this can lead to uneven sanding, overheating, and reduced abrasive life.
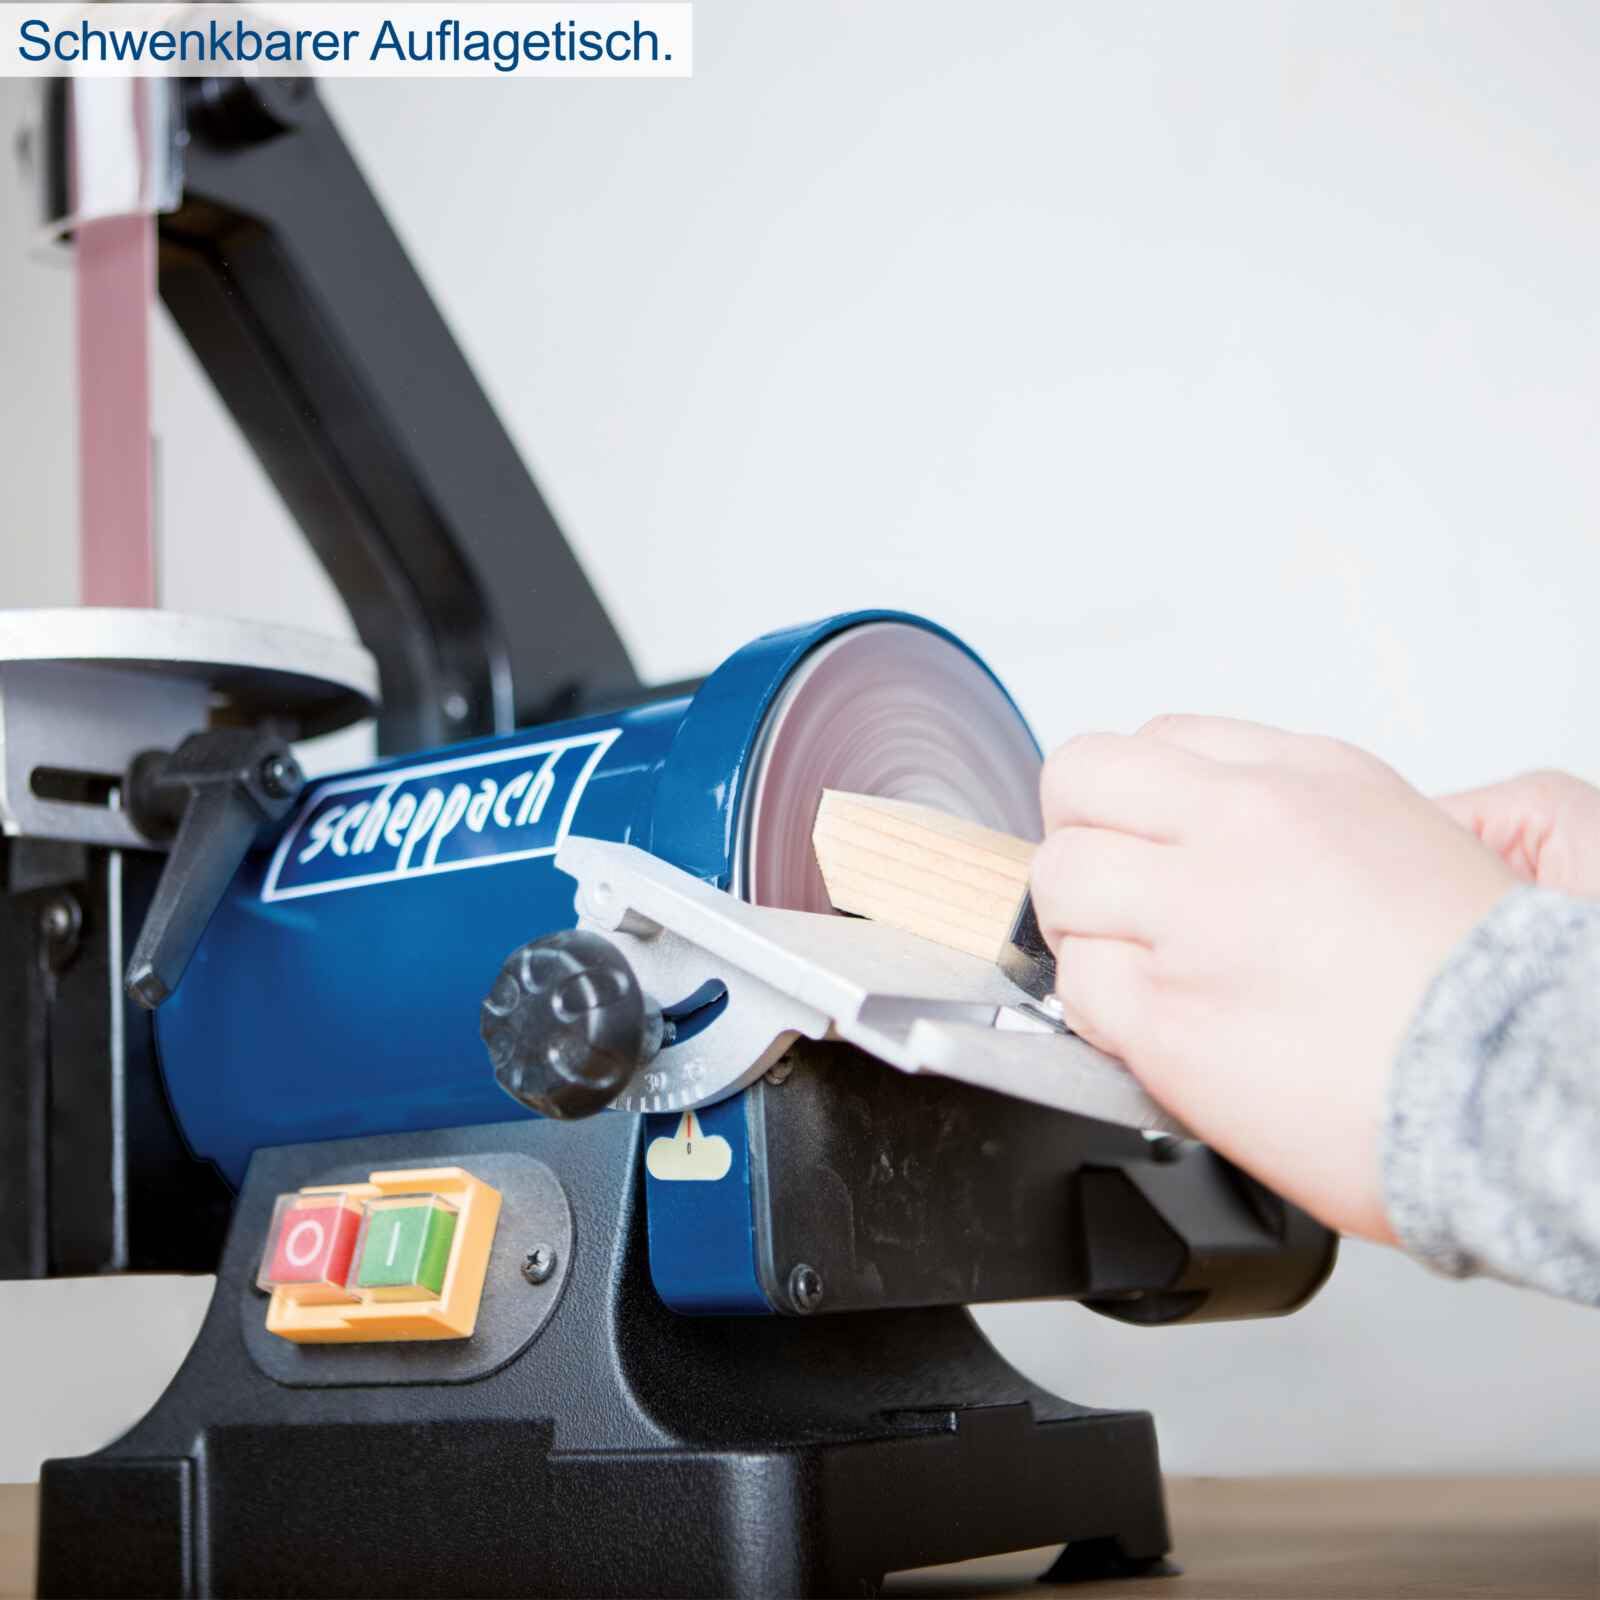
Figure 5.3: Using the belt sander for intricate and delicate sanding tasks.
Figure 5.4: The 125 mm disc sander allows for quick material removal on workpieces.
6. Maintenance
Regular maintenance ensures the longevity and optimal performance of your sander.
6.1 Cleaning
- Always disconnect the power before cleaning.
- Use a brush or compressed air to remove dust and debris from the motor vents and sanding areas.
- Wipe down external surfaces with a damp cloth. Do not use harsh chemicals or solvents.
6.2 Inspection
- Regularly check the sanding belt and disc for wear and tear. Replace them when they become dull or damaged.
- Inspect the power cord for any cuts, fraying, or damage.
- Ensure all fasteners are tight.
6.3 Storage
Store the sander in a clean, dry place, out of reach of children. Protect it from moisture and extreme temperatures.
7. Troubleshooting
| Problem | Possible Cause | Solution |
|---|---|---|
| Sander does not start | No power supply Faulty power switch | Check power connection and outlet Contact qualified service personnel |
| Poor sanding performance | Worn sanding belt/disc Incorrect abrasive grit Excessive pressure | Replace belt/disc Use appropriate grit for material Reduce pressure, let the tool do the work |
| Excessive vibration | Loose mounting Damaged belt/disc Unbalanced workpiece | Securely mount the sander Replace damaged belt/disc Ensure workpiece is stable |
| Belt tracking issues | Belt not centered Worn belt tension mechanism | Adjust belt tracking (if applicable) Contact service for repair |
8. Technical Specifications
| Feature | Specification |
|---|---|
| Model | BTS700 |
| Power | 250 Watts |
| Voltage | 230 Volts |
| Amperage | 16 A |
| Disc Diameter | 125 mm |
| Belt Length | 762 mm |
| Belt Width | 25.4 mm |
| Max. Rotational Speed | 2850 rpm |
| Work Table Adjustment | 0° to 45° |
| Product Dimensions (L x W x H) | 45 x 30 x 30 cm |
| Item Weight | 7.5 Kilograms |
| Grain (Included) | 80 (Fine) |
| Manufacturer Model Number | 4903304901 |
| Country of Origin | China |
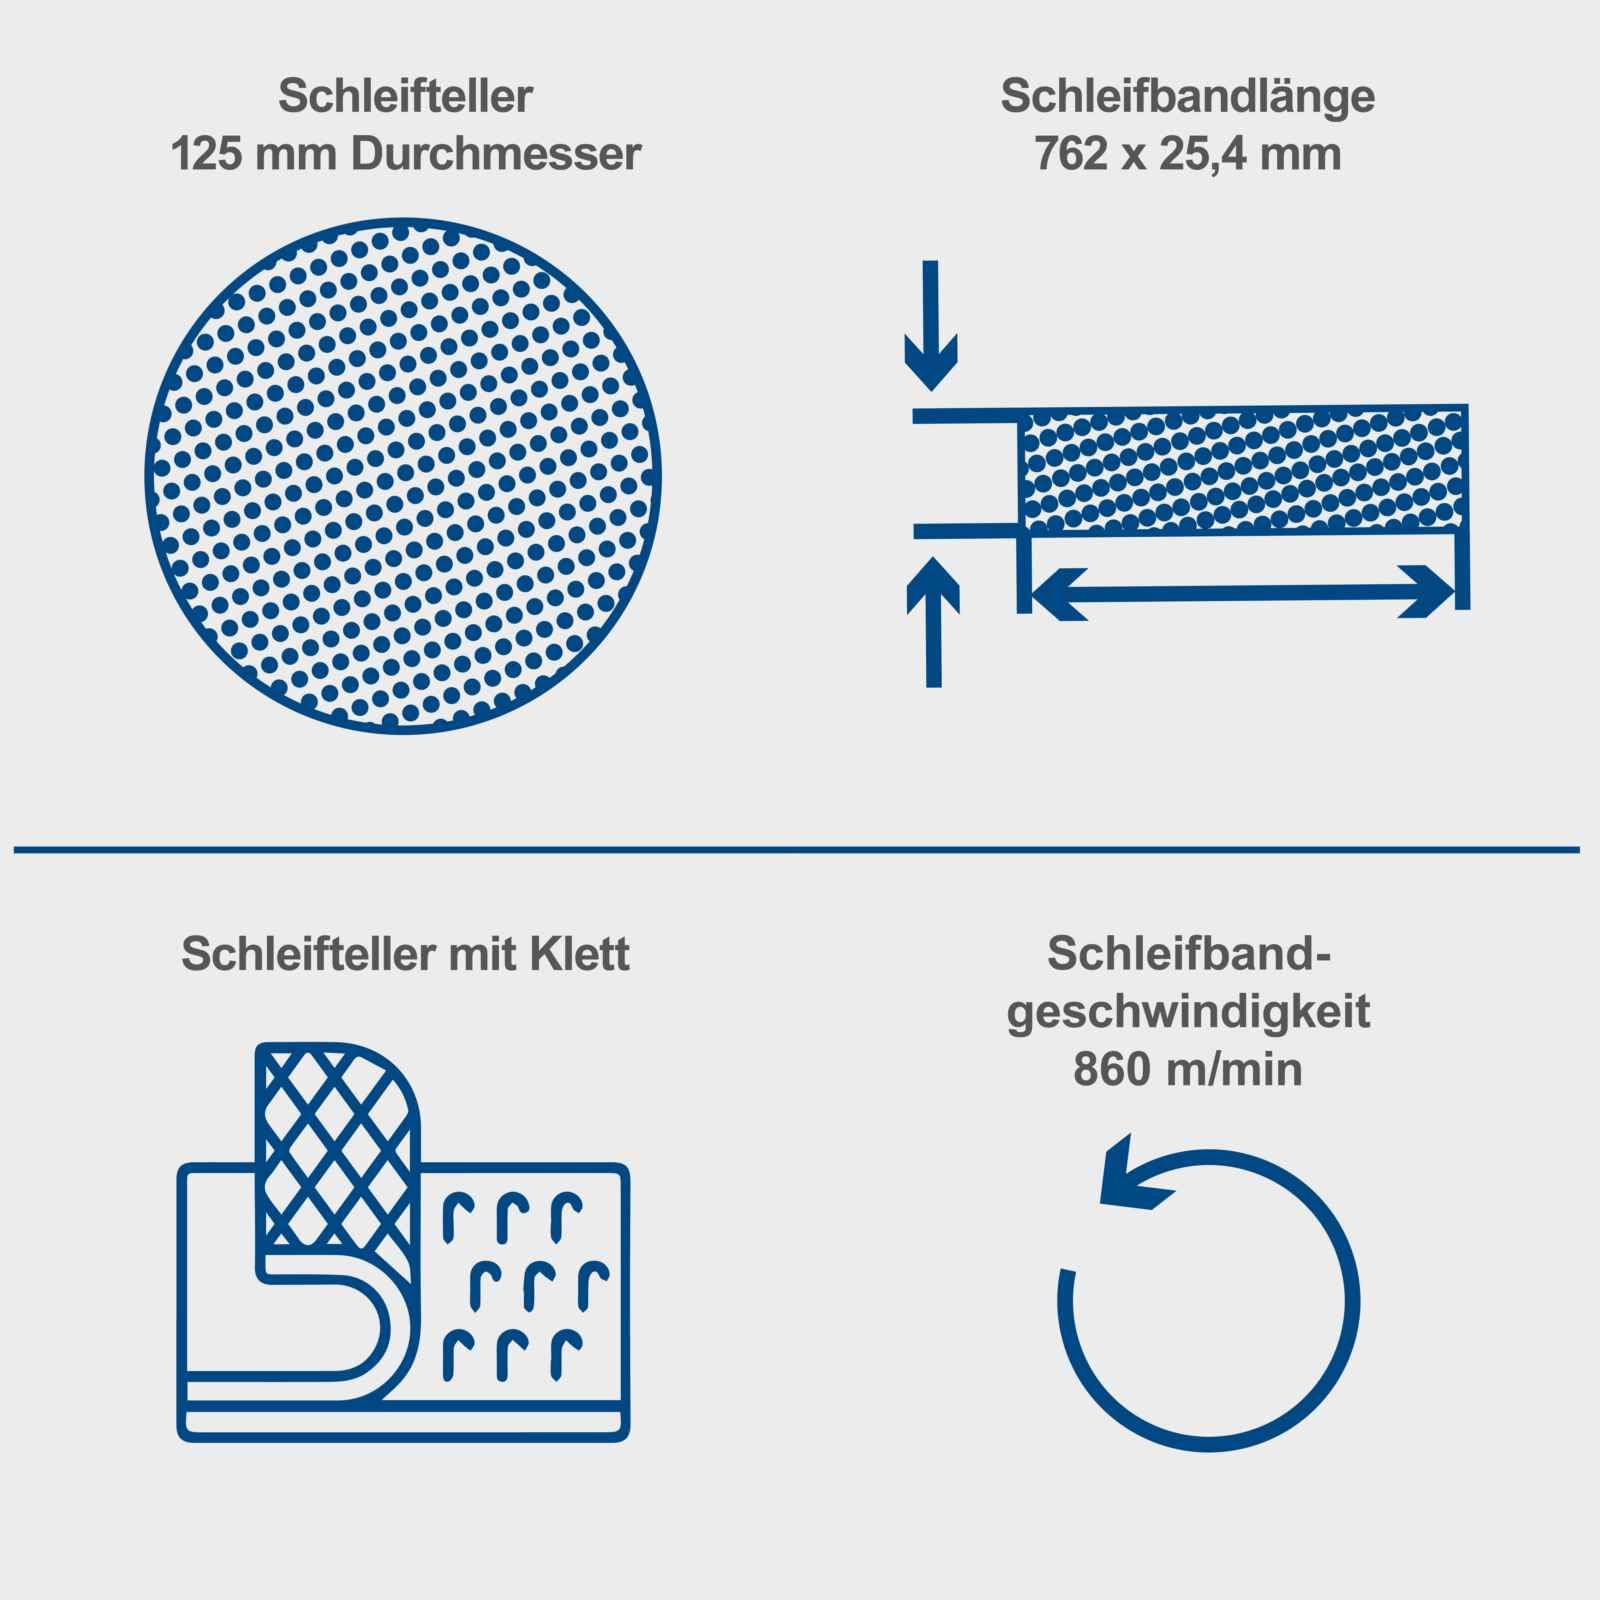
Figure 8.1: Technical specifications diagram illustrating disc diameter, belt dimensions, and belt speed.
9. Warranty and Support
Scheppach products are manufactured to high-quality standards. For warranty information, please refer to the warranty card included with your product or visit the official Scheppach website. In case of technical issues, spare parts inquiries, or service requests, please contact Scheppach customer support or your authorized dealer.
Please have your model number (BTS700) and serial number ready when contacting support.


