1. Introduction
This manual provides detailed instructions for the setup, operation, and maintenance of your Marathon Digital Desktop Clock, Model CL030050BK. This compact and versatile digital clock is designed for use on a desk or nightstand, offering time, date, day of the week, and temperature displays, along with a dual alarm function and a button-activated backlight.
2. Product Overview

Figure 2.1: Front view of the Marathon Digital Desktop Clock CL030050BK, showing its large digital display with time, date, day, and temperature.
2.1 Key Features
- Large, High-Quality Display: Enhanced contrast for clear legibility.
- Nightowl Super Glow Backlight: Button-activated, gentle blue backlight that illuminates for approximately 10 seconds.
- Dual Alarm Function: Separate alarm settings for weekdays (Monday-Friday) and weekends (Saturday-Sunday).
- Snooze Button: Conveniently located for temporary alarm suspension.
- Multiple Display Modes: Time in 12 or 24-hour format, temperature in Fahrenheit or Celsius.
- Multilingual Day of Week: Displays the day of the week in seven languages: English, Dutch, French, Spanish, Italian, Danish, and German.
- Compact and Lightweight Design: Ideal for desktop, nightstand, or travel.
2.2 Package Contents
- 1 x Marathon Digital Desktop Clock CL030050BK
- 3 x AAA Batteries (included)
- 1 x User Manual
3. Setup
3.1 Battery Installation
- Locate the battery compartment cover on the back of the clock.
- Slide the cover downwards to open the compartment.
- Insert 3 new AAA batteries, ensuring the correct polarity (+ and -) as indicated inside the compartment.
- Replace the battery compartment cover by sliding it upwards until it clicks into place.
3.2 Initial Power On
Upon successful battery installation, the clock display will activate, typically showing a default time and date. It is recommended to perform a reset after battery installation to ensure optimal performance.
3.3 Resetting the Clock
To reset the clock, use a thin, pointed object (like a paperclip) to press the recessed RESET button located on the back of the unit. This will clear all settings and return the clock to its factory defaults.
4. Operating Instructions
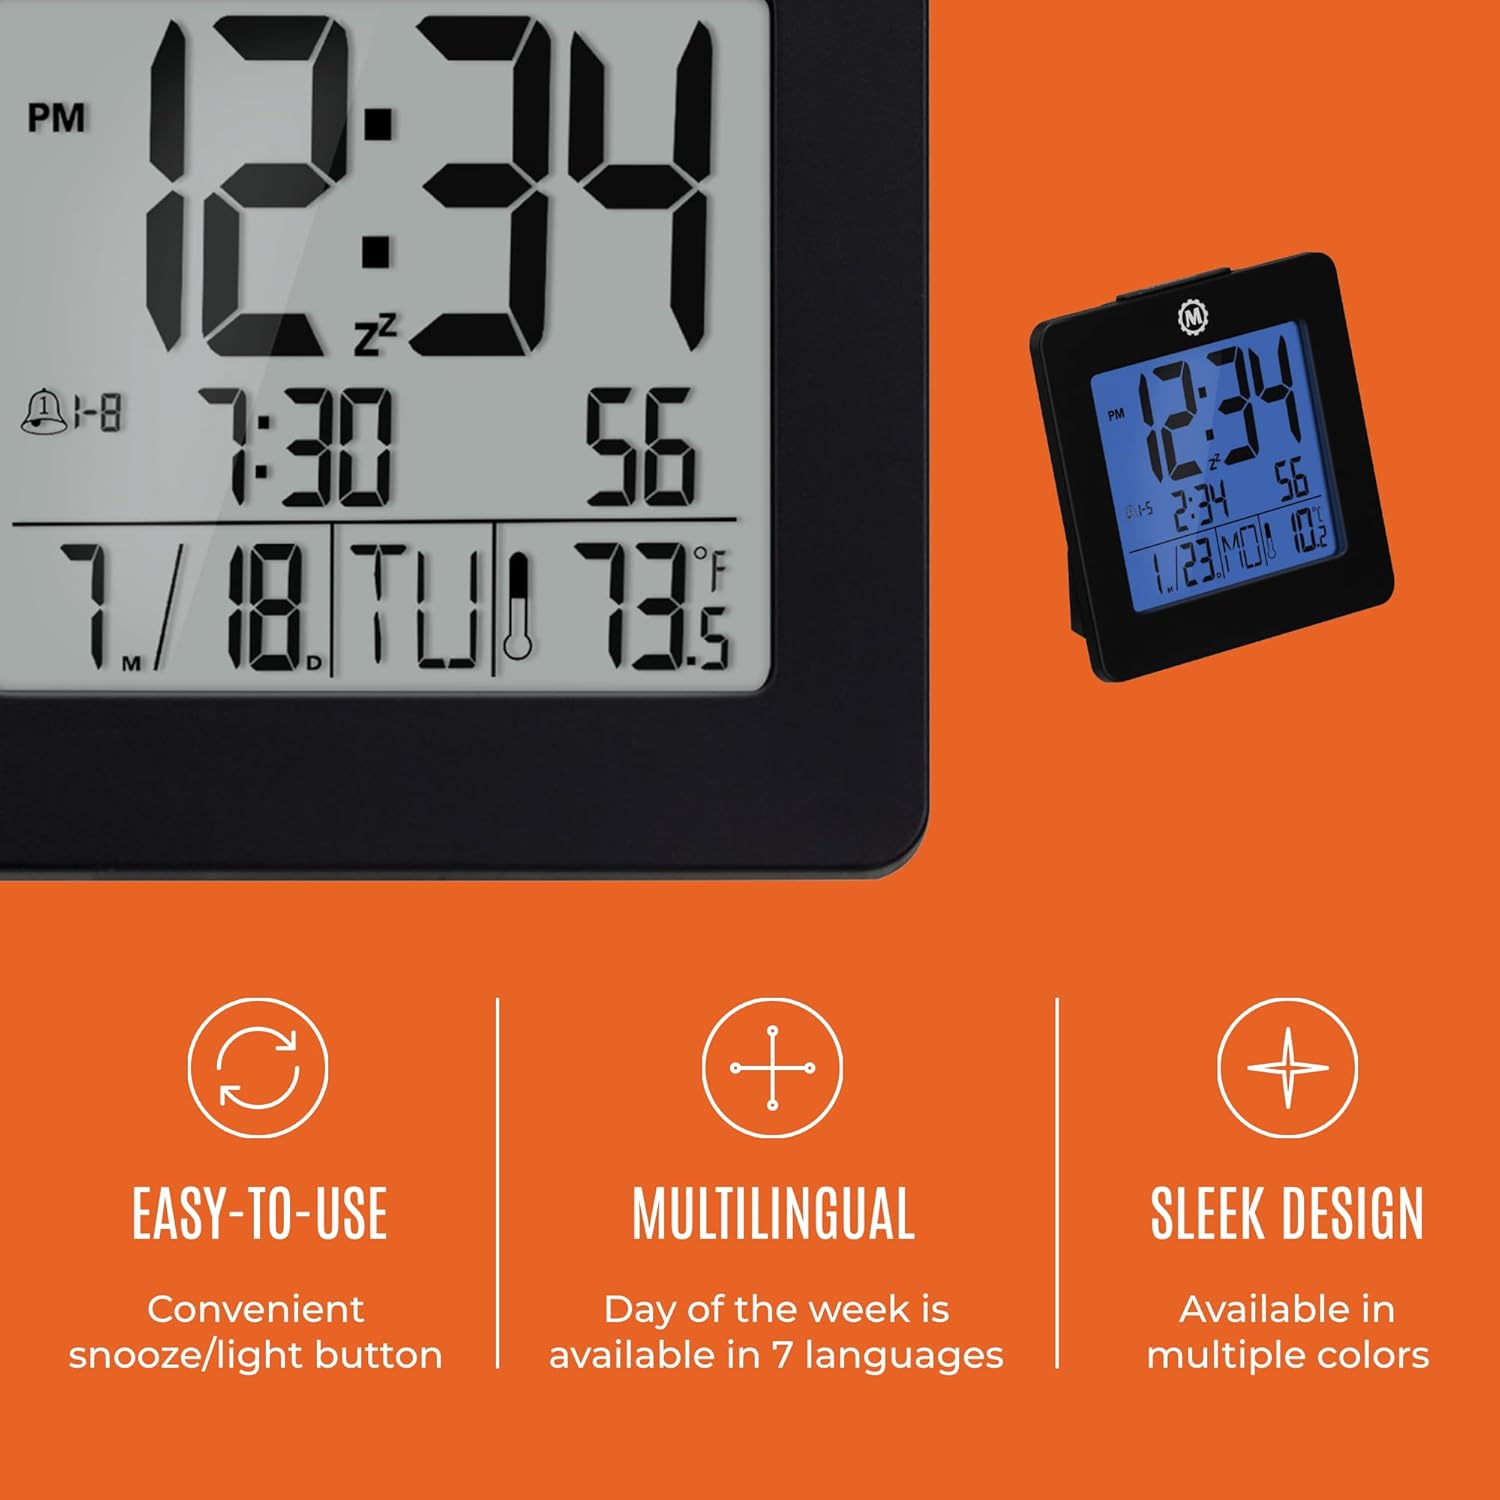
Figure 4.1: Overview of key features and design elements.
4.1 Button Functions
The clock features several buttons on the back for configuration:
- MODE: Toggles between Time, Alarm, and Timer display modes.
- SET: Enters setting mode for the currently displayed mode (Time, Alarm, Timer).
- UP / 12/24: In setting mode, increases the value. In time display mode, toggles between 12-hour and 24-hour format.
- DOWN / °C/°F: In setting mode, decreases the value. In time display mode, toggles between Celsius and Fahrenheit temperature units.
- LIGHT / SNOOZE: Activates the backlight for 10 seconds. When the alarm sounds, press to activate snooze.
- RESET: Resets the clock to factory defaults (requires a pointed object).
4.2 Setting the Time and Date
- Press the MODE button until the time is displayed.
- Press and hold the SET button for approximately 3 seconds until the year flashes.
- Use the UP or DOWN buttons to adjust the year.
- Press SET to confirm and move to the month setting.
- Repeat steps 3 and 4 to set the month, day, 12/24-hour format, hour, and minute.
- After setting the minutes, press SET to exit time/date setting mode.
4.3 Setting the Day of Week Language
While in time display mode, repeatedly press the UP or DOWN button to cycle through the 7 available languages for the day of the week display (English, Dutch, French, Spanish, Italian, Danish, German).
4.4 Setting the Temperature Unit
While in time display mode, press the DOWN / °C/°F button to toggle the temperature display between Celsius (°C) and Fahrenheit (°F).
4.5 Setting the Dual Alarm
- Press the MODE button until the alarm time is displayed (indicated by an alarm icon).
- Press and hold the SET button for approximately 3 seconds until the alarm hour flashes.
- Use the UP or DOWN buttons to adjust the alarm hour.
- Press SET to confirm and move to the alarm minute setting.
- Repeat steps 3 and 4 to set the alarm minute.
- After setting the minutes, press SET to select the alarm type: Weekday (1-5) or Weekend (6-7). Use UP or DOWN to choose.
- Press SET to confirm and exit alarm setting mode.
- To activate/deactivate the alarm, press the UP button while in alarm display mode. An alarm icon will appear/disappear on the screen.
4.6 Using the Snooze and Backlight
Press the large LIGHT / SNOOZE button on the top of the clock to activate the blue backlight. The backlight will remain illuminated for approximately 10 seconds. If the alarm is sounding, pressing this button will activate the snooze function, temporarily silencing the alarm for a short period before it sounds again.
5. Maintenance
- Cleaning: Wipe the clock with a soft, dry cloth. Avoid using abrasive cleaners or solvents.
- Battery Replacement: Replace all 3 AAA batteries when the display becomes dim or the clock functions erratically. Always replace with new batteries of the same type.
- Storage: If storing the clock for an extended period, remove the batteries to prevent leakage.
6. Troubleshooting
| Problem | Possible Cause | Solution |
|---|---|---|
| Display is blank or dim. | Low or dead batteries. | Replace all 3 AAA batteries. |
| Incorrect time/date displayed. | Settings were not saved or incorrect. | Perform a reset and re-enter time/date settings as per Section 4.2. |
| Alarm does not sound. | Alarm is not activated or set incorrectly. | Ensure the alarm is activated (alarm icon visible) and the alarm time is correctly set (Section 4.5). |
| Backlight not working. | Low batteries or button malfunction. | Replace batteries. If the issue persists, contact customer support. |
7. Specifications
- Model Number: CL030050BK
- Brand: Marathon
- Display Type: Digital
- Color: Black
- Product Dimensions: 3.7"W x 3.7"H
- Item Weight: 5.6 ounces
- Power Source: Battery Powered (3 x AAA batteries included)
- Material: Plastic
- Mounting Type: Tabletop
- Special Feature: Button-activated backlight, dual alarm, temperature display, multilingual day of week.
8. Warranty and Support
8.1 Warranty Information
This Marathon Digital Desktop Clock CL030050BK comes with a 1-year warranty from the date of purchase. This warranty covers manufacturing defects and workmanship under normal use. It does not cover damage caused by misuse, accidents, unauthorized modifications, or normal wear and tear.
8.2 Customer Support
For technical assistance, troubleshooting, or warranty claims, please visit the official Marathon website or contact their customer service department. Please have your model number and proof of purchase ready when contacting support.


