
1. Introduction
Thank you for choosing the AUDIOTEK AT820S 2-Channel Class AB Car Amplifier. This amplifier is designed to provide high-quality audio performance for your vehicle's sound system. Please read this manual thoroughly before installation and operation to ensure proper use and to maximize the amplifier's performance and longevity.
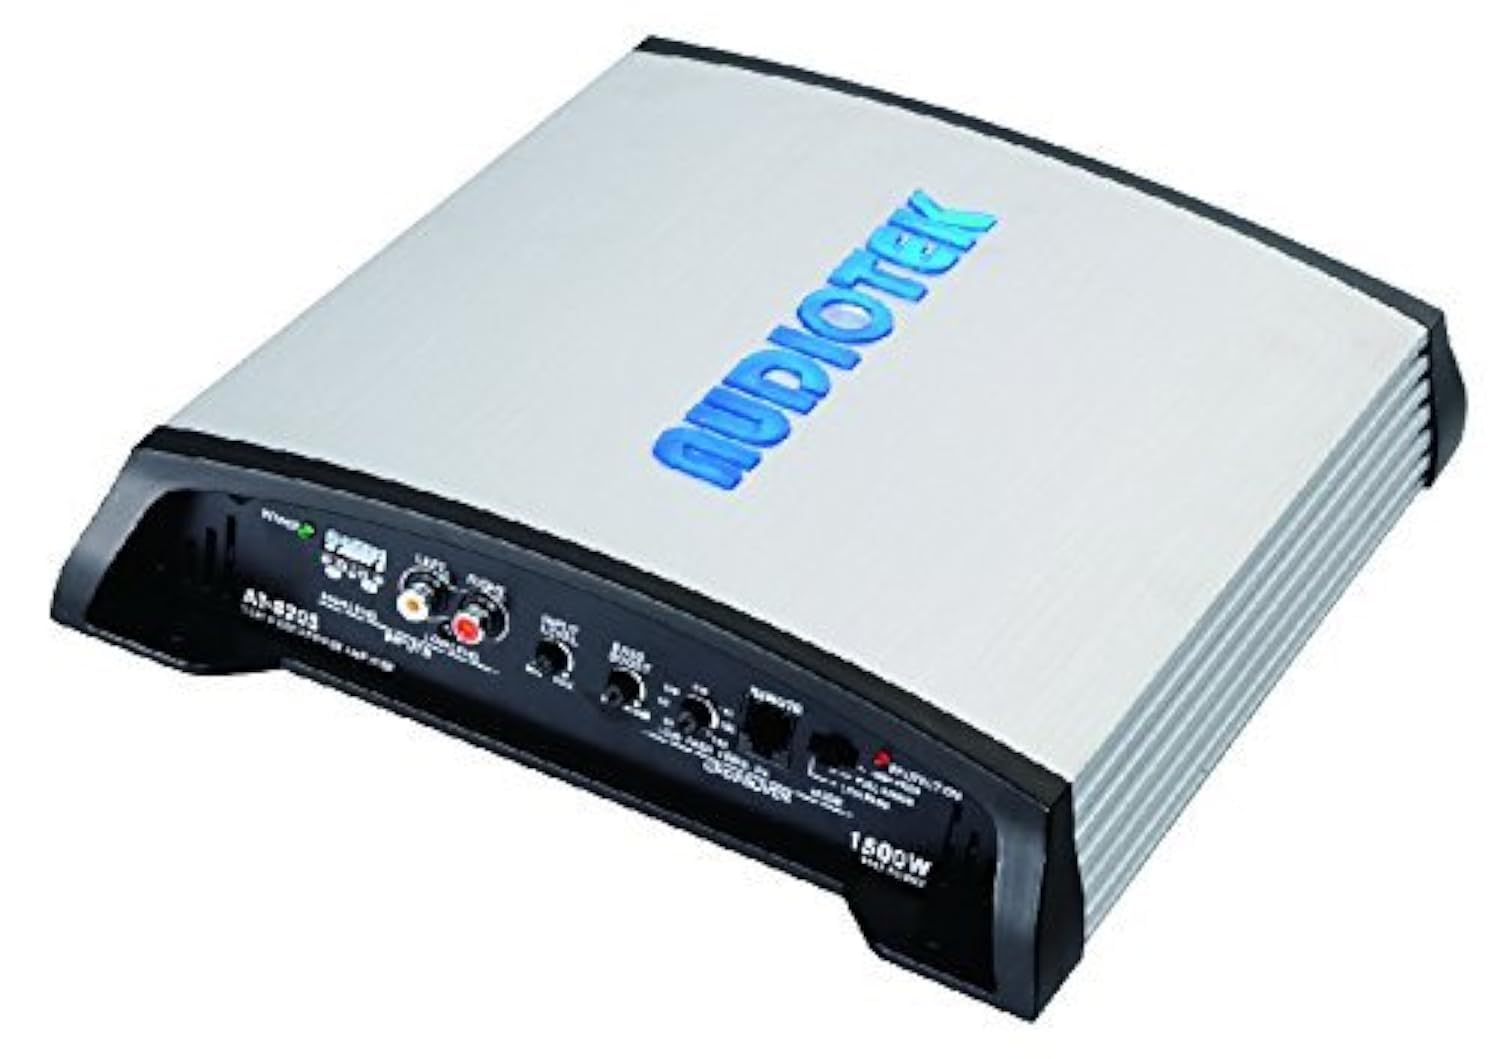
Figure 1.1: AUDIOTEK AT820S 2-Channel Car Amplifier, top view.
2. Safety Information
Always observe the following safety precautions during installation and operation:
- Professional Installation Recommended: Installation of car audio components requires experience with electrical wiring and automotive procedures. If you are unsure, seek professional assistance.
- Disconnect Battery: Always disconnect the vehicle's negative battery terminal before starting any electrical work to prevent short circuits.
- Proper Wiring: Ensure all wiring is correctly connected and insulated to prevent damage to the amplifier, vehicle, or personal injury. Use appropriate gauge wires for power and ground connections.
- Fuse Protection: Install an external fuse on the main power cable within 18 inches (45 cm) of the battery. The fuse rating should match the amplifier's requirements.
- Ventilation: Mount the amplifier in a location that allows for adequate air circulation to prevent overheating. Do not cover the amplifier's cooling fins.
- Avoid Moisture: Do not expose the amplifier to moisture or water.
- Volume Levels: Prolonged exposure to high volume levels can cause hearing damage.
3. Key Features
The AUDIOTEK AT820S amplifier offers the following features:
- 2-Channel Design: Provides stereo output for speakers or can be bridged for mono subwoofer applications.
- Class AB Topology: Delivers a balance of sound quality and efficiency.
- 1500W Max Power: High power output for robust audio performance.
- 2 Ohm Stable: Capable of driving speakers with 2-ohm impedance for increased power output.
- Variable Crossover: Built-in high-pass and low-pass filters for precise sound tuning.
- Bass Boost Control: Adjustable bass equalization for enhanced low-frequency response.
- High and Low-Level Inputs: Versatile input options for compatibility with various head units.
- Remote Bass Control: Allows for convenient adjustment of bass levels from the driver's seat.
4. Setup and Installation
Proper installation is crucial for optimal performance. Follow these steps carefully:
4.1. Package Contents
Before installation, verify that all items are present:
- AUDIOTEK AT820S Amplifier
- Remote Bass Control Knob with Cable
- Mounting Hardware (screws)
- User Manual (this document)

Figure 4.1: Amplifier, packaging, and remote bass control knob.
4.2. Mounting the Amplifier
Choose a secure location that provides adequate ventilation and is protected from moisture. Common locations include under a seat, in the trunk, or behind a panel. Ensure the mounting surface is solid and can support the amplifier's weight.
- Place the amplifier in the desired mounting location and mark the screw holes.
- Drill pilot holes if necessary, ensuring no wires or fuel lines are behind the drilling surface.
- Secure the amplifier using the provided mounting screws.
4.3. Wiring Connections
Refer to the diagrams below for proper wiring. Use high-quality wiring kits for best results.

Figure 4.2: Rear panel connections (Power, Ground, Remote, Speaker Outputs).

Figure 4.3: Front panel connections (Inputs, Crossover, Bass Boost, Remote).
4.3.1. Power Connections
- BATT (+12V): Connect a heavy-gauge power cable (e.g., 8 AWG or larger) directly from the positive terminal of the vehicle's battery to the BATT terminal on the amplifier. Install an in-line fuse holder with an appropriate fuse (e.g., 40A) within 18 inches of the battery.
- GND (Ground): Connect a heavy-gauge ground cable (same gauge as power) from the GND terminal on the amplifier to a clean, unpainted metal surface of the vehicle's chassis. Ensure a good electrical connection.
- REM (Remote Turn-On): Connect a smaller gauge wire (e.g., 18 AWG) from the REM terminal on the amplifier to the remote turn-on output of your head unit. This wire turns the amplifier on and off with your head unit.
4.3.2. Audio Input Connections
- Low-Level Inputs (RCA): If your head unit has RCA pre-outs, connect RCA cables from the head unit's pre-outs to the LOW LEVEL INPUTS on the amplifier.
- High-Level Inputs: If your head unit does not have RCA pre-outs, use the HIGH LEVEL INPUTS. Connect the speaker wires from your head unit's speaker outputs to the high-level input terminals on the amplifier. Observe correct polarity (+/-).
4.3.3. Speaker Output Connections
- Connect your speakers to the SPEAKER CONNECTIONS terminals on the amplifier. Ensure correct polarity (+/-) for each speaker.
- For stereo operation, connect one speaker to the Left (+) and Left (-) terminals, and another speaker to the Right (+) and Right (-) terminals.
- For bridged mono operation (e.g., for a subwoofer), connect the subwoofer to the Left (+) and Right (-) terminals. Refer to your speaker's impedance to ensure it is compatible with the amplifier's 2-ohm stable rating in bridged mode.
4.3.4. Remote Bass Control
Connect the remote bass control knob to the REMOTE port on the amplifier using the provided cable. Mount the knob in a convenient location for easy access.
5. Operation and Adjustments
Once installed, you can fine-tune the amplifier's settings for optimal sound.
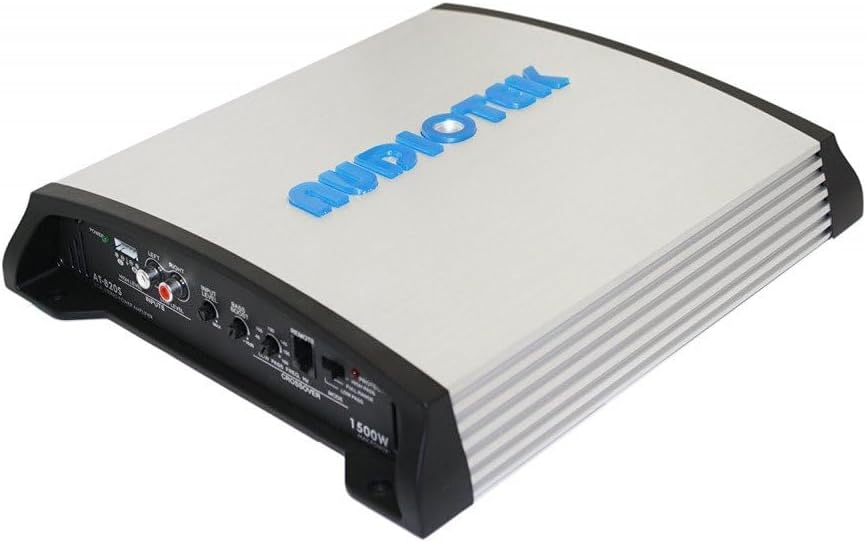
Figure 5.1: Amplifier control panel for adjustments.
5.1. Initial Power-Up
After all connections are made, reconnect the vehicle's negative battery terminal. The amplifier's POWER indicator should illuminate. If the PROTECTION indicator illuminates, refer to the troubleshooting section.
5.2. Input Level (Gain) Adjustment
The INPUT LEVEL control matches the amplifier's input sensitivity to the output level of your head unit. This is not a volume control.
- Turn the INPUT LEVEL control to its minimum (MIN) position.
- Set your head unit's volume to about 75-80% of its maximum.
- Slowly increase the INPUT LEVEL control on the amplifier until you hear slight distortion, then back it off slightly until the sound is clear.
5.3. Crossover Settings
The crossover allows you to direct specific frequency ranges to your speakers or subwoofer.
- MODE Switch:
- FULL RANGE: All frequencies are passed through. Use for full-range speakers.
- HIGH PASS: Only frequencies above the set LOW PASS FREQ. Hz knob are passed. Use for component speakers or full-range speakers to prevent low bass.
- LOW PASS: Only frequencies below the set LOW PASS FREQ. Hz knob are passed. Use for subwoofers.
- LOW PASS FREQ. Hz Knob: Adjusts the cutoff frequency for the high-pass or low-pass filter (e.g., 40Hz to 160Hz).
5.4. Bass Boost
The BASS BOOST control provides an adjustable boost to low frequencies (0 to +18dB).
- Adjust this control to enhance bass response to your preference.
- Use sparingly to avoid distortion and potential speaker damage.
5.5. Remote Bass Control
The remote bass control knob allows you to adjust the bass boost level conveniently from your driving position.
6. Maintenance
The AUDIOTEK AT820S amplifier requires minimal maintenance.
- Cleaning: Periodically wipe the amplifier's exterior with a soft, dry cloth. Do not use harsh chemicals or abrasive cleaners.
- Ventilation: Ensure the cooling fins remain free of dust and debris to maintain proper heat dissipation.
- Connections: Occasionally check all wiring connections to ensure they are secure and free from corrosion.
7. Troubleshooting
If you experience problems with your amplifier, consult the following table before contacting support.
| Problem | Possible Cause | Solution |
|---|---|---|
| No Power (Power LED off) | Blown fuse Poor power/ground connection No remote turn-on signal | Check and replace amplifier fuse and in-line battery fuse. Verify all power and ground connections are secure. Check remote wire connection to head unit and amplifier. |
| Protection LED on | Overheating Speaker short circuit Speaker impedance too low | Ensure adequate ventilation; allow amplifier to cool down. Check speaker wiring for shorts to chassis or between wires. Verify speaker impedance is within amplifier's specifications (2 ohms stable). |
| No Sound | Input level too low RCA cables disconnected/faulty Speaker wires disconnected/faulty Head unit issue | Adjust INPUT LEVEL control. Check RCA cable connections and test cables. Check speaker wire connections. Verify head unit is functioning correctly. |
| Distorted Sound | Input level too high Gain set too high Poor ground connection Speaker damage | Reduce head unit volume. Reduce INPUT LEVEL control on amplifier. Ensure ground connection is clean and secure. Inspect speakers for damage. |
| Engine Noise/Whine | Poor ground connection RCA cables routed near power wires Ground loop | Improve ground connection. Reroute RCA cables away from power cables. Install a ground loop isolator if necessary. |
8. Specifications
The following are the technical specifications for the AUDIOTEK AT820S amplifier:
- Model: AT820S
- Brand: AUDIOTEK
- Number of Channels: 2
- Output Power: 1500 Watts (Max)
- Class: AB
- Stable Impedance: 2 Ohm
- Item Dimensions (L x W x H): 8 x 11 x 3 inches
- Item Weight: 7 Pounds
- Mounting Type: Freestanding
- UPC: 701160332689
9. Warranty and Support
AUDIOTEK products are designed for reliability and performance. For specific warranty details, please refer to the warranty card included with your product or contact AUDIOTEK customer support.
For technical assistance or service inquiries, please contact your authorized AUDIOTEK dealer or visit the official AUDIOTEK website for support resources.