1. Introduction
The ICP DAS X001 is a versatile large prototype board designed for electronic circuit development and testing. It provides a flexible platform for hobbyists, students, and professionals to build and experiment with various electronic components and circuits. Its robust design ensures reliable performance for a wide range of prototyping needs.
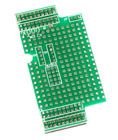
Figure 1: Top view of the ICP DAS X001 Prototype Board, showing its array of solder points and connection pads.
2. Features
- Large Prototyping Area: Ample space for complex circuit designs.
- High-Quality Construction: Durable PCB material for repeated use.
- Standard Hole Spacing: Compatible with common electronic components.
- Clear Markings: Facilitates easy component placement and wiring.
- Versatile Application: Suitable for digital, analog, and mixed-signal circuits.
3. Setup
The X001 prototype board requires minimal setup. It is a passive component designed to facilitate circuit assembly.
- Workspace Preparation: Ensure a clean, well-lit, and static-free workspace.
- Component Selection: Gather all necessary electronic components (resistors, capacitors, ICs, wires, etc.) for your intended circuit.
- Tools: Prepare soldering iron, solder, desoldering braid, wire strippers, multimeters, and safety glasses.
- Circuit Design: Have your circuit schematic readily available for reference.
4. Operating
Operating the X001 involves the process of populating the board with components and connecting them according to your circuit design.
- Component Placement: Carefully insert components into the desired holes on the prototype board. Ensure correct polarity for polarized components like diodes, LEDs, and electrolytic capacitors.
- Soldering: Solder the component leads to the copper pads on the board. Use appropriate soldering techniques to ensure strong, reliable electrical connections. Avoid cold solder joints or solder bridges.
- Wiring: Use jumper wires or solid core wires to connect different points on the board as per your schematic. Keep wires neat and organized to prevent errors and facilitate troubleshooting.
- Power Connection: Once the circuit is assembled, connect the power supply to the designated power input points on your circuit. Double-check all connections before applying power.
- Testing: Use a multimeter or oscilloscope to test various points in your circuit to verify correct functionality and voltage levels.
5. Maintenance
Proper maintenance ensures the longevity and reusability of your X001 prototype board.
- Cleaning: After use, remove any solder flux residue using an appropriate PCB cleaner and a soft brush. This prevents corrosion and ensures good electrical contact for future projects.
- Storage: Store the board in a dry, dust-free environment, preferably in an anti-static bag, to prevent damage from static discharge or environmental factors.
- Inspection: Periodically inspect the board for any physical damage, such as bent pins, lifted pads, or excessive wear.
6. Troubleshooting
If your circuit built on the X001 board is not functioning as expected, consider the following troubleshooting steps:
- Check Connections: Verify all solder joints are solid and there are no cold joints or solder bridges. Ensure all wires are correctly connected according to the schematic.
- Component Orientation: Confirm that all polarized components (diodes, LEDs, ICs, electrolytic capacitors) are inserted with the correct orientation.
- Power Supply: Check the power supply voltage and current. Ensure it is providing the correct power to your circuit.
- Component Functionality: Test individual components if possible, to rule out faulty parts.
- Short Circuits: Use a multimeter to check for any unintended short circuits between traces or components.
7. Specifications
| Attribute | Value |
|---|---|
| Model Number | X001 |
| Brand | ICP DAS |
| Item Weight | 3 Pounds |
| ASIN | B014K1GYAE |
| First Available Date | August 14, 2014 |
| Description | Large Prototype board |
8. Warranty and Support
The ICP DAS X001 prototype board is a passive component and typically does not come with an explicit manufacturer's warranty for its functionality as a standalone electronic device. However, it is covered by standard return policies for manufacturing defects.
- Return Policy: Refer to the retailer's return policy for details regarding returns or replacements for defective products. For purchases made on Amazon, the standard return policy is typically 30 days for refund/replacement.
- Technical Support: For general inquiries regarding ICP DAS products, you may visit the official ICP DAS website or contact their customer support channels.
- Manufacturer: ICP DAS


