1. Introduction
The Universal Audio LA-2A Classic Leveling Amplifier is an iconic tube compressor designed to enhance audio signals. First introduced in the early 1960s as the Teletronix LA-2A, it quickly became a standard in professional recording and broadcast environments. This modern iteration is meticulously crafted to original specifications, featuring handwired point-to-point construction and carefully selected components to ensure authenticity. Its tube-driven electro-optical attenuation circuit provides smooth, natural, and musical gain reduction without introducing harmonic distortion, making it a highly regarded piece of equipment for processing vocals and various live instruments.

Figure 1: Front view of the Universal Audio LA-2A Classic Leveling Amplifier, showcasing its classic design and controls.
2. Setup
Proper setup of the LA-2A is crucial for optimal performance. Ensure the unit is placed in a well-ventilated area, away from direct heat sources or excessive moisture. The LA-2A is designed for rack mounting and should be securely installed in a standard 19-inch equipment rack.
2.1 Power Connection
Connect the provided power cable to the AC inlet on the rear panel of the unit and then to a grounded electrical outlet. Verify that the power supply voltage matches the unit's requirements before connecting.
2.2 Audio Connections
The LA-2A features balanced XLR inputs and outputs. Use high-quality balanced audio cables for all connections to minimize noise and interference.
- Connect the audio source (e.g., microphone preamplifier output, mixing console insert send) to the INPUT XLR connector on the rear panel.
- Connect the OUTPUT XLR connector on the rear panel to the next device in your signal chain (e.g., mixing console input, audio interface input).
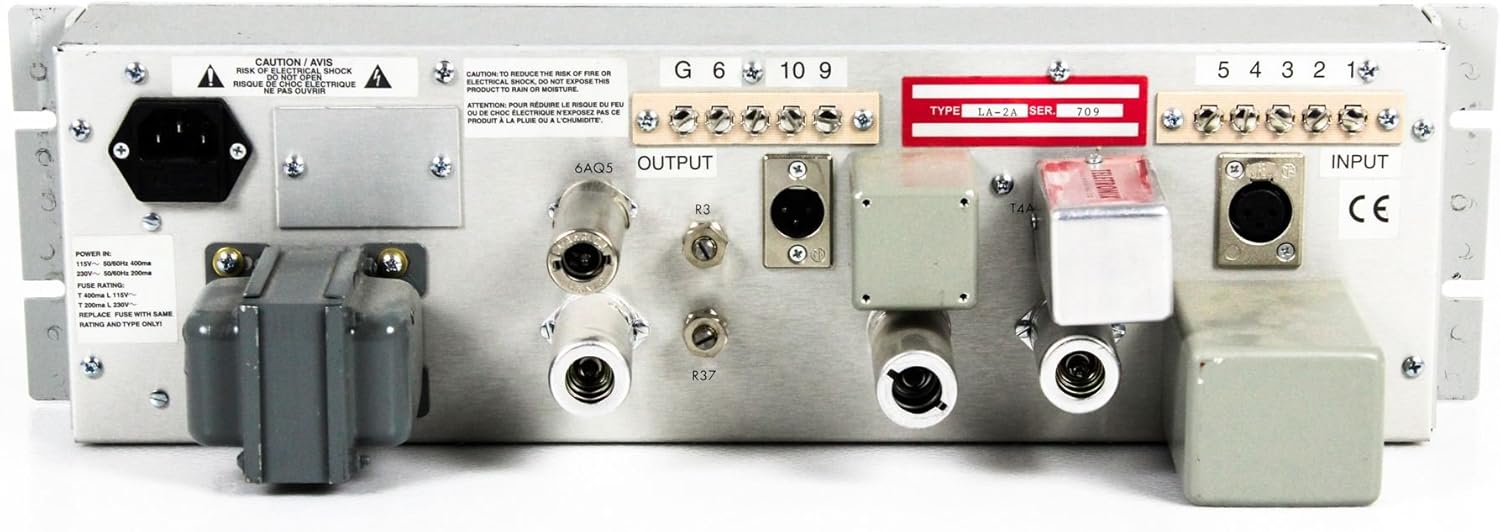
Figure 2: Rear panel of the LA-2A, illustrating the power input, audio input, and audio output connections.
3. Operating Instructions
The LA-2A is known for its straightforward operation, offering intuitive controls for shaping your audio. It is an electro-optical compressor/limiter with tube circuitry.
3.1 Powering On
After all connections are made, flip the POWER switch to the ON position. Allow a few moments for the tubes to warm up before passing audio through the unit.
3.2 Front Panel Controls

Figure 3: Detailed view of the LA-2A's front panel, highlighting the Gain, Peak Reduction, and Limit/Compress controls.
- GAIN: This knob controls the overall output level of the amplifier. Adjust it to achieve the desired output volume after compression.
- PEAK REDUCTION: This knob determines the amount of compression or limiting applied to the signal. Turning it clockwise increases the amount of gain reduction.
- LIMIT/COMPRESS Switch: This toggle switch selects between two modes of operation:
- COMPRESS: Provides a gentler compression ratio, typically around 3:1, suitable for general dynamic range control.
- LIMIT: Engages a higher compression ratio, closer to infinity:1, for hard limiting and peak control.
- VU LEVEL INDICATOR: The large VU meter displays the amount of gain reduction or output level.
- In Gain Reduction mode, the needle indicates the amount of signal attenuation.
- In Output mode, it shows the output signal level.
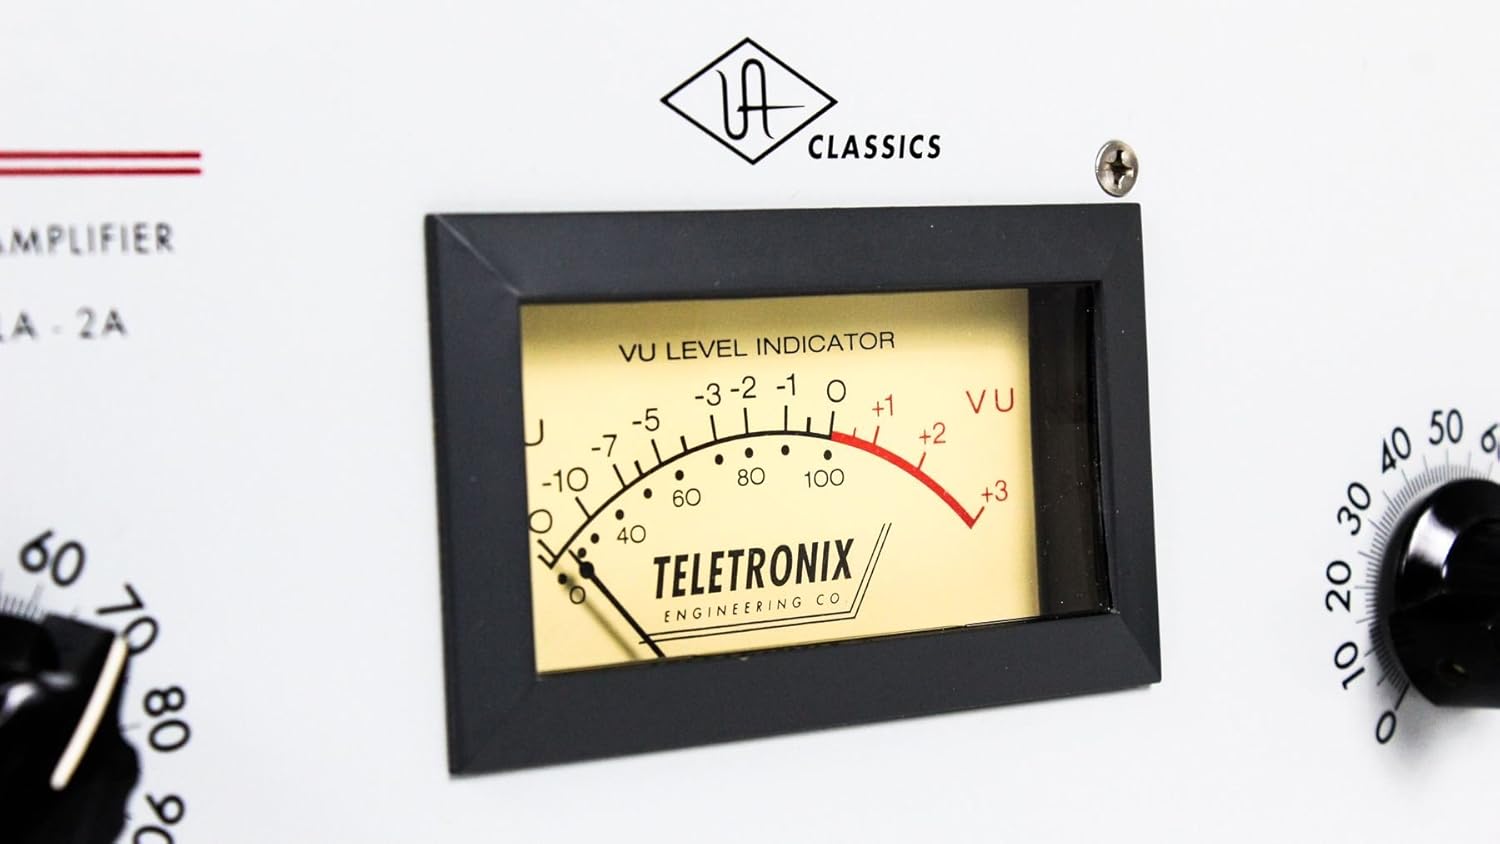
Figure 4: The illuminated VU meter, essential for monitoring gain reduction and output levels.
3.3 Achieving Desired Compression
Start with the PEAK REDUCTION knob fully counter-clockwise (minimum compression). Gradually increase the PEAK REDUCTION until the desired amount of gain reduction is observed on the VU meter. Adjust the GAIN knob to compensate for any perceived volume loss and achieve the optimal output level. Experiment with both COMPRESS and LIMIT modes to find the best setting for your audio material.
4. Maintenance
To ensure the longevity and consistent performance of your Universal Audio LA-2A, follow these maintenance guidelines:
- Cleaning: Use a soft, dry cloth to clean the exterior of the unit. Avoid abrasive cleaners or solvents, which can damage the finish.
- Ventilation: Ensure that the ventilation slots are clear of obstructions to prevent overheating.
- Tube Replacement: The LA-2A uses vacuum tubes, which have a finite lifespan. If you notice a degradation in sound quality or unusual noise, consult a qualified technician for tube inspection and replacement.
- Storage: When not in use for extended periods, store the unit in a cool, dry environment, preferably in its original packaging or a protective case.
5. Troubleshooting
If you encounter issues with your LA-2A, refer to the following common troubleshooting steps:
| Problem | Possible Cause | Solution |
|---|---|---|
| No Power | Power cable not connected; Power outlet faulty; Blown fuse. | Check power cable connection; Try a different outlet; Replace fuse (refer to specifications for correct type). |
| No Audio Output | Incorrect cabling; Input/Output levels too low; Faulty tubes. | Verify all audio cables are correctly connected; Increase GAIN and check source levels; Consult technician for tube inspection. |
| Excessive Noise/Hum | Ground loop; Unbalanced cables; Proximity to interference sources. | Ensure proper grounding; Use balanced cables; Relocate unit away from power supplies or other noisy equipment. |
| No Gain Reduction | PEAK REDUCTION knob too low; Input signal too low. | Increase PEAK REDUCTION; Ensure adequate input signal level. |
If the problem persists after attempting these solutions, please contact Universal Audio customer support or a certified service center.
6. Specifications
The Universal Audio LA-2A Classic Leveling Amplifier adheres to the following technical specifications:
- Model: LA-2A
- Type: Electro-Optical Compressor / Limiter with Tube Circuitry
- Item Weight: 13.42 pounds
- Product Dimensions: 24.55 x 12.65 x 10.3 inches
- Manufacturer: Universal Audio
- First Available: December 12, 2008
Note: Specifications are subject to change without notice for product improvement.
7. Warranty and Support
Universal Audio products are designed for reliability and performance. For detailed warranty information, including coverage period and terms, please refer to the warranty card included with your product or visit the official Universal Audio website. For technical support, service, or to inquire about replacement parts, please contact Universal Audio customer service through their website or the contact information provided in your product documentation.
For additional resources and product information, visit the Universal Audio Store on Amazon.


