
1. Introduction
Thank you for purchasing the BLACK+DECKER CS3652LC 3.6V Compact Cordless Screwdriver. This tool is designed for light-duty fastening tasks, such as furniture assembly and general household repairs. Its compact size and USB charging capability make it convenient for various DIY projects.
Please read this manual carefully before using the tool to ensure safe and efficient operation. Keep this manual for future reference.

Image 1.1: The BLACK+DECKER CS3652LC Compact Cordless Screwdriver.
2. Safety Instructions
Always follow basic safety precautions when using electric tools to reduce the risk of fire, electric shock, and personal injury.
- Wear appropriate personal protective equipment, such as safety glasses.
- Keep the work area clean and well-lit.
- Do not operate power tools in explosive atmospheres, such as in the presence of flammable liquids, gases, or dust.
- Keep children and bystanders away while operating a power tool.
- Avoid accidental starting. Ensure the switch is in the off-position before connecting to a battery pack, picking up or carrying the tool.
- Do not overreach. Keep proper footing and balance at all times.
- Use the correct tool for your application. Do not force the tool.
- Disconnect the battery pack from the power tool before making any adjustments, changing accessories, or storing power tools.
3. Setup
3.1 Charging the Battery
The tool is equipped with a 3.6V, 1.5Ah Lithium-Ion battery. Before first use, fully charge the battery. A full charge takes approximately 3 hours.
- Locate the USB charging port on the tool.
- Connect the provided USB charging cable to the tool and to a compatible USB power adapter (not included) or a computer USB port.
- The charging indicator light will illuminate during charging. It will change or turn off once charging is complete.
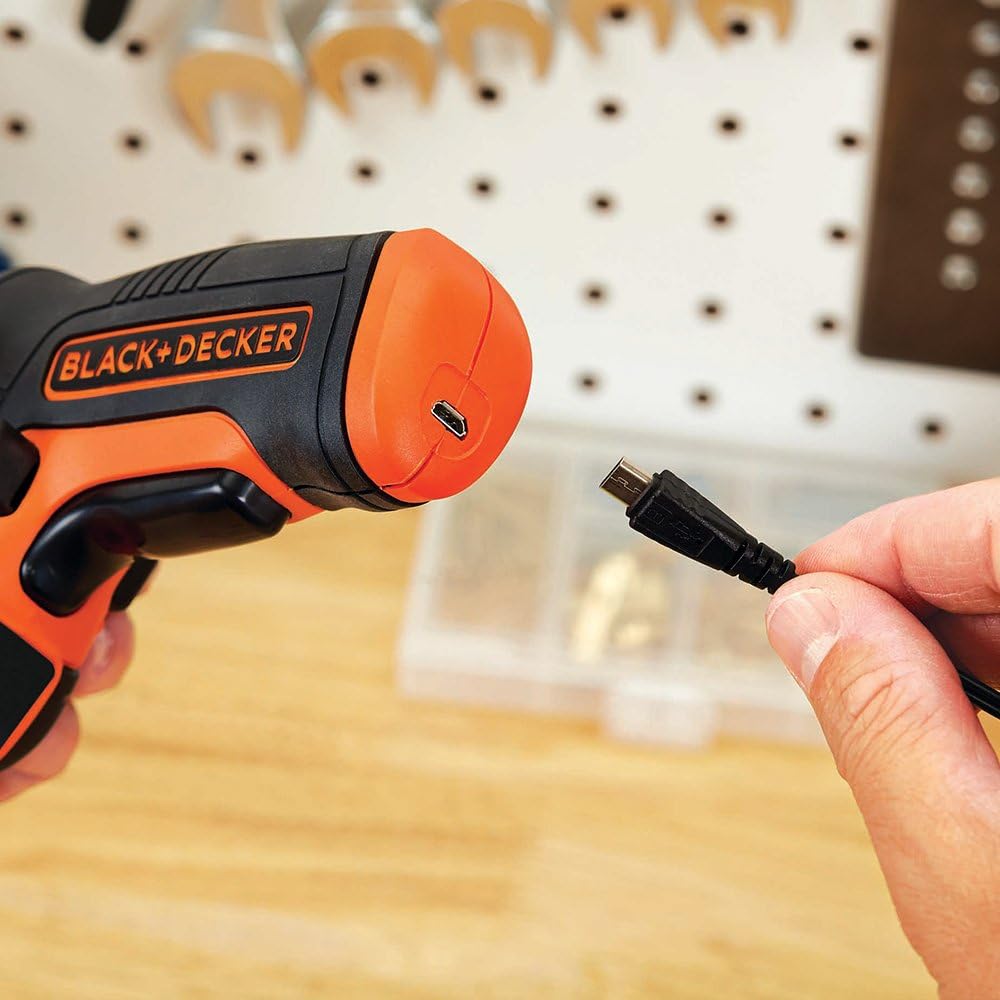
Image 3.1: Connecting the USB charging cable to the screwdriver.
3.2 Installing and Removing Bits
The screwdriver comes with a variety of bits for different screw types and sizes. Ensure the tool is off before changing bits.
- To Install a Bit: Insert the desired bit firmly into the chuck until it clicks into place.
- To Remove a Bit: Pull the bit straight out from the chuck.

Image 3.2: Inserting a screwdriver bit.
4. Operating Instructions
4.1 Basic Operation
- Forward/Reverse Switch: Locate the forward/reverse switch near the trigger. Push it to the left for forward (tightening) and to the right for reverse (loosening). The center position locks the tool.
- Trigger Switch: Squeeze the trigger to start the tool. Release it to stop.
- LED Work Light: The integrated LED light illuminates the work area when the trigger is pressed, improving visibility in dimly lit spaces.

Image 4.1: The LED work light illuminates the work area.
4.2 Applications
This compact screwdriver is ideal for various tasks:
- Assembling flat-pack furniture.
- Installing light fixtures or wall plates.
- Tightening loose screws around the house.
- Light DIY projects requiring screw fastening up to 38mm in length.

Image 4.2: Using the screwdriver for furniture assembly.

Image 4.3: Fastening a wall plate with the screwdriver.
5. Maintenance
Regular maintenance ensures the longevity and optimal performance of your tool.
- Cleaning: Keep the ventilation slots of the tool clean to prevent overheating. Use a soft, damp cloth to clean the exterior. Do not use harsh chemicals or abrasive cleaners.
- Storage: Store the tool in a dry, secure place out of reach of children. Ensure the battery is partially charged before long-term storage.
- Battery Care: Do not store the battery in temperatures above 40°C (104°F) or below 0°C (32°F). Do not dispose of batteries in fire.
6. Troubleshooting
If you encounter issues with your screwdriver, refer to the following common troubleshooting steps:
- Tool not starting: Ensure the battery is fully charged. Check that the forward/reverse switch is not in the center (locked) position.
- Reduced power or short run time: The battery may need recharging. Battery performance can decrease over time; consider contacting support if issues persist after charging.
- Bit slipping: Ensure the bit is correctly inserted and fully seated in the chuck. Use the appropriate bit size and type for the screw.
For further assistance, please contact BLACK+DECKER customer support.
7. Specifications
| Feature | Specification |
|---|---|
| Model Number | CS3652LC |
| Power Source | Rechargeable (DC 3.6V) |
| Max Torque | 5.5 N·m |
| No-Load Speed | 180 RPM |
| Battery Capacity | 1.5 Ah (Lithium-Ion) |
| Charging Time | Approx. 3 hours (via USB) |
| Max Screw Length | 38 mm |
| Max Work Volume | Approx. 240 screws (φ3.5mm x 20mm) |
| Chuck Size | 6.35 mm |
| Dimensions (L x W x H) | 15.5 x 5.5 x 14 cm |
| Weight | 0.33 kg |
| Country of Origin | China |
| Included Accessories | #1 Phillips, #2 Phillips, #2 PoziDrive, #8 Slotted, 3mm Hex, 4mm Hex, 5mm Hex, 6mm Hex (50mm length each); #2 Phillips, #2 PoziDrive (100mm length each); 2.5mm Drill Bit; Charger |
8. Warranty and Support
BLACK+DECKER products are manufactured to high-quality standards. For information regarding warranty coverage, service, or technical support, please refer to the warranty card included with your purchase or visit the official BLACK+DECKER website.
You can also contact BLACK+DECKER customer service directly for assistance with product operation, parts, or repairs.
Website: www.blackanddecker.com


