
1. Introduction
This user manual provides detailed instructions for the Carina R-Evolution 2020 Black Edition Sewing Machine. Please read this manual thoroughly before operating the machine to ensure safe and efficient use. Proper understanding of the machine's functions and maintenance procedures will help you achieve optimal sewing results and extend the lifespan of your machine.
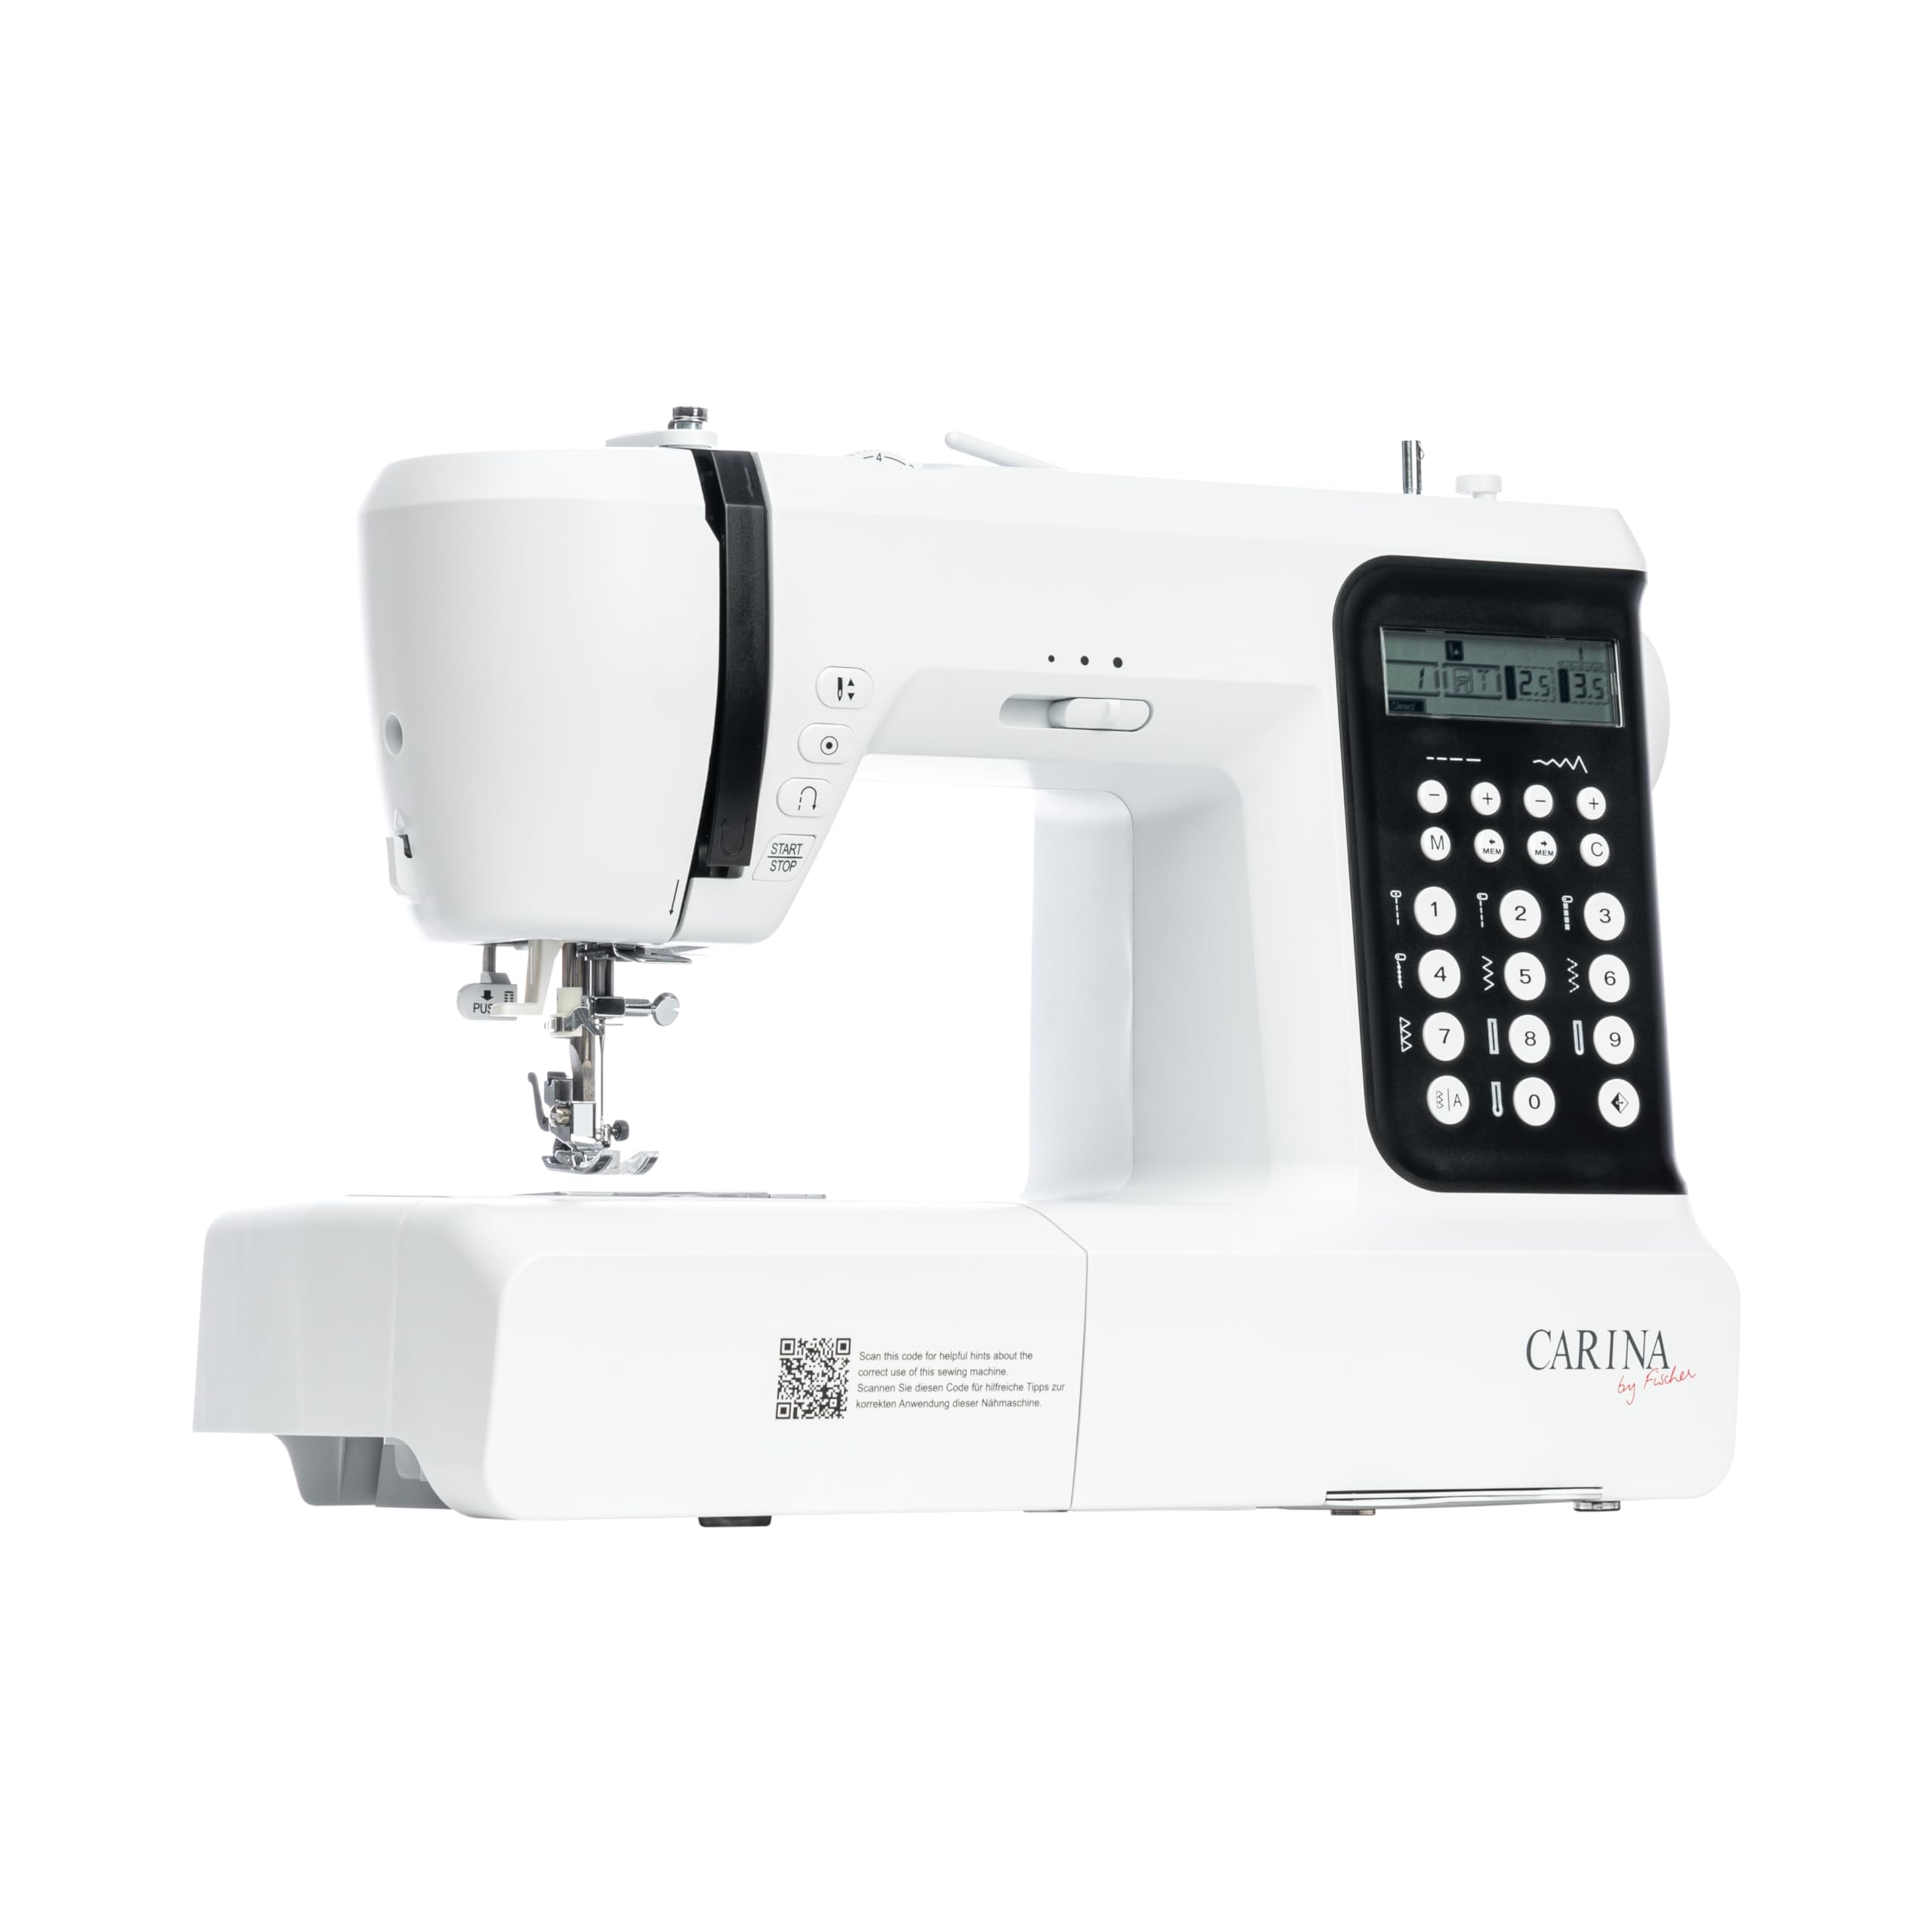
Image 1.1: The Carina R-Evolution 2020 Black Edition Sewing Machine. This image shows the overall design of the sewing machine, highlighting its control panel and sewing area.
2. Safety Instructions
Always follow basic safety precautions when using electrical appliances to reduce the risk of fire, electric shock, or injury to persons.
- Ensure the machine is unplugged from the electrical outlet when not in use, when cleaning, or when making any adjustments.
- Keep fingers away from all moving parts. Special care is required around the sewing machine needle.
- Use the correct needle plate. The wrong plate can cause the needle to break.
- Do not pull on the power cord to disconnect from the outlet. Grasp the plug, not the cord.
- Never operate the machine with any air openings blocked. Keep ventilation openings of the sewing machine and foot controller free from the accumulation of lint, dust, and loose cloth.
- Do not operate where aerosol (spray) products are being used or where oxygen is being administered.
- This appliance is not intended for use by persons (including children) with reduced physical, sensory or mental capabilities, or lack of experience and knowledge, unless they have been given supervision or instruction concerning use of the appliance by a person responsible for their safety.
3. Product Features
The Carina R-Evolution 2020 Black Edition Sewing Machine is equipped with advanced features designed for versatility and ease of use:
- Snap High System Presser Foot: Features two height settings, providing an advantage when working with thick fabrics.
- STS Stretch Transport System: Specifically designed for optimal fabric feeding when sewing elastic and stretch materials.
- Robust and Durable Construction: Built with a full metal frame for enhanced stability and longevity.
- Advanced Stitch Quality: Delivers precise stitches on various fabric types, including thick, thin, and elastic materials.
- 7-Segment Feed Dog: Retractable for free-motion sewing tasks such as darning or embroidery.
- Needle Stop Up/Down Function: Allows precise needle positioning.
- Automatic Sewing: Start and stop sewing with a simple button press.
- Integrated Needle Threader: Simplifies the threading process.
- Adjustable Presser Foot Pressure: Provides control for different fabric thicknesses.
- Thread Cutter: Conveniently cuts upper and lower threads.
- High Speed Operation: Capable of up to 1000 stitches per minute while maintaining quiet operation.

Image 3.1: The sewing machine shown with its extension table, providing a larger work surface for bigger projects.
4. Setup
4.1 Unpacking and Placement
- Carefully remove the machine from its packaging. Retain all packaging materials for future storage or transport.
- Place the machine on a stable, flat surface. Ensure there is adequate space around the machine for comfortable operation.
- Connect the power cord to the machine and then to a suitable electrical outlet.
- Connect the foot controller to the machine.
4.2 Attaching the Extension Table
To attach the extension table, slide it onto the free arm of the machine until it clicks securely into place. This provides a larger, flat work surface, which is particularly useful for larger sewing projects.
4.3 Winding the Bobbin
- Place a spool of thread on the spool pin.
- Guide the thread through the upper thread guide and around the bobbin winding tension disc.
- Insert the thread through the hole in the bobbin and place the bobbin onto the bobbin winder spindle.
- Push the bobbin winder spindle to the right.
- Start the machine (using the foot controller or start/stop button) to wind the thread evenly onto the bobbin. Stop when the bobbin is full.
- Cut the thread and push the bobbin winder spindle back to the left. Remove the wound bobbin.
4.4 Inserting the Bobbin
- Open the bobbin cover plate.
- Place the wound bobbin into the bobbin case with the thread unwinding counter-clockwise.
- Guide the thread through the tension spring and into the thread guide slot.
- Pull out approximately 10-15 cm of thread.
- Replace the bobbin cover plate.
4.5 Threading the Upper Thread
- Raise the presser foot lever.
- Place a spool of thread on the spool pin.
- Guide the thread through the upper thread guides as indicated by the numbered path on the machine.
- Ensure the thread passes through the tension discs and into the take-up lever.
- Thread the needle using the integrated needle threader or manually.
- Pull the bobbin thread up through the needle plate hole by turning the handwheel towards you to lower and raise the needle once.
- Pull both upper and bobbin threads under the presser foot and towards the back of the machine.

Image 4.1: A close-up view of the needle and presser foot area, illustrating the precision of the sewing mechanism.
5. Operating Instructions
5.1 Selecting a Stitch
Use the stitch selection buttons on the control panel to choose your desired stitch pattern. The selected stitch will be displayed on the LCD screen. Adjust stitch length and width as needed using the corresponding buttons.
5.2 Adjusting Thread Tension
Correct thread tension is crucial for balanced stitches. Adjust the upper thread tension dial according to your fabric and thread type. A balanced stitch will have the upper and lower threads meeting evenly between the fabric layers. If the upper thread lies flat on the fabric and the bobbin thread shows on top, the upper tension is too tight. If the bobbin thread lies flat on the fabric and the upper thread shows on the bottom, the upper tension is too loose.
5.3 Starting to Sew
- Place the fabric under the presser foot.
- Lower the presser foot lever.
- Turn the handwheel towards you to lower the needle into the fabric at the starting point.
- Press the foot controller or the start/stop button to begin sewing. Guide the fabric gently with both hands, but do not push or pull it.
- To secure the beginning and end of a seam, use the reverse stitch button.
- When finished, press the start/stop button or release the foot controller. Raise the needle to its highest position and lift the presser foot.
- Pull the fabric towards the back and use the integrated thread cutter or scissors to cut the threads.

Image 5.1: A user operating the Carina R-Evolution 2020 Black Edition Sewing Machine, demonstrating typical use.
6. Maintenance
Regular maintenance ensures the smooth operation and longevity of your sewing machine.
6.1 Cleaning the Machine
- Always unplug the machine before cleaning.
- Remove the needle, presser foot, needle plate, and bobbin case.
- Use a small brush to remove lint and dust from the feed dogs and bobbin area. A vacuum cleaner with a small nozzle can also be used.
- Wipe the exterior of the machine with a soft, dry cloth. Do not use harsh chemicals or abrasive cleaners.
6.2 Oiling (If Applicable)
Refer to the specific instructions in your full manual regarding oiling. Some modern sewing machines are self-lubricating and do not require user oiling. If oiling is required, use only high-quality sewing machine oil in the designated points.
6.3 Changing the Needle
- Unplug the machine.
- Loosen the needle clamp screw.
- Remove the old needle.
- Insert a new needle with the flat side facing the back of the machine, pushing it up as far as it will go.
- Tighten the needle clamp screw securely.
Always use the correct needle type and size for your fabric and thread to prevent skipped stitches or needle breakage.
7. Troubleshooting
This section addresses common issues you might encounter. For more complex problems, consult a qualified service technician.
| Problem | Possible Cause | Solution |
|---|---|---|
| Skipped Stitches | Incorrect needle, bent needle, improper threading, wrong tension. | Change needle to correct type/size, replace bent needle, re-thread machine correctly, adjust tension. |
| Thread Breakage (Upper) | Improper threading, tension too tight, burr on needle eye or thread path, poor quality thread. | Re-thread machine, loosen upper tension, check for burrs, use good quality thread. |
| Thread Breakage (Bobbin) | Improper bobbin winding, bobbin inserted incorrectly, tension too tight in bobbin case. | Re-wind bobbin evenly, re-insert bobbin correctly, check bobbin case for lint/damage. |
| Uneven Stitches / Looping | Incorrect thread tension (upper or bobbin), improper threading. | Adjust upper and bobbin tension, ensure machine is threaded correctly. |
| Machine Not Feeding Fabric | Feed dogs lowered, lint in feed dog area, presser foot pressure too low. | Raise feed dogs, clean feed dog area, increase presser foot pressure. |
8. Specifications
Detailed technical specifications for the Carina R-Evolution 2020 Black Edition Sewing Machine:
- Brand: Carina
- Model Number: 20058888
- Color: Black
- Dimensions (L x W x H): 36 x 15 x 23 cm (14.17 x 5.91 x 9.06 inches)
- Weight: 5.9 Kilograms (13 lbs)
- Power: 70.00 Watts
- Material: Metal, Plastic
- Automatic Stop Function: Yes
- Power Source: Corded Electric
- UPC: 785983175401, 785983175326, 785983175265
9. Warranty and Support
The Carina R-Evolution 2020 Black Edition Sewing Machine is designed for durability and performance. Spare parts availability is guaranteed for 10 years from the date of purchase.
For technical support or warranty claims, please refer to the contact information provided at the point of purchase or visit the official Carina website. Ensure you have your model number (20058888) and proof of purchase available when contacting support.