
1. Introduction
This manual provides detailed instructions for the safe and effective use of your Retevis RT388 Walkie Talkies. Please read this manual thoroughly before operating the device and retain it for future reference.
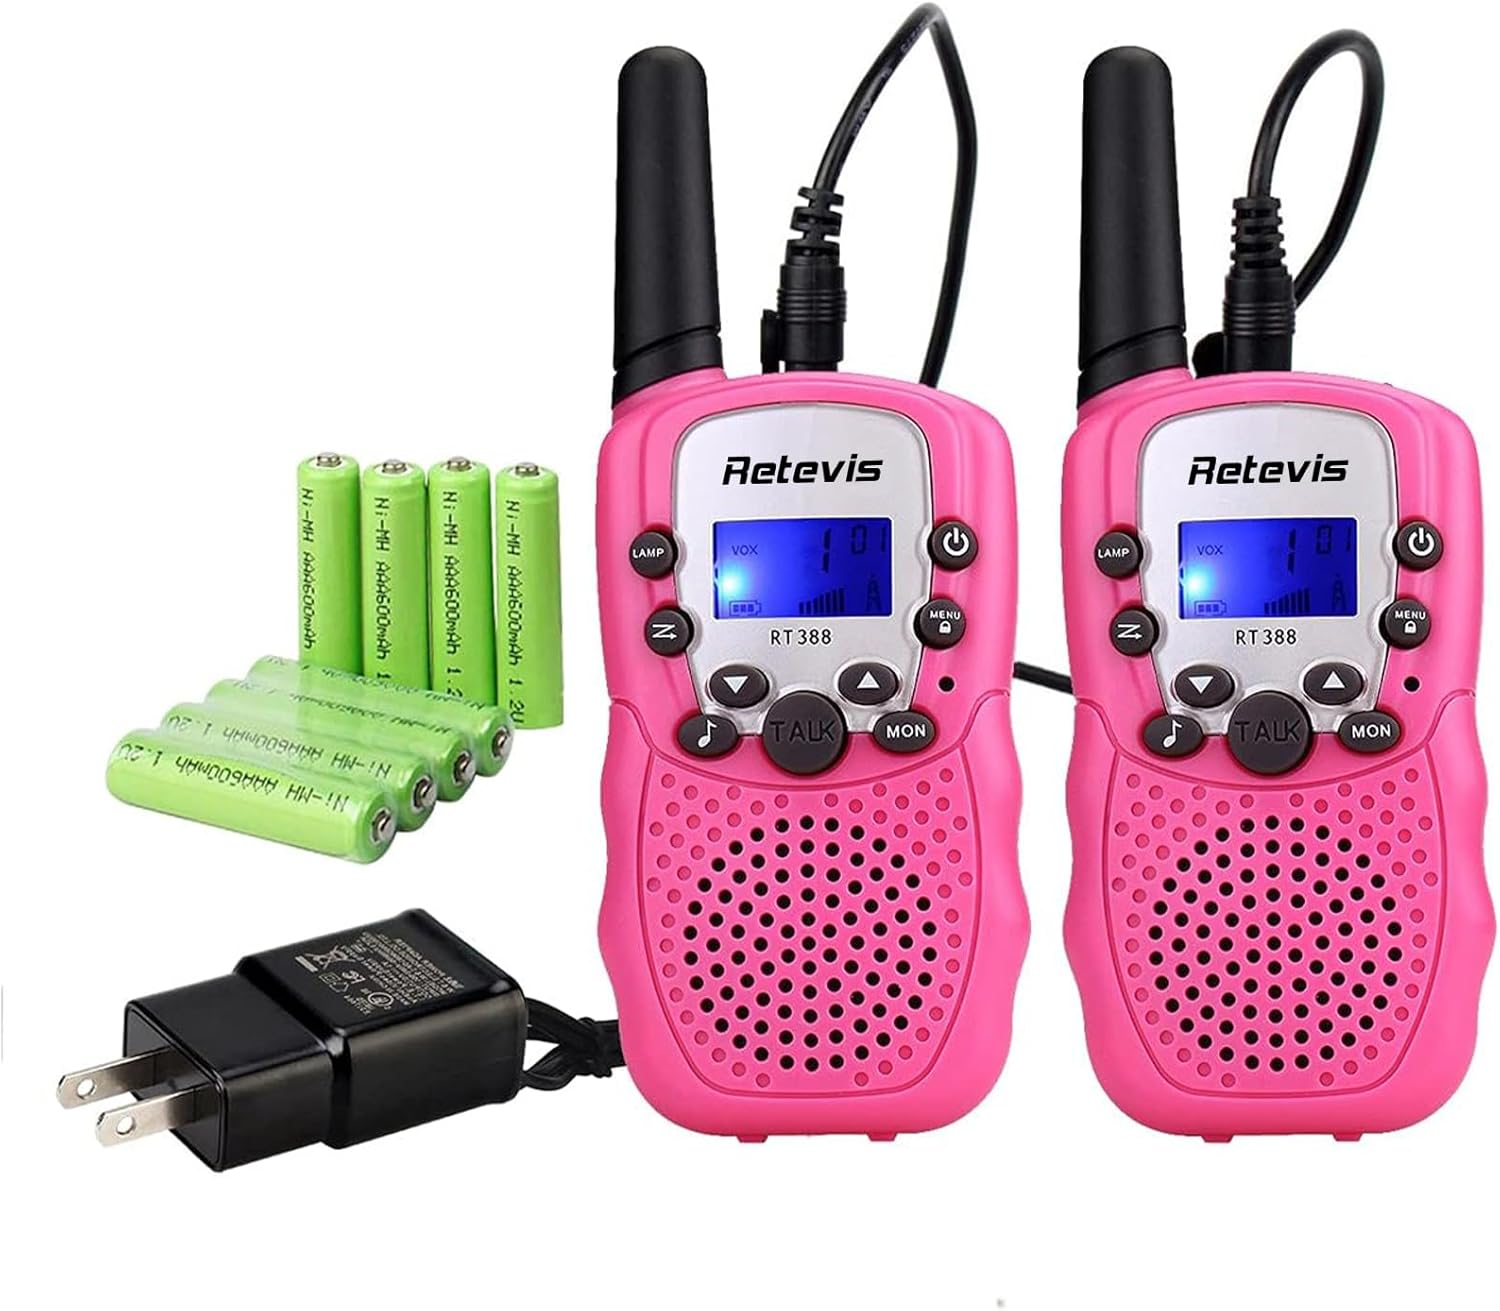
Image: Two Retevis RT388 walkie talkies, rechargeable batteries, and charging adapter.
2. What's in the Box
Verify that all items are present in your package:
- 2 x Retevis RT388 Walkie Talkies
- 8 x AAA Rechargeable Batteries
- 1 x One-to-two Charging Cable and Adapter
- 1 x User Manual (this document)

Image: Package contents including two walkie talkies, batteries, and charger.
3. Product Features
- Rechargeable Batteries: Equipped with rechargeable AAA batteries and a charging cable for convenience.
- LCD Display: Clear screen for channel and status information.
- Built-in LED Torch: Provides illumination in low-light conditions.
- 22 Channels: Offers multiple communication channels.
- 99 CTCSS/DCS Codes: Enhances privacy by filtering unwanted signals.
- VOX Function: Hands-free operation for voice-activated transmission.
- Keypad Lock: Prevents accidental changes to settings.
- Durable Construction: Made from new materials for improved resistance to drops.
- Lightweight Design: Each unit weighs approximately 75g.
- 10 Call Tones: Customizable alert sounds.
- 2.5mm Mic/Speaker Port: For connecting external audio accessories.

Image: Walkie talkie with illuminated LCD and flashlight beam.

Image: Representation of clear sound transmission.

Image: Walkie talkie demonstrating its lightweight nature.

Image: Detail of flashlight and earpiece port.
4. Setup
4.1 Battery Installation
- Locate the battery compartment cover on the back of the walkie talkie.
- Slide or unclip the cover to open the compartment.
- Insert 4 AAA rechargeable batteries into each walkie talkie, ensuring correct polarity (+/-).
- Replace the battery compartment cover, ensuring it is securely closed.
4.2 Charging the Batteries
- Connect the one-to-two charging cable to the charging port on each walkie talkie.
- Plug the adapter into a standard electrical outlet.
- The walkie talkies will begin charging. Refer to the device's display or indicator light for charging status.
- Once fully charged, disconnect the charging cable and adapter.
5. Operating Instructions
5.1 Power On/Off
- To power on, press and hold the Power button (
 ) until the LCD screen illuminates.
 - To power off, press and hold the Power button until the screen turns off.
5.2 Adjusting Volume
- Use the Up (
 ) and Down (
 ) buttons to increase or decrease the speaker volume.
5.3 Channel Selection
- Press the MENU button once. The channel number on the LCD will flash.
- Use the Up or Down buttons to select your desired channel (1-22).
- Press the TALK button to confirm the channel selection, or press MENU again to cycle through other settings.
5.4 CTCSS/DCS Code Setting
- Press the MENU button twice. The CTCSS/DCS code number will flash.
- Use the Up or Down buttons to select a code (0-99).
- Press the TALK button to confirm, or MENU to proceed.
- Note: Both walkie talkies must be on the same channel and CTCSS/DCS code to communicate.
5.5 Transmitting and Receiving
- To transmit, press and hold the TALK button. Speak clearly into the microphone.
- Release the TALK button to receive messages.
5.6 VOX Function (Voice Operated Exchange)
- The VOX function allows hands-free transmission. When activated, the walkie talkie will transmit automatically when it detects your voice.
- To activate/deactivate VOX: Press MENU three times. Use Up or Down to select VOX sensitivity level (1-3) or OFF.
5.7 Keypad Lock
- To lock the keypad, press and hold the MENU button until a key icon appears on the LCD.
- To unlock, press and hold the MENU button again until the key icon disappears.
5.8 Flashlight Operation
- To turn on the built-in LED torch, press the LAMP button.
- Press the LAMP button again to turn it off.
6. Maintenance
- Cleaning: Wipe the walkie talkies with a soft, damp cloth. Do not use harsh chemicals or abrasive cleaners.
- Battery Care:
- Always use the provided rechargeable batteries and charging cable.
- If the walkie talkies will not be used for an extended period, remove the batteries to prevent leakage.
- Ensure batteries are fully charged before long periods of storage.
- Storage: Store the walkie talkies in a cool, dry place away from direct sunlight and extreme temperatures.
7. Troubleshooting
| Problem | Possible Cause | Solution |
|---|---|---|
| No power | Batteries are dead or incorrectly installed. | Check battery polarity. Recharge or replace batteries. |
| Cannot communicate with other walkie talkie | Different channels or CTCSS/DCS codes. Out of range. | Ensure both units are on the same channel and code. Move closer to the other unit. |
| Poor sound quality / Static | Weak signal. Obstructions. Low battery. | Move to an open area. Recharge batteries. |
| Keypad is unresponsive | Keypad lock is activated. | Deactivate keypad lock by pressing and holding the MENU button. |
| Batteries not charging | Charging cable or adapter faulty. Batteries not seated correctly. | Ensure cable and adapter are properly connected. Re-seat batteries in the compartment. |
8. Specifications
- Model Number: RT388
- Product Dimensions: 5.51 x 2.17 x 1.1 inches
- Item Weight: 12 ounces (0.34 Kilograms)
- Number of Channels: 22
- Frequency Range: FRS
- Talking Range Maximum: 1000 Meter (approximately 0.62 miles)
- Voltage: 3.7 Volts
- Batteries: 8 AAA rechargeable batteries (included)
- Water Resistance Level: Not Water Resistant
- Manufacturer: Retevis
9. Safety Information
FCC ID: 2AAR8RETEVISRT388
Our walkie talkies meet FCC Part 95 rules. Please adhere to the following safety guidelines:
- Do not operate the walkie talkie with a damaged antenna. If a damaged antenna comes into contact with your skin, a minor burn may result.
- Maintain a safe distance from the antenna during transmission. The antenna emits Radio Frequency (RF) energy. Avoid direct contact with the antenna, especially near the face or lips, to prevent potential exposure to electromagnetic energy.
- Do not use the walkie talkie in environments with explosive hazards (e.g., gas stations, chemical plants).
- Keep the device away from medical devices such as pacemakers, as it may interfere with their operation.
- Supervise children during use to ensure proper handling and adherence to safety guidelines.
10. Warranty and Support
For warranty information, technical support, or service inquiries, please contact Retevis customer service through their official website or the retailer where the product was purchased. Please retain your proof of purchase for warranty claims.
Manufacturer: Retevis
Model: RT388


