
allsun EM5812
Contents
ALLOSUN Digital Cable Length Multimeter
Model: EM5812 User Manual
1. Introduction
Thank you for choosing the ALLOSUN EM5812 Digital Cable Length Multimeter. This device is designed for accurate measurement of cable length, resistance, and includes features for wire gauge settings. It is an essential tool for professionals working with electrical wiring and networks. This manual provides detailed instructions for the safe and effective use of your new meter.
2. Safety Information
WARNING: To avoid electric shock or personal injury, please read and understand all safety information before using this product.
- Do not apply voltage to the inputs. This device is designed for cable length and resistance measurement only.
- Ensure the device is turned off before connecting or disconnecting test leads.
- Do not use the meter if it appears damaged or if the test leads are damaged.
- Always use the meter within its specified measurement ranges.
- Keep the device away from water and extreme temperatures.
- Battery replacement should be performed by following the instructions carefully.
3. Product Overview
The ALLOSUN EM5812 is a versatile digital meter featuring a clear display, intuitive controls, and robust construction for reliable performance in various environments.
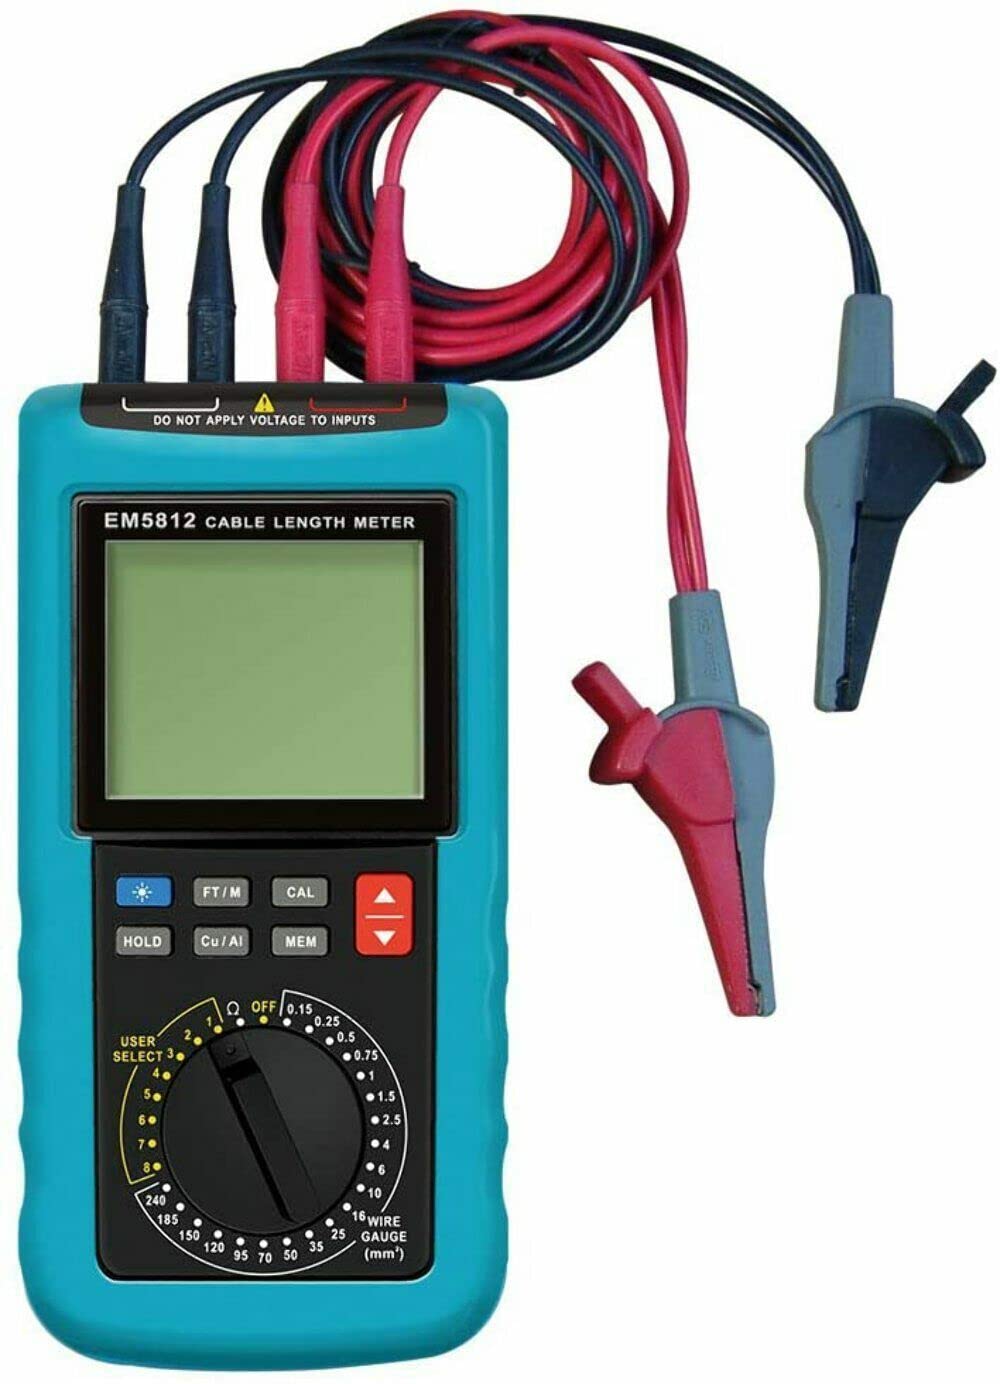
Figure 3.1: Front view of the ALLOSUN EM5812 Digital Cable Length Multimeter, showing the display, function dial, and input jacks with connected test leads.
Key Features:
- Length Measurement: Measures cable length from 0 to 100,000 feet (0 to 30 kilometers).
- Resistance Measurement: Measures resistance from 0.1mΩ to 1999.9Ω.
- Wire Gauge Settings: Includes 20 pre-set wire gauge settings (e.g., 18AWG, 16AWG, up to 1000kcmil) and 8 user-selectable memory locations for custom settings.
- Automatic Sleep Mode: The meter enters sleep mode after approximately 10 minutes of inactivity to conserve battery life.
- Power Supply: Operates on 6 pieces of 1.5V AA batteries.
4. Setup
4.1 Battery Installation
- Locate the battery compartment cover on the back of the meter.
- Use a screwdriver to open the battery compartment.
- Insert 6 x 1.5V AA batteries, ensuring correct polarity as indicated inside the compartment.
- Replace the battery compartment cover and secure it with the screw.
4.2 Connecting Test Leads
- Ensure the meter is turned off.
- Insert the red test lead into the positive (+) input jack and the black test lead into the negative (-) input jack.
- Connect the alligator clips to the ends of the cable or wire you wish to test.
5. Operating Instructions
5.1 Powering On/Off
Turn the rotary dial to any measurement function to power on the meter. Turn the dial to the "OFF" position to power off the meter.
5.2 Length Measurement
- Connect the test leads to the cable to be measured.
- Select the desired wire gauge setting using the rotary dial or by recalling a user-defined setting.
- Press the "FT/M" button to toggle between feet and meters display units.
- The cable length will be displayed on the screen.
5.3 Resistance Measurement
- Connect the test leads to the component or wire for resistance measurement.
- Ensure the meter is set to a resistance measurement mode (if applicable, based on the dial).
- The resistance value will be displayed on the screen.
5.4 Wire Gauge Settings and Calibration
The meter offers 20 pre-set wire gauge settings. For specific or non-standard wires, you can use the 8 memory locations for user-defined settings.
- To calibrate for a specific wire, measure a known length of that wire (e.g., 100ft).
- Access the calibration mode (refer to the 'CAL' button on the device).
- Input the known length. The meter will then use this calibration for subsequent measurements of that wire type.
- Save custom settings to one of the 8 memory locations using the 'MEM' button.
5.5 Data Hold Function
Press the "HOLD" button to freeze the current reading on the display. Press it again to release the hold function.
6. Maintenance
6.1 Cleaning
Wipe the meter's casing with a damp cloth and mild detergent. Do not use abrasives or solvents. Ensure the device is dry before storage or next use.
6.2 Battery Replacement
When the low battery indicator appears on the display, replace the batteries promptly to ensure accurate readings. Refer to Section 4.1 for battery installation instructions.
6.3 Storage
If the meter is not used for an extended period, remove the batteries to prevent leakage and damage. Store the device in a cool, dry place, away from direct sunlight and extreme temperatures.
7. Troubleshooting
| Problem | Possible Cause | Solution |
|---|---|---|
| Meter does not power on. | Dead or incorrectly installed batteries. | Check battery polarity; replace batteries. |
| Inaccurate length/resistance readings. | Incorrect wire gauge setting; poor test lead connection; uncalibrated for specific wire type. | Verify wire gauge setting; ensure secure connections; perform calibration for the specific wire. |
| Display is blank or flickering. | Low battery; internal fault. | Replace batteries. If problem persists, contact support. |
| Meter enters sleep mode too quickly. | Normal operation (10 minutes inactivity). | Wake up by pressing any button or turning the dial. This is a power-saving feature. |
8. Specifications
- Model: EM5812
- Brand: allsun
- Length Measurement Range: 0 - 100,000 ft (0 - 30 km)
- Resistance Measurement Range: 0.1mΩ - 1999.9Ω
- Wire Gauge Settings: 20 pre-set, 8 user-defined memory locations
- Power Source: 6 x 1.5V AA Batteries
- Automatic Shut-off: Approximately 10 minutes of inactivity
- Product Dimensions: 3.94 x 2.36 x 7.87 inches
- Item Weight: 0.6 Kilograms (1.32 Pounds)
- Color: Turquoise
- Manufacturer: Zhangzhou Eastern Intelligent Meter Co., Ltd
9. Warranty and Support
ALLOSUN is committed to providing high-quality test and measurement instruments. For warranty information, technical support, or service inquiries, please contact your point of purchase or the manufacturer directly.
Manufacturer: Zhangzhou Eastern Intelligent Meter Co., Ltd
Please retain your purchase receipt as proof of purchase for any warranty claims.
Documents and downloads
Ask a question about this manual
Ask about setup, troubleshooting, compatibility, parts, safety, or missing instructions. Manuals+ will review the question and use this page’s manual context to help answer it.