
1. Introduction
This manual provides instructions for the assembly and installation of the Easy Up Inc EZ NP-30-166 Non-Penetrating Roof Mount. This mount is designed to securely hold satellite dishes, wireless internet antennas, weather stations, and similar equipment on flat roofs without requiring roof penetration. It utilizes standard concrete blocks (not included) for ballast to ensure stability.
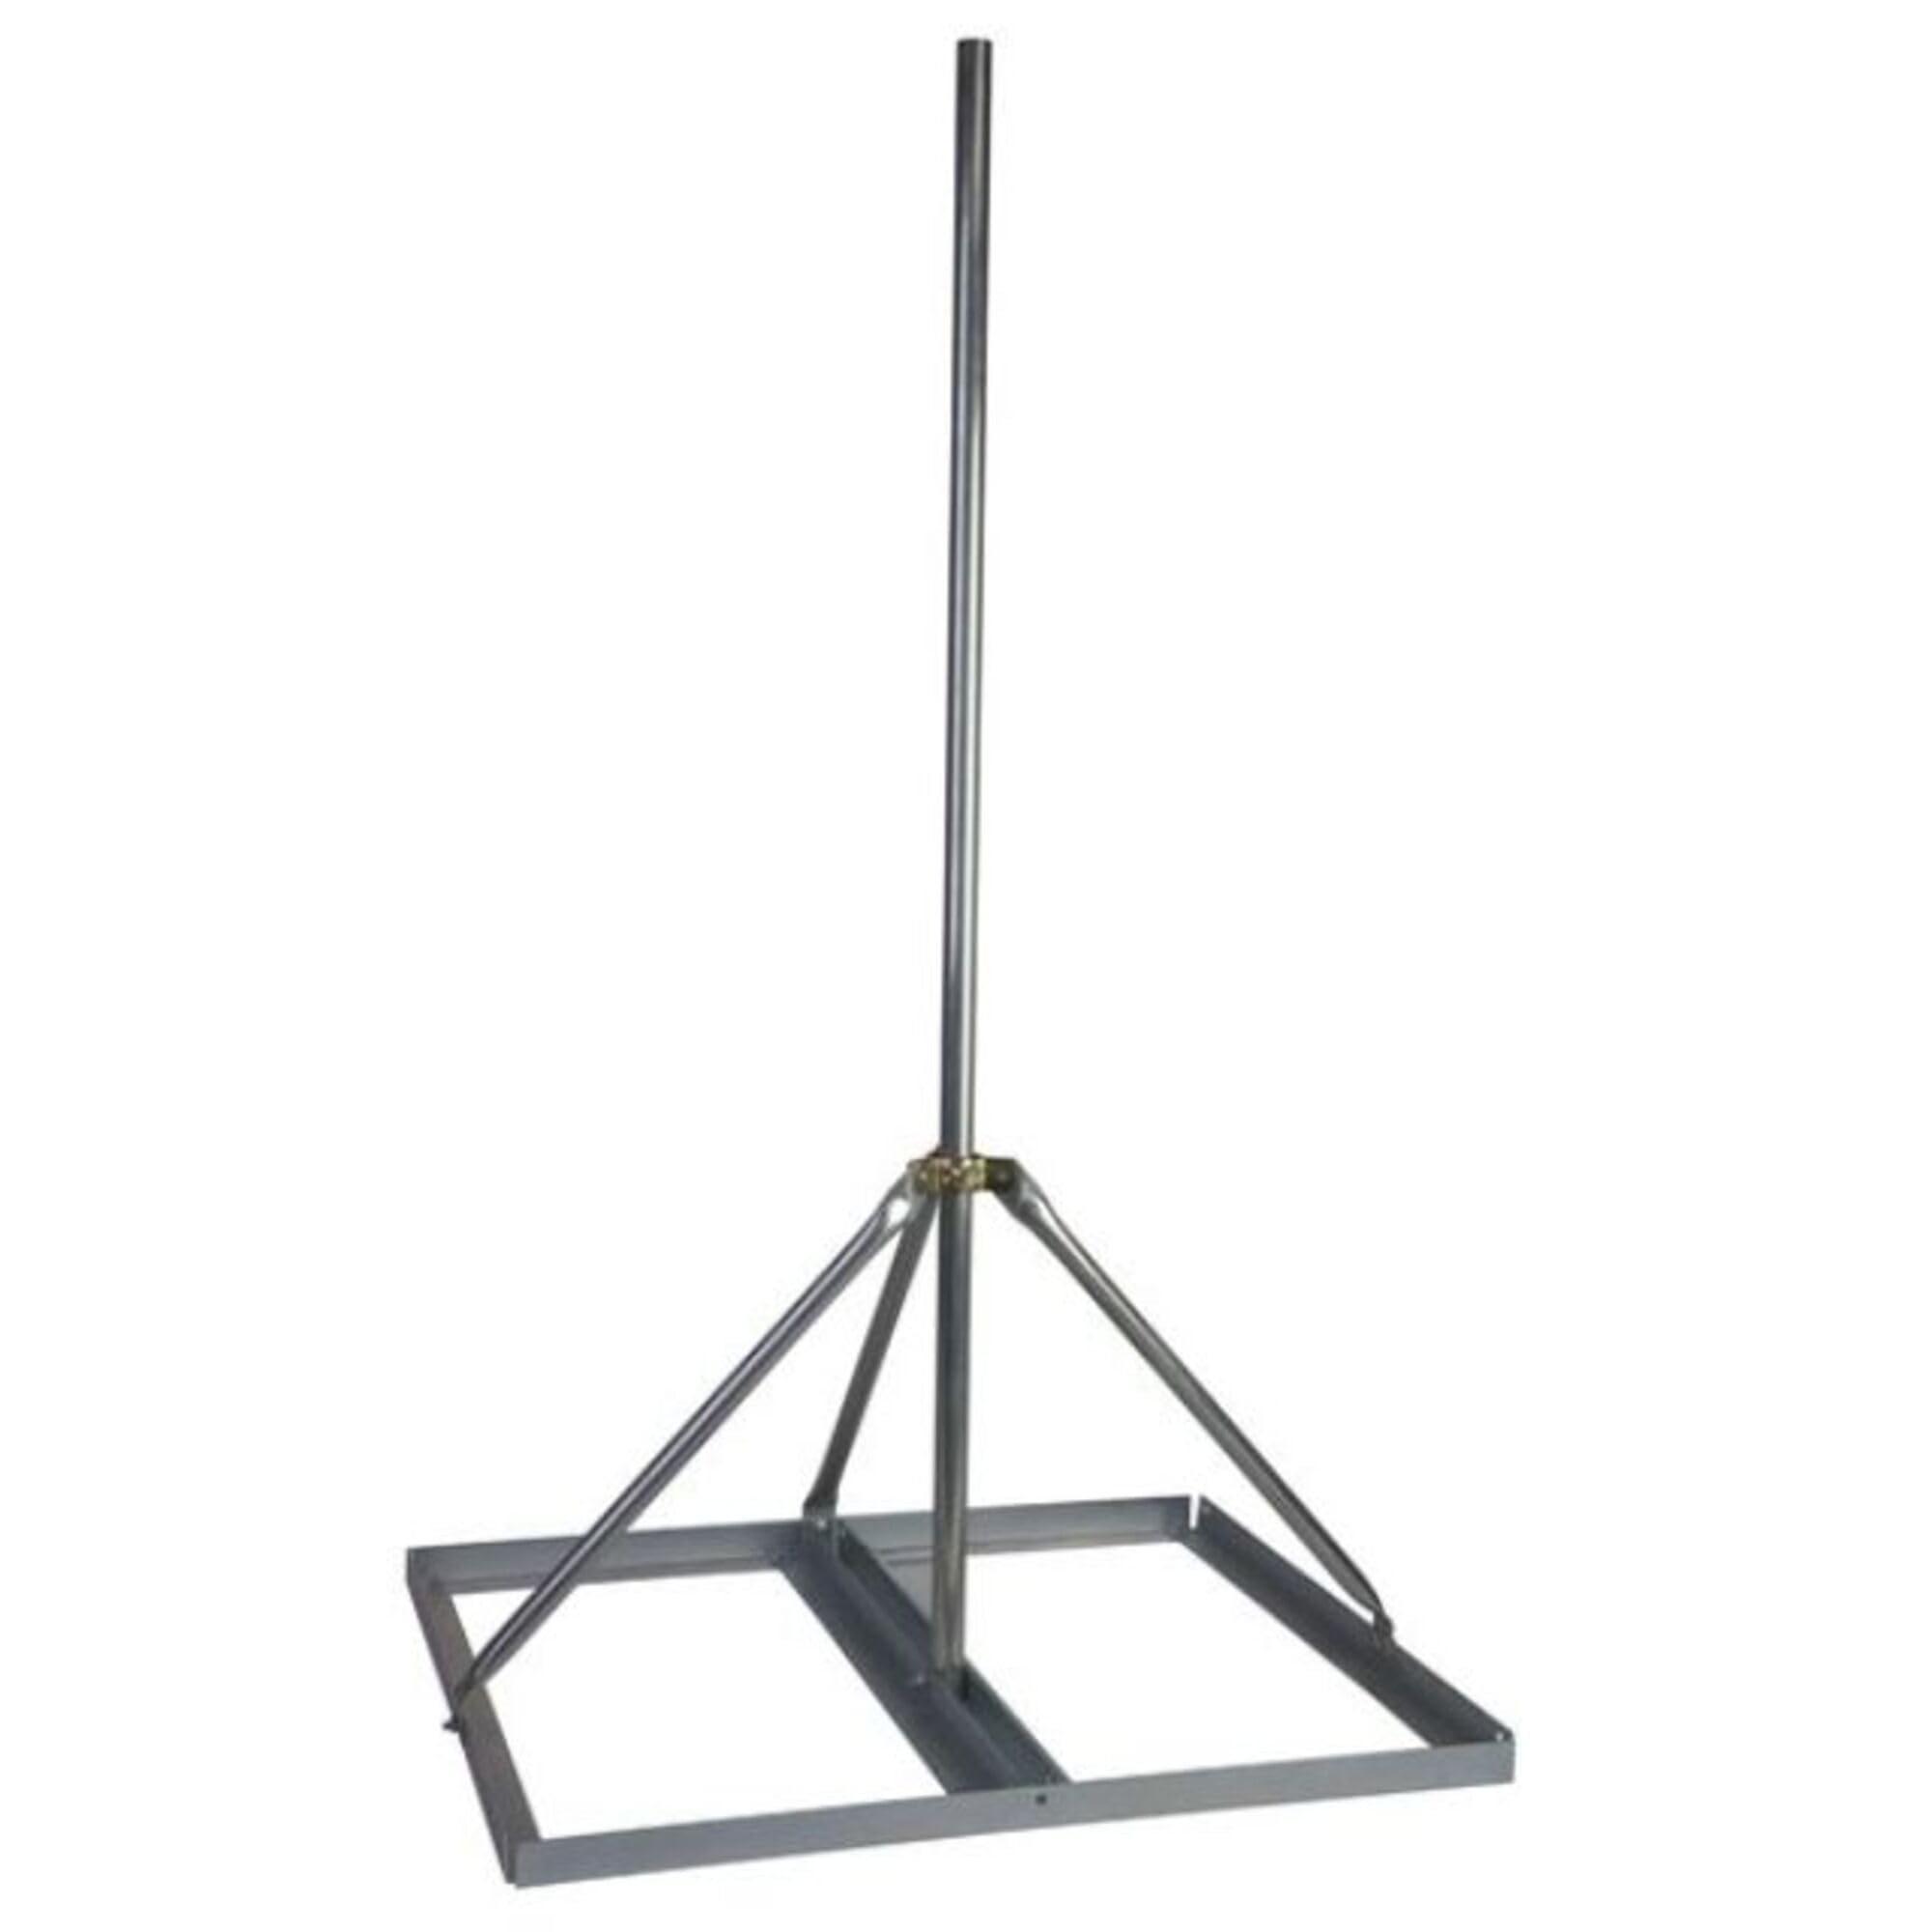
Image: The fully assembled Easy Up Inc EZ NP-30-166 Non-Penetrating Roof Mount, ready for ballast and equipment installation.
2. Product Features
- Non-Penetrating Design: Mounts equipment on flat roofs without drilling, preserving roof integrity.
- Ballast System: Designed to be anchored using standard concrete blocks (not included) for stability.
- Durable Construction: Made from steel, available in galvanized or powder-coated finishes for weather resistance.
- Mast Dimensions: Features a 30-inch long mast with a 1.66-inch diameter, 18 gauge, clear coat zinc coated.
- Base Dimensions: The base measures 35 inches by 28 inches.
- Made in the USA: Ensures quality manufacturing standards.
3. Package Contents
Verify that all components are present before beginning assembly:
- Frame components
- Mast (30 inches long, 1.66 inches diameter)
- Assembly hardware (bolts, nuts, washers)
Note: Concrete blocks for ballast are NOT included and must be purchased separately.
4. Safety Information
- Professional Installation: Professional installation is always recommended to determine appropriate ballast weight and to assess roof integrity.
- Weight: The mount itself weighs 25 pounds. Ensure you can safely lift and maneuver it.
- Roof Safety: Exercise extreme caution when working on roofs. Use appropriate safety gear, including fall protection, and ensure the roof surface is stable and dry.
- Ballast: Use sufficient concrete blocks to prevent the mount from tipping or shifting, especially in high winds. Consult local building codes and engineering recommendations for proper ballast requirements.
- Tools: Use appropriate tools for assembly and ensure they are in good working condition.
- Sharp Edges: Be aware of potential sharp edges on metal components during assembly. Wear gloves if necessary.
5. Setup and Assembly
Follow these steps to assemble your Non-Penetrating Roof Mount. Refer to the assembly video for visual guidance.
Assembly Video
Video: This official "Mount Assembly Video" from Antenna Parts Outlet (Seller) demonstrates the step-by-step process of assembling the Easy Up Inc Non-Penetrating Roof Mount. It shows how to connect the frame pieces, attach the central support, and secure the mast.
Step-by-Step Assembly Instructions:
- Unpack Components: Lay out all frame pieces, the mast, bolts, nuts, and washers on a clean, flat surface.
- Assemble the Base Frame: Connect the four rectangular frame pieces to form the base. Ensure the pre-drilled holes align.
- Secure Frame Corners: Insert bolts through the aligned holes at each corner of the frame. Use washers and nuts to secure them, but do not fully tighten yet.
- Attach Central Support Beam: Position the central support beam across the middle of the assembled frame, aligning its holes with the corresponding holes on the frame.
- Secure Central Support: Insert bolts, washers, and nuts to attach the central support beam to the frame. Again, do not fully tighten.
- Install Mast Support Arms: Attach the angled mast support arms to the central support beam and the outer frame. Ensure the mast clamp is oriented correctly.
- Secure Mast Support Arms: Use bolts, washers, and nuts to secure the mast support arms to both the central beam and the frame.
- Insert Mast: Slide the 30-inch mast into the mast clamp located on the central support.
- Secure Mast: Tighten the bolts on the mast clamp to firmly hold the mast in place.
- Final Tightening: Once all components are in place and aligned, systematically tighten all bolts and nuts securely.
- Add Ballast: Place standard concrete blocks (not included) into the frame to provide the necessary ballast. The number of blocks required will depend on the equipment mounted and local wind conditions.
6. Operating Instructions
The Easy Up Inc EZ NP-30-166 Non-Penetrating Roof Mount serves as a stable platform for various outdoor equipment. Once assembled and ballasted, your equipment can be attached to the mast.
- Equipment Attachment: Use appropriate mounting hardware (not included with this mount) to attach your satellite dish, antenna, or weather station to the 1.66-inch diameter mast.
- Alignment: Follow the specific instructions provided with your equipment for proper alignment and aiming.
- Cable Management: Secure any cables running from your equipment down the mast and across the roof to prevent tripping hazards and damage.
7. Maintenance
Regular maintenance will ensure the longevity and continued stability of your roof mount.
- Periodic Inspection: Annually inspect all bolts, nuts, and connections for tightness. Re-tighten as necessary.
- Corrosion Check: Examine the steel components for any signs of rust or corrosion. While the mount is galvanized or powder-coated for protection, extreme weather can cause wear over time. Address any corrosion promptly.
- Ballast Stability: Ensure that the concrete blocks remain securely within the frame and have not shifted.
- Clear Debris: Keep the area around the mount clear of debris, leaves, and snow to prevent water accumulation and potential damage.
8. Troubleshooting
If you encounter issues with your roof mount, consider the following:
- Mount Instability:
- Ensure all bolts are securely tightened.
- Verify that sufficient ballast (concrete blocks) has been placed in the frame according to manufacturer recommendations and local wind load requirements.
- Check if the roof surface is level and stable.
- Equipment Not Level:
- Confirm the mast is plumb (vertically straight). Adjust the mast clamp if necessary.
- Ensure the base frame is level on the roof. Shims may be required under the frame if the roof is uneven.
- Corrosion:
- Minor surface rust on galvanized steel is normal and does not typically affect structural integrity.
- For significant rust, consider applying a rust-inhibiting primer and paint suitable for outdoor metal.
9. Specifications
| Attribute | Detail |
|---|---|
| Brand | Easy Up Inc |
| Model Number | EZ NP-30-166 |
| Mounting Type | Non-Penetrating Roof Mount |
| Material | Alloy Steel |
| Finish Types | Matte or Powder-Coated (Galvanized) |
| Item Dimensions (L x W x H) | 28 x 28 x 30 inches |
| Base Dimensions | 35 x 28 inches |
| Mast Length | 30 inches |
| Mast Diameter | 1.66 inches |
| Mast Gauge | 18 Gauge |
| Item Weight | 25 Pounds |
| UPC | 636134500491 |
| Country of Origin | USA |
10. Warranty and Support
For warranty information or technical support, please contact Easy Up Inc directly. Refer to the product packaging or the manufacturer's website for the most current contact details and warranty terms.