
X-PRO CT50 CT70 Trail 50 70 (Model No. 320-999023)
X-PRO CT50 CT70 Trail 50 70 Bike Muffler Exhaust Pipe User Manual
Brand: X-PRO | Model: CT50 CT70 Trail 50 70 (Part No. 320-999023)
1. Overview
The X-PRO CT50 CT70 Trail 50 70 Bike Muffler Exhaust Pipe is a high-quality replacement component designed for specific Honda CT series trail bikes. This muffler is engineered to provide efficient exhaust gas flow and maintain appropriate sound levels for your motorcycle. It is a direct replacement part, ensuring compatibility and ease of installation for the specified models.
This product is a crucial part of your motorcycle's exhaust system, contributing to engine performance and compliance with noise regulations. It is built to meet the demands of trail riding and general use.
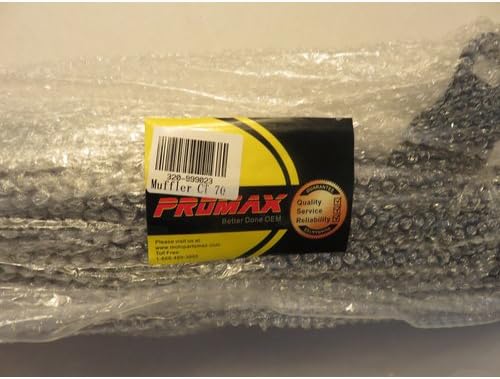
Figure 1.1: The X-PRO muffler exhaust pipe as received in its packaging.
2. Product Features
- Direct Fit Replacement: Specifically designed for CT50 and CT70 Trail bikes, ensuring proper fitment and function.
- Durable Construction: Manufactured with robust materials to withstand the rigors of motorcycle operation and environmental exposure.
- Optimized Exhaust Flow: Engineered to facilitate efficient exhaust gas expulsion, contributing to engine performance.
- Integrated Heat Shield: Features a perforated heat shield to protect against high temperatures.
- Complete Muffler Assembly: Includes the muffler body and integrated exhaust pipe for a comprehensive replacement solution.

Figure 2.1: Detail of the muffler's outlet end, showing the exhaust port.
3. Installation Guide
Before beginning installation, ensure your motorcycle is cool and stable. It is recommended to wear appropriate safety gear, including gloves and eye protection. If you are unsure about any step, consult a qualified mechanic.
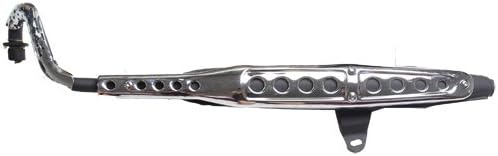
Figure 3.1: Complete X-PRO CT50 CT70 Trail Bike Muffler Exhaust Pipe assembly.
- Preparation: Park your motorcycle on a level surface using its kickstand or a stand to ensure stability. Allow the engine and existing exhaust system to cool completely to prevent burns.
- Remove Old Muffler: Locate and loosen all bolts and clamps securing the existing muffler and exhaust pipe to the engine header and frame. Carefully remove the old exhaust system. Note the position of all gaskets and mounting hardware.
- Inspect Mounting Points: Clean any residue from the engine exhaust port and frame mounting points. Inspect for any damage or wear. Replace any worn gaskets if necessary.
- Position New Muffler: Carefully align the new X-PRO muffler exhaust pipe with the engine exhaust port. Ensure the mounting bracket aligns with the frame mounting point.
- Secure Connections: Hand-tighten the bolts at the engine exhaust port and the frame mounting bracket. Ensure the muffler is properly seated and aligned.
- Final Tightening: Once aligned, progressively tighten all bolts and clamps. Do not overtighten, as this can strip threads or damage components. Refer to your motorcycle's service manual for specific torque specifications if available.
- Check for Leaks: Start the engine and listen for any exhaust leaks. A common method is to feel for escaping gases around the connections or use soapy water to look for bubbles. If leaks are detected, re-tighten connections or replace gaskets.
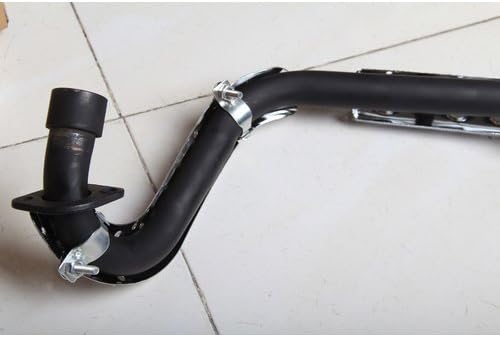
Figure 3.2: Detail of the mounting bracket and pipe connection point.
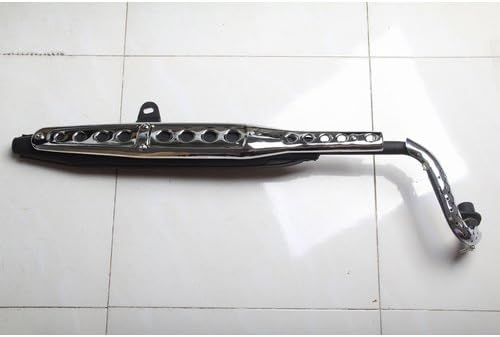
Figure 3.3: The X-PRO muffler exhaust pipe laid out, showing its full length and curvature.
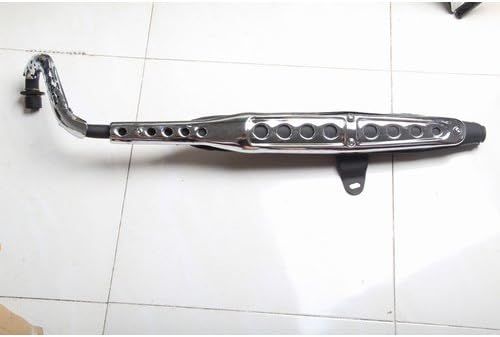
Figure 3.4: An alternative angle of the muffler exhaust pipe, highlighting its design.

Figure 3.5: Close-up view of the exhaust pipe's bend, crucial for engine clearance.

Figure 3.6: Detailed view of the muffler's main body and integrated heat shield.
4. Operation
Once installed, the X-PRO muffler exhaust pipe operates passively as part of your motorcycle's exhaust system. It is designed to effectively channel exhaust gases away from the engine, reduce engine noise, and contribute to optimal back pressure for engine performance.
No specific user interaction is required for its operation beyond proper installation. Ensure that the muffler is not obstructed and that there are no unusual noises or excessive smoke emanating from the exhaust system during operation.
5. Maintenance
Regular maintenance will extend the life and performance of your X-PRO muffler exhaust pipe.
- Cleaning: Periodically clean the exterior of the muffler with a soft cloth and mild detergent to remove dirt, grime, and road salt. Avoid abrasive cleaners that could damage the finish.
- Inspection: Regularly inspect the muffler and exhaust pipe for any signs of damage, such as cracks, dents, rust, or loose connections. Pay close attention to welds and mounting points.
- Bolt Check: Over time, vibrations can cause mounting bolts to loosen. Periodically check and re-tighten all mounting bolts and clamps to ensure the muffler remains securely attached.
- Gasket Condition: If you notice any exhaust leaks, inspect the gaskets at the engine header and other connection points. Replace worn or damaged gaskets promptly.
6. Troubleshooting
This section addresses common issues you might encounter with your exhaust muffler.
| Problem | Possible Cause | Solution |
|---|---|---|
| Exhaust Leak | Loose connections, damaged gasket, crack in pipe/muffler. | Tighten all bolts and clamps. Replace worn gaskets. Inspect for physical damage and repair or replace if necessary. |
| Muffler Rattling/Vibrating | Loose mounting bolts, damaged mounting bracket, internal baffle issue. | Check and tighten all mounting hardware. Inspect the mounting bracket for damage. If internal rattling persists, the muffler may need replacement. |
| Poor Fitment (Interference) | Variations in motorcycle models/years, manufacturing tolerances. | Carefully re-align the pipe. Minor adjustments to mounting brackets may be required. If significant interference, consult the seller or a professional. (Note: Some user reviews indicate potential fitment issues with certain CT70 models, requiring minor modifications.) |
| Excessive Noise | Internal damage to muffler, exhaust leak. | Check for leaks as described above. If no leaks, the internal baffling of the muffler may be compromised, requiring replacement. |
7. Specifications
| Attribute | Detail |
|---|---|
| Brand | X-PRO |
| Manufacturer | X-PRO |
| Model Number | 320-999023 |
| Item Weight | 5.6 ounces |
| Vehicle Service Type | Bike (CT50, CT70 Trail) |
| Shape | Round (Muffler Body) |
| ASIN | B0136E08V2 |
| Date First Available | August 1, 2015 |
8. Warranty and Support
X-PRO stands behind the quality of its products. For specific warranty information regarding your X-PRO CT50 CT70 Trail Bike Muffler Exhaust Pipe, please refer to the documentation included with your purchase or visit the official X-PRO website.
For technical support, installation assistance, or inquiries about replacement parts, please contact X-PRO customer service through their official channels. You can often find contact information on the product packaging or the brand's official online store.
X-PRO Official Store: Visit the X-PRO Store on Amazon
Ask a question about this manual
Ask about setup, troubleshooting, compatibility, parts, safety, or missing instructions. Manuals+ will review the question and use this page’s manual context to help answer it.