Introduction
This manual provides essential instructions for the safe operation, assembly, maintenance, and troubleshooting of your XtremepowerUS V-Type 55CC 2 Stroke Gas Post Hole Digger. Please read this manual thoroughly before operating the machine to ensure proper use and to prevent injury or damage.

Figure 1: XtremepowerUS V-Type 55CC 2 Stroke Gas Post Hole Digger
The XtremepowerUS V-Type 55CC 2 Stroke Gas Post Hole Digger is designed for efficiently digging holes for fence posts, planting trees, and other similar tasks. It features a 55CC 2-stroke engine and is compatible with standard 3/4-inch shaft auger bits.
Safety Information
Always prioritize safety when operating power equipment. Failure to follow safety instructions can result in serious injury or death.
- Read the Manual: Understand all instructions and warnings before use.
- Personal Protective Equipment (PPE): Always wear appropriate safety gear, including eye protection, hearing protection, gloves, and sturdy footwear.
- Fuel Handling: Gasoline is highly flammable. Handle fuel in a well-ventilated area, away from sparks, open flames, or heat sources. Do not smoke while fueling.
- Engine Exhaust: Engine exhaust contains carbon monoxide, a colorless, odorless, and deadly gas. Operate the digger only in well-ventilated outdoor areas.
- Clear Work Area: Ensure the work area is clear of bystanders, pets, and obstacles.
- Secure Grip: Maintain a firm grip on the handles during operation. Be prepared for sudden movements if the auger encounters resistance.
- Avoid Loose Clothing: Do not wear loose clothing, jewelry, or long hair that could get caught in moving parts.
- Inspect Before Use: Before each use, inspect the digger for loose parts, damage, or fuel leaks. Do not operate a damaged machine.
- Emergency Stop: Familiarize yourself with the location and operation of the engine stop switch.
Components Overview
Familiarize yourself with the main components of your post hole digger.

Figure 2: Top view of the powerhead
- Engine: 55CC 2-stroke gasoline engine.
- Fuel Tank: Translucent tank for fuel mixture.
- Recoil Starter: Manual pull-start mechanism.
- Control Handle: Integrated throttle and stop switch.
- Gearbox: Connects the engine to the auger shaft.
- Auger Shaft: Output shaft for attaching auger bits (3/4-inch standard).

Figure 3: Control Handle
The control handle features an easy-to-grip finger throttle and a stop switch for immediate engine shutdown.
Setup
1. Fuel Mixture
This is a 2-stroke engine and requires a specific gasoline-to-oil mixture. Refer to the engine label or manufacturer's specifications for the correct ratio (typically 25:1 or 50:1, depending on the oil type). Use fresh, unleaded gasoline and high-quality 2-stroke engine oil.
- Mix the fuel and oil in a separate, approved fuel container.
- Shake the container thoroughly to ensure proper mixing.
- Carefully pour the mixed fuel into the digger's fuel tank. Do not overfill.

Figure 4: Fuel Tank and Recoil Starter
2. Attaching the Auger Bit
The digger is compatible with auger bits featuring a 3/4-inch shaft.
- Ensure the engine is off and cool.
- Align the auger bit shaft with the output shaft of the gearbox.
- Insert the auger bit shaft into the gearbox shaft.
- Secure the auger bit using the provided pin or bolt, ensuring it is fully seated and locked.

Figure 5: Gearbox and Auger Attachment Point

Figure 6: Auger Bit
Operating Instructions
1. Starting the Engine
Ensure the digger is on a flat, stable surface and the auger bit is not touching the ground.
- Prime the Carburetor: Press the primer bulb 5-8 times until fuel is visible in the return line.
- Set Choke: Move the choke lever to the "FULL CHOKE" position.
- Pull Starter Cord: Grip the recoil starter handle firmly and pull the cord slowly until resistance is felt, then pull sharply and quickly. Repeat 3-5 times or until the engine briefly "pops" or attempts to start.
- Open Choke: Once the engine "pops" or starts briefly, move the choke lever to the "HALF CHOKE" or "RUN" position.
- Restart: Pull the starter cord again until the engine starts.
- Warm-up: Allow the engine to warm up for a minute or two before engaging the throttle.
Note: If the engine does not start after several pulls with the choke open, it may be flooded. Remove the spark plug, dry it, and pull the starter cord a few times with the choke off to clear excess fuel. Reinstall the plug and try starting again with the choke off.
2. Digging Operation
- Hold the digger firmly with both hands on the handles.
- Position the auger bit over the desired digging location.
- Slowly increase the throttle to engage the auger.
- Apply steady, downward pressure. Allow the auger to do the work. Do not force it.
- If the auger binds or encounters a hard obstruction, release the throttle immediately.
- Periodically lift the auger slightly to clear soil from the hole and allow the blades to bite into fresh material.
- Once the desired depth is reached, release the throttle and allow the auger to stop completely before removing it from the hole.
3. Stopping the Engine
To stop the engine, release the throttle and press the engine stop switch located on the control handle.
Maintenance
Regular maintenance ensures optimal performance and extends the life of your post hole digger.
1. Spark Plug
Inspect the spark plug periodically (e.g., every 25 hours of operation). Clean or replace if it is fouled, damaged, or has incorrect gap.
- Disconnect the spark plug cap.
- Use a spark plug wrench to remove the plug.
- Inspect for carbon buildup or damage. Clean with a wire brush if necessary.
- Check the gap with a feeler gauge and adjust if needed (refer to specifications for correct gap).
- Reinstall the spark plug and reconnect the cap. Do not overtighten.
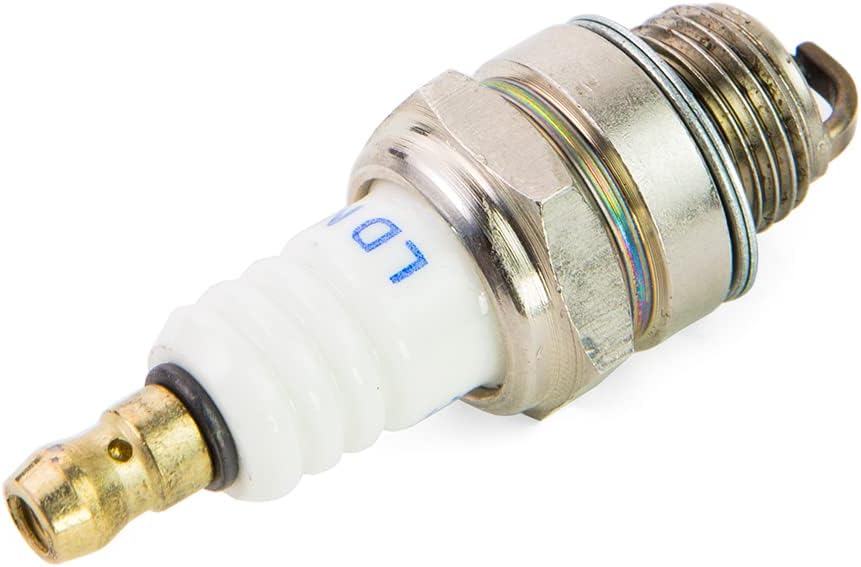
Figure 7: Spark Plug
2. Air Filter
A dirty air filter can reduce engine performance and increase wear. Clean the air filter regularly, especially in dusty conditions.
- Remove the air filter cover.
- Remove the foam air filter element.
- Wash the element in warm, soapy water. Rinse thoroughly and allow to air dry completely.
- Lightly oil the dry foam element with 2-stroke air filter oil, then squeeze out excess oil.
- Reinstall the air filter element and cover.
3. Fuel System
Empty the fuel tank before long-term storage (over 30 days) to prevent fuel degradation and carburetor issues. Run the engine until it stops from lack of fuel to clear the carburetor.
4. Gearbox Lubrication
The gearbox requires lubrication. This model typically uses grease fittings rather than oil. Periodically apply high-quality grease to the grease fittings on the gearbox using a grease gun. Consult the manufacturer's specific recommendations for grease type and frequency.
5. General Cleaning and Storage
After each use, clean the digger of dirt, debris, and grass. Store the machine in a clean, dry, and secure location, out of reach of children.
Troubleshooting
| Problem | Possible Cause | Solution |
|---|---|---|
| Engine won't start |
|
|
| Loss of power during operation |
|
|
| Excessive smoke from exhaust |
|
|
Specifications
- Model: 81096
- Engine Type: Single Cylinder, Air-cooled, 2-Stroke Gasoline Engine
- Engine Displacement: 55CC
- Horsepower: 2.3 HP
- Max Engine Speed: 7500 r/min
- Fuel Tank Capacity: Approximately 0.98L
- Auger Shaft Size: 3/4-inch
- Product Dimensions: 23 x 14.5 x 17.5 inches (Powerhead only)
- Item Weight: 1 pounds (Powerhead only, Note: This weight appears to be a typographical error in the source data and likely refers to packaging or a component, not the full powerhead unit.)
- EPA Approved: Yes

Figure 8: Engine Specifications Overview
Warranty and Support
For specific warranty information and technical support, please contact XtremepowerUS directly or the retailer from whom the product was purchased. It is recommended to retain your proof of purchase for warranty claims.
Note: Some customer reviews indicate potential issues with warranty claims or support for this product. It is advisable to clarify warranty terms with the seller at the time of purchase.


