1. Product Overview
The Volteck TEM-8 Digital Timer is designed to automate the power supply to electrical appliances, allowing for precise scheduling of on/off cycles. This device features 8 programmable events per day, offering flexibility for various applications.

Figure 1: Front view of the Volteck TEM-8 Digital Timer, showing the LCD display, control buttons, and power outlet.
Key Features:
- 8 Programmable Events: Set up to 8 distinct ON/OFF programs daily.
- Flexible Scheduling: Programs can be set for specific days of the week or daily.
- LCD Display: Clear digital display for time and program settings.
- Integrated Rechargeable Battery: Maintains program settings during power outages.
- Durable Construction: Made from polycarbonate for longevity.

Figure 2: Key features of the timer, including the LCD screen, integrated rechargeable battery, and polycarbonate construction.
2. Setup and Initial Configuration
2.1 Unpacking and Initial Charge
Remove the timer from its packaging. Before first use, plug the timer into a standard electrical outlet for at least 30 minutes to charge the internal rechargeable battery. This ensures that the timer retains its settings even if unplugged or during a power interruption.
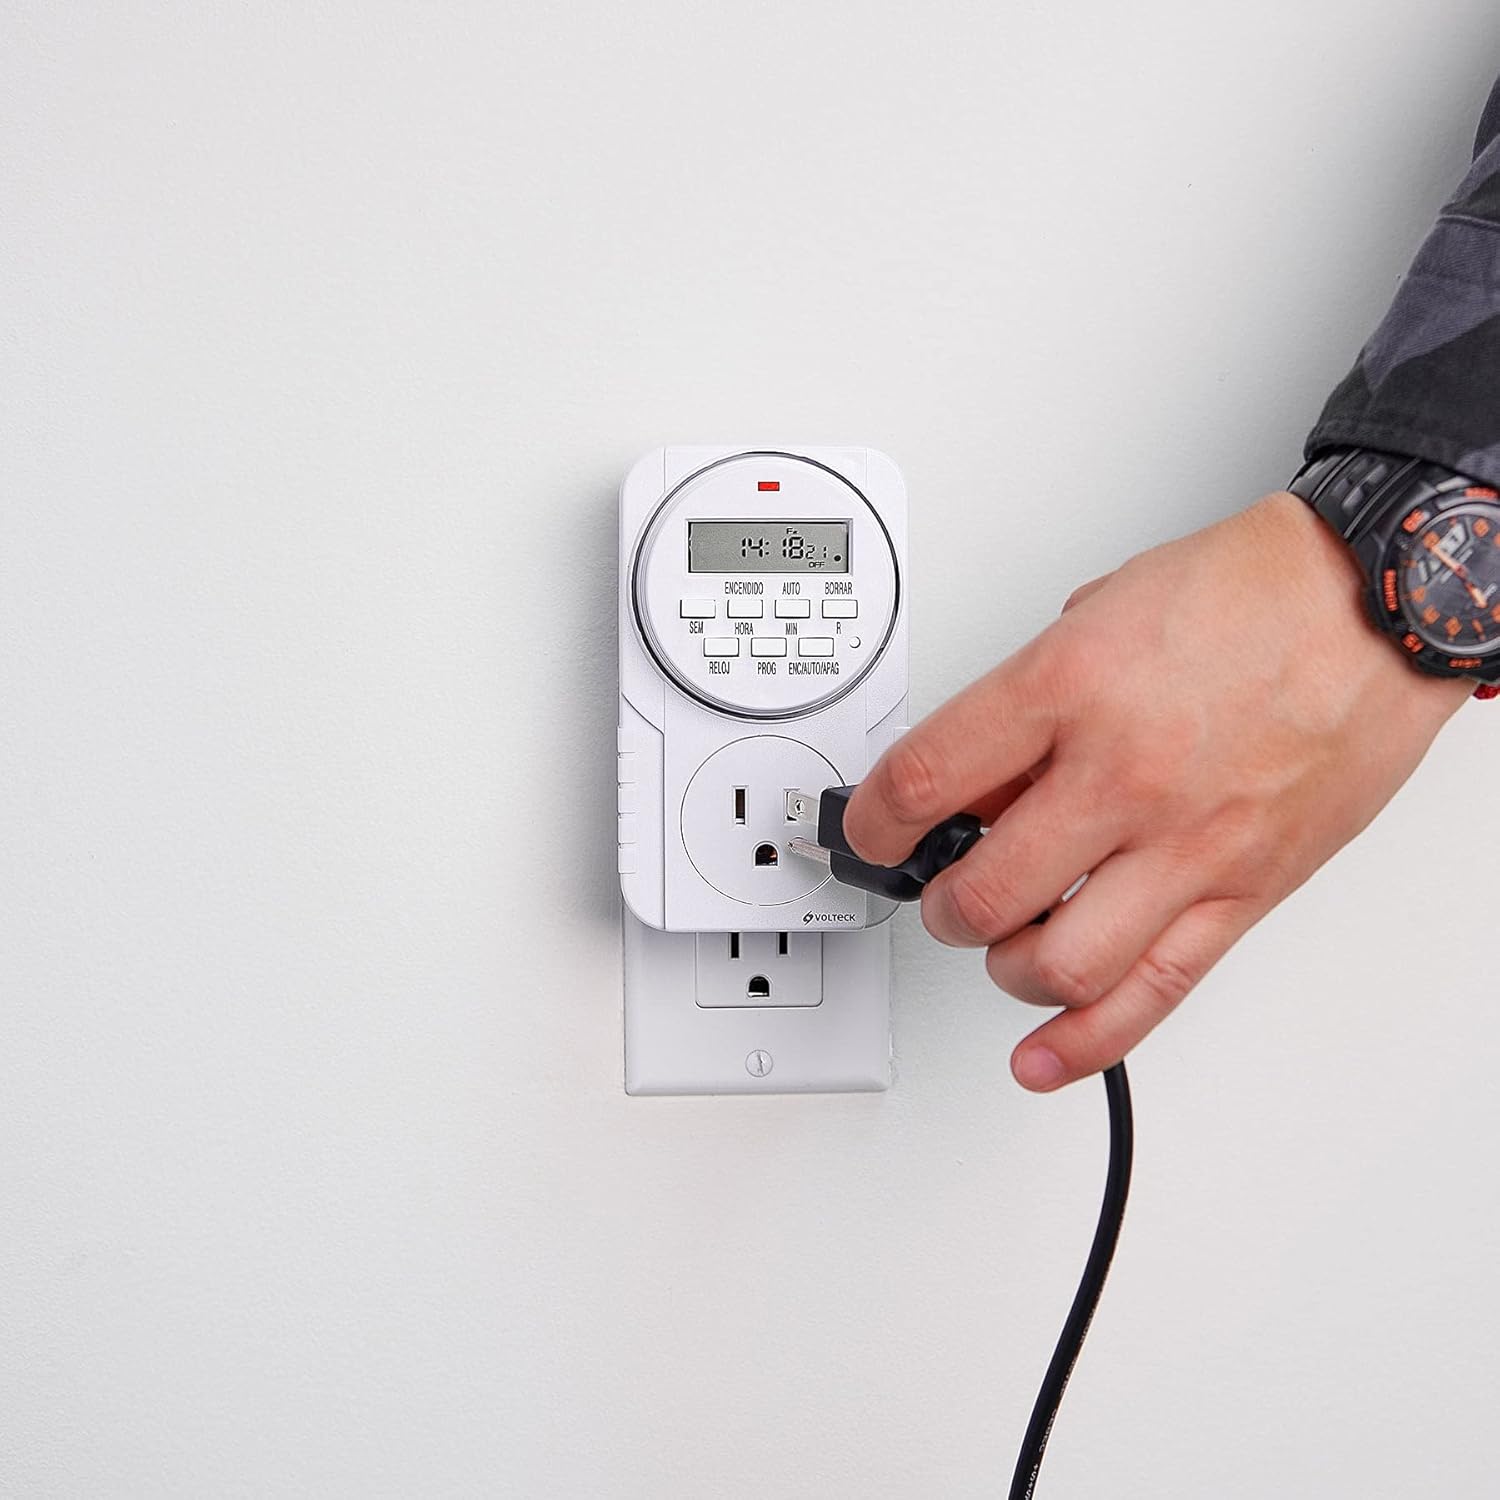
Figure 3: The Volteck TEM-8 Digital Timer plugged into a wall outlet for initial charging and operation.
2.2 Setting the Current Time
- Press the CLOCK button. The display will show the current time.
- While holding the CLOCK button, press the WEEK button to select the current day of the week (e.g., MO, TU, WE, TH, FR, SA, SU).
- While holding the CLOCK button, press the HOUR button to set the current hour.
- While holding the CLOCK button, press the MIN button to set the current minute.
- Release the CLOCK button. The time is now set.
3. Operating Instructions
3.1 Programming ON/OFF Events
The TEM-8 timer allows for up to 8 ON/OFF programs. Each program consists of an ON time and an OFF time.
- Press the PROG button once. The display will show "1 ON". This is for setting the first ON time.
- Press the WEEK button to select the desired day(s) for this program. Options include individual days, weekdays, weekends, or all days.
- Press the HOUR button to set the desired hour for the ON time.
- Press the MIN button to set the desired minute for the ON time.
- Press the PROG button again. The display will show "1 OFF". This is for setting the first OFF time.
- Repeat steps 2-4 to set the desired day(s), hour, and minute for the OFF time. Ensure the OFF time is after the ON time for the same program.
- Continue pressing the PROG button to cycle through "2 ON", "2 OFF", up to "8 ON", "8 OFF", setting each program as needed.
- After setting all desired programs, press the CLOCK button to return to the current time display.

Figure 4: A user pressing buttons on the timer to set programs or adjust settings.
3.2 Manual Override (ON/AUTO/OFF)
The ON/AUTO/OFF button allows you to manually control the timer's output, overriding programmed settings temporarily.
- Press once for ON: The connected appliance will turn ON immediately and stay ON, ignoring all programs.
- Press again for AUTO: The timer will follow the programmed ON/OFF events. This is the standard operating mode.
- Press a third time for OFF: The connected appliance will turn OFF immediately and stay OFF, ignoring all programs.

Figure 5: A power cord being plugged into the timer's outlet, ready for automated control.
3.3 Clearing Programs
To clear a specific program, navigate to the desired "ON" or "OFF" setting using the PROG button, then press the BORRAR (Clear) button. This will reset the time for that specific event to "--:--". To clear all programs, a full reset may be required (see Troubleshooting).
4. Maintenance
4.1 Cleaning
To clean the timer, first unplug it from the wall outlet. Use a soft, dry cloth to wipe the exterior. Do not use liquid cleaners, abrasive materials, or immerse the device in water.
4.2 Battery Information
The Volteck TEM-8 features an integrated rechargeable Ni-MH battery. This battery is designed to maintain the time and program settings during power interruptions or when the timer is unplugged. The battery is not user-replaceable. If the display becomes dim or settings are lost frequently, ensure the timer is plugged into a live outlet for sufficient charging time.
5. Troubleshooting
| Problem | Possible Cause | Solution |
|---|---|---|
| Display is blank or dim. | Internal battery is low or depleted. | Plug the timer into a live electrical outlet for at least 30 minutes to charge the internal battery. |
| Programs are not executing. | Timer is not in AUTO mode. Incorrect program settings. | Ensure the ON/AUTO/OFF button is set to AUTO. Review program settings for correct ON/OFF times and days. Ensure OFF time is after ON time. |
| Time or programs are lost after unplugging. | Internal battery is not sufficiently charged. | Plug the timer into a live outlet for an extended period (e.g., 4 hours) to fully charge the internal battery. |
| Timer is unresponsive. | Temporary electronic glitch. | Perform a full reset by pressing the recessed R (Reset) button using a pointed object (e.g., a pen tip). This will clear all settings, and you will need to re-set the time and programs. |
6. Specifications
- Model: TEM-8
- Brand: Volteck
- Color: Black
- Material: Polycarbonate
- Number of Settings: 8 (ON/OFF events)
- Item Weight: 0.26 Kilograms (approximately 9.2 ounces)
- Product Dimensions: Approximately 7 cm (width) x 12 cm (height) x 4 cm (depth). Note: Product packaging dimensions may vary.
- Internal Battery: Rechargeable Ni-MH (non-user replaceable)
- First Available: December 8, 2015

Figure 6: Dimensions of the Volteck TEM-8 Digital Timer (approximately 7 cm width, 12 cm height, 4 cm depth).
7. Warranty and Support
7.1 Warranty Information
Based on product packaging, the Volteck TEM-8 Digital Timer typically includes a 1-year warranty from the date of purchase. Please retain your proof of purchase for warranty claims. The warranty covers manufacturing defects under normal use. It does not cover damage caused by misuse, accidents, unauthorized modifications, or improper installation.
7.2 Customer Support
For further assistance, technical support, or warranty inquiries, please contact Volteck customer service. Refer to the product packaging or the official Volteck website for the most current contact information.


