
1. Important Safety Information
Please read all safety instructions carefully before installing or operating this product. Failure to follow these instructions may result in electric shock, fire, or other hazards.
- Electrical Safety: This LED light source operates at 32-35V DC. Ensure power supply is compatible and correctly wired. Incorrect voltage or polarity can damage the LED.
- Heat Management: This 20W COB LED generates significant heat. Proper heat sinking is absolutely critical for its operation and longevity. Do not operate without an adequate heat sink.
- Eye Protection: Do not look directly into the illuminated LED. The intense light can cause eye damage.
- Installation: Installation should be performed by qualified personnel if you are unsure about electrical wiring.
- Environment: Keep the LED away from water, moisture, and flammable materials.
2. Product Overview
The SPL 20W 1200lm 1-COB LED RGB Light Source is a high-power, compact light-emitting diode designed for various lighting applications. It features a single Chip-on-Board (COB) array with RGB (Red, Green, Blue) elements, allowing for a wide spectrum of colors. It is configured as 18-series and 1-parallel, requiring a specific voltage range for optimal performance.
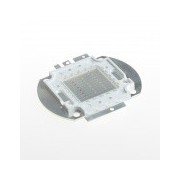
Figure 2.1: Top view of the SPL 20W 1-COB LED RGB Light Source, showing the central COB array and mounting tabs.
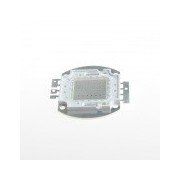
Figure 2.2: Front view of the SPL 20W 1-COB LED RGB Light Source, highlighting the compact design and electrical contacts.
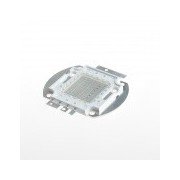
Figure 2.3: Angled view of the SPL 20W 1-COB LED RGB Light Source, providing a perspective of its thickness and mounting points.
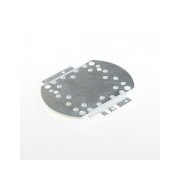
Figure 2.4: Rear view of the SPL 20W 1-COB LED RGB Light Source, showing the solder pads for electrical connections.
3. Setup and Installation
Proper setup is crucial for the performance and longevity of your COB LED.
- Heat Sink Attachment: Securely mount the COB LED to an appropriately sized heat sink using thermal paste or thermal adhesive. Ensure excellent thermal contact across the entire base of the LED. The heat sink must be capable of dissipating 20W of thermal energy.
- Wiring: Identify the positive (+) and negative (-) terminals on the LED. For RGB control, there will be separate terminals for Red, Green, Blue, and a common anode or cathode. Connect these to a suitable constant current LED driver or power supply.
- Power Supply: Connect the LED to a DC power supply providing 32-35V. For RGB functionality, a multi-channel LED driver with current control for each color channel is recommended. Ensure the power supply can deliver sufficient current for 20W operation.
- Testing: Before final installation, briefly test the LED to ensure proper illumination and color control.
4. Operating Instructions
Once installed, operating the SPL 20W COB LED is straightforward.
- Power On: Apply the specified 32-35V DC power to the connected terminals. The LED should illuminate.
- Color Control (RGB): If using an RGB controller, adjust the intensity of the Red, Green, and Blue channels independently to achieve desired colors. Refer to your specific LED driver/controller manual for detailed operation.
- Power Off: Disconnect the power supply to turn off the LED.
- Continuous Operation: Ensure the heat sink remains effective during prolonged operation to prevent overheating.
5. Maintenance
Minimal maintenance is required for this COB LED, primarily focusing on thermal management and cleanliness.
- Heat Sink Cleaning: Periodically inspect the heat sink for dust accumulation. Clean with compressed air or a soft brush to ensure optimal airflow and heat dissipation.
- LED Surface: If necessary, gently clean the LED surface with a soft, lint-free cloth. Avoid abrasive materials or harsh chemicals.
- Connections: Periodically check electrical connections to ensure they remain secure and free from corrosion.
6. Troubleshooting
If you encounter issues with your SPL COB LED, refer to the following common problems and solutions:
| Problem | Possible Cause | Solution |
|---|---|---|
| LED does not light up. | No power, incorrect voltage, incorrect polarity, faulty wiring, damaged LED. | Check power supply connection and output voltage. Verify correct polarity. Inspect wiring for breaks or shorts. If all else fails, the LED may be damaged. |
| LED is dim or flickers. | Insufficient power, unstable power supply, overheating. | Ensure power supply meets current requirements. Check for stable voltage. Verify heat sink is properly attached and effective. |
| Incorrect colors or no color change (RGB). | Incorrect wiring of RGB channels, faulty RGB controller. | Verify RGB channel wiring according to your controller's manual. Test the RGB controller with another compatible LED if possible. |
| LED overheats quickly. | Inadequate heat sink, poor thermal contact. | Ensure the heat sink is appropriately sized for 20W dissipation. Reapply thermal paste/adhesive to ensure full contact between LED and heat sink. |
7. Specifications
| Feature | Detail |
|---|---|
| Product Type | 1-COB LED Light Source |
| Power Output | 20W |
| Luminous Flux | 1200lm (lumens) |
| Color Type | RGB (Red, Green, Blue) |
| Configuration | 18-Series 1-Parallel |
| Operating Voltage | 32-35V DC |
| ASIN | B0117FBK9G |
| Date First Available | 10 July 2017 |
8. Warranty Information
Specific warranty details for this product are not provided in the available information. Please refer to your point of purchase or the manufacturer's official website for any applicable warranty terms and conditions.
9. Customer Support
For technical assistance, troubleshooting beyond this manual, or inquiries regarding your SPL 20W 1-COB LED RGB Light Source, please contact the retailer or manufacturer directly. Specific contact information is not provided in this document.

