1. Introduction
Thank you for choosing the VITEK VT-3602BW-I Multi-Kitchen Processor. This versatile appliance is designed to simplify various kitchen tasks, including meat grinding, vegetable processing (shredding, slicing, grating), juicing, and pureeing. With its powerful 2000W motor and multiple attachments, it offers efficiency and convenience for preparing a wide range of dishes. Please read this manual carefully before use to ensure safe and optimal operation.

Image 1: Front view of the VITEK VT-3602BW-I Multi-Kitchen Processor.
2. Important Safety Instructions
To reduce the risk of fire, electric shock, or injury, always follow these basic safety precautions:
- Read all instructions before operating the appliance.
- Do not immerse the motor unit in water or other liquids.
- Always unplug the appliance from the power outlet when not in use, before assembling or disassembling parts, and before cleaning.
- Keep hands and utensils away from moving parts during operation to prevent injury.
- Ensure all attachments are securely locked in place before operating.
- Do not use accessories or attachments not recommended or sold by the manufacturer.
- This appliance is for household use only. Do not use outdoors.
- Supervise children closely when the appliance is in use.
- Do not operate the appliance with a damaged cord or plug, or after the appliance malfunctions or has been damaged in any manner.
- Avoid contact with sharp blades. Handle with care.
3. Parts and Components
Familiarize yourself with the various parts of your VITEK Multi-Kitchen Processor:

Image 2: Detailed view of all components.
- Pusher: Used to guide food into the feeding tube.
- Loading Tray: Holds food items before processing.
- Grinder Head Lock Button: Secures the grinder head to the motor unit.
- Grinder Head: Main housing for meat mincing components.
- Screw (Auger): Feeds food through the attachments.
- Control Panel: Includes ON/OFF and Reverse (REV) buttons.
- Motor Unit: The main power unit of the appliance.
- Power Cord Storage: Integrated compartment for the power cord.
- Vegetable Processing Attachment Housing: Holds the interchangeable drums.
- Shredding Drum: For fine shredding of vegetables.
- Slicing Drum: For uniform slicing of vegetables.
- Grating Drum: For grating various food items.
- Juicer/Puree Attachment Screw: Part of the slow juicer mechanism.
- Juicer/Puree Attachment Filter: Separates juice from pulp.
- Juicer/Puree Attachment Housing: Main body for juicing/pureeing.
- Meat Mincer Discs: Includes fine, medium, and coarse grinding discs.
- Cutting Blade: Stainless steel blade for mincing meat.
- Sausage Attachment: For making homemade sausages.
- Kebab Attachment: For shaping kebabs.
- Disc Cleaning Tool: Special device for cleaning grinding discs.
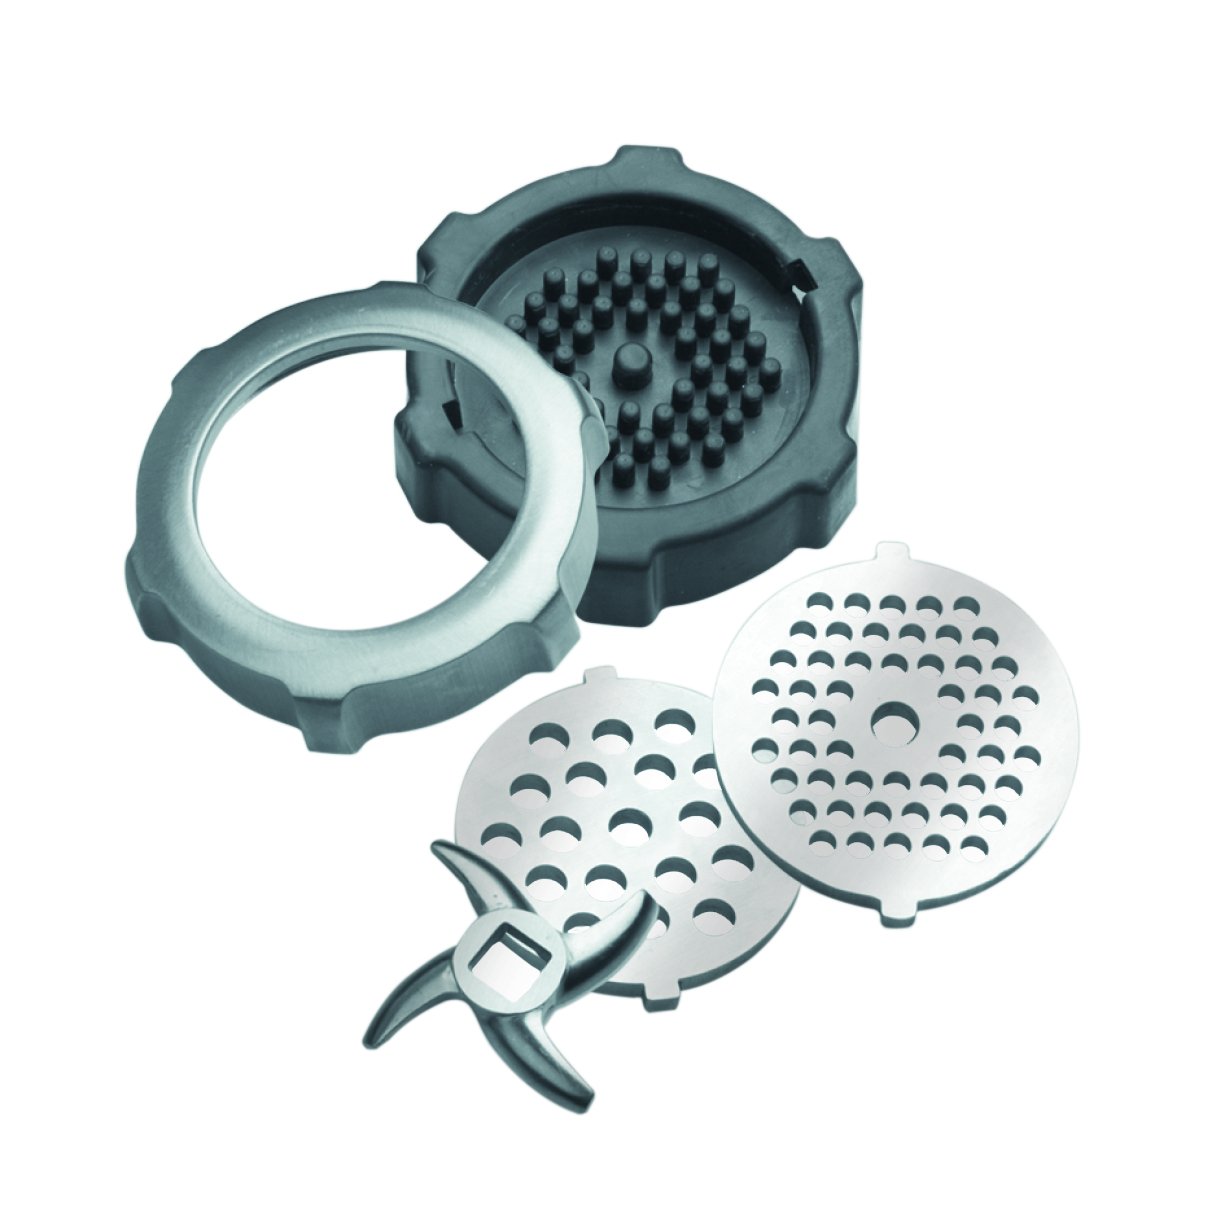
Image 3: Meat Mincer Discs and Blade.
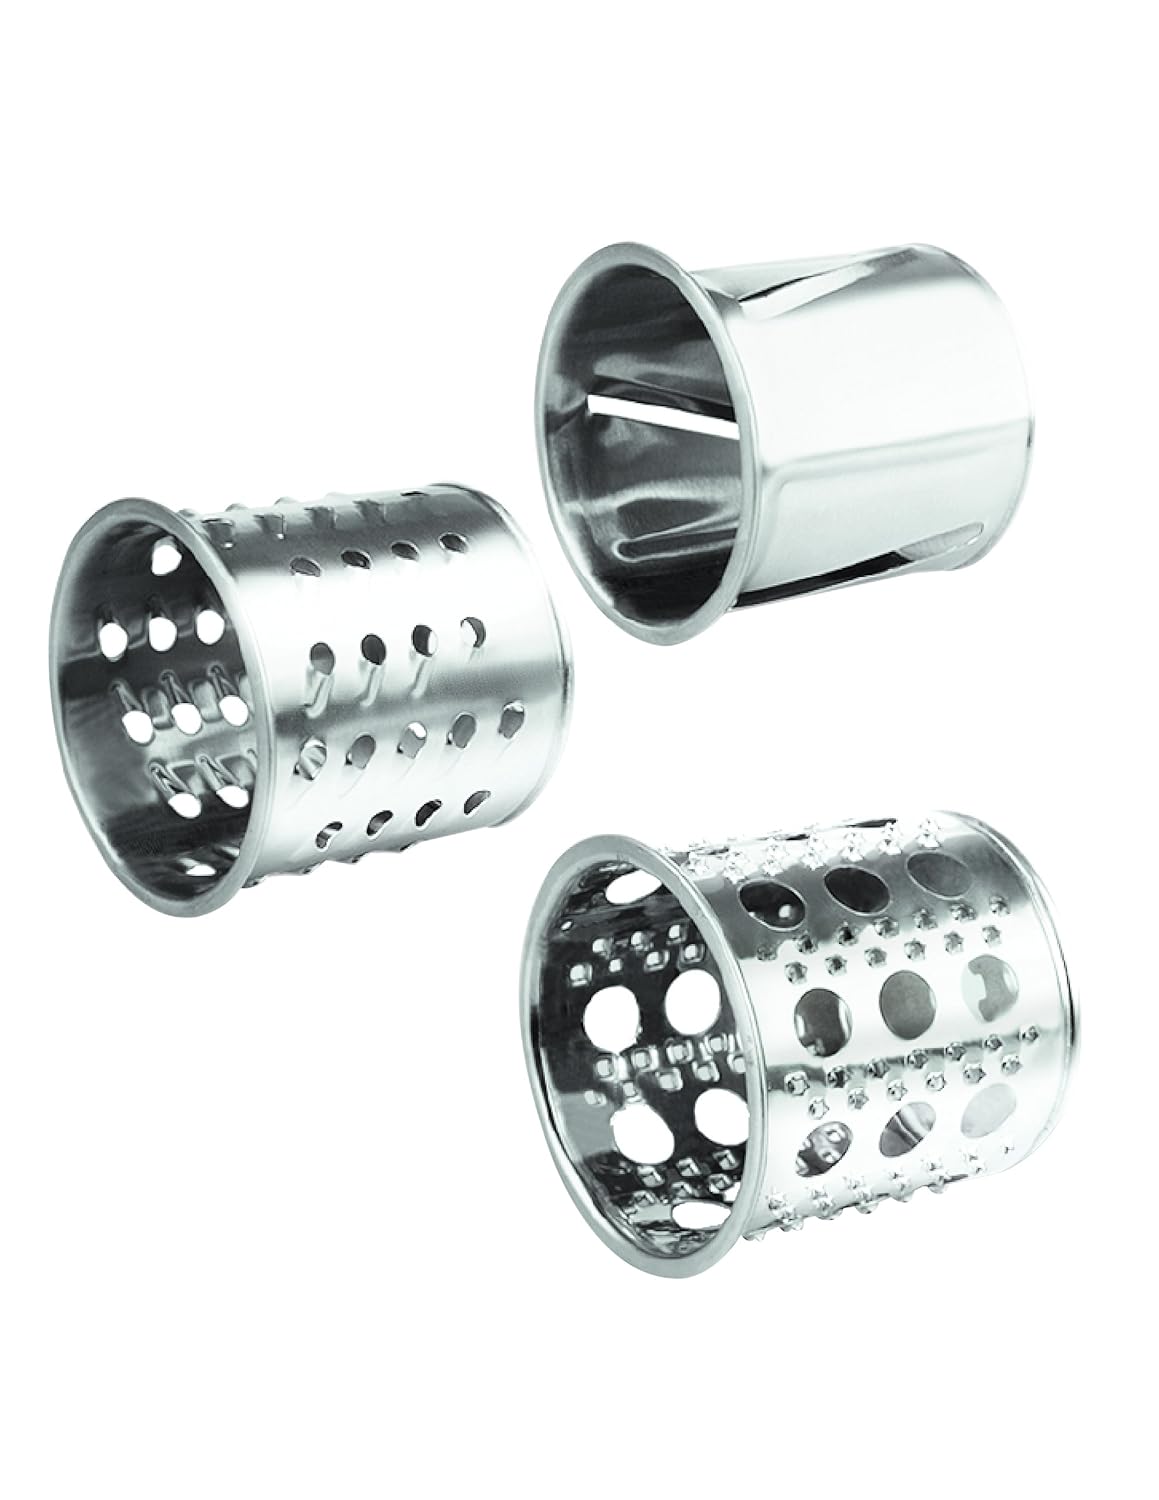
Image 4: Vegetable Processing Drums.

Image 5: Juicer/Puree Attachment.

Image 6: Sausage and Kebab Attachments.
4. Assembly and Setup
Before first use, wash all removable parts in warm soapy water, rinse thoroughly, and dry. Ensure the motor unit is unplugged.
4.1 General Assembly
- Place the motor unit on a stable, flat surface.
- Insert the desired attachment (e.g., grinder head, vegetable processing housing, or juicer attachment) into the opening on the front of the motor unit.
- Press the Grinder Head Lock Button (3) and rotate the attachment clockwise until it locks securely into place. Release the button.
- Place the loading tray (2) onto the top of the assembled attachment.
4.2 Specific Attachment Assembly
4.2.1 Meat Mincer Assembly
- Insert the screw (auger) (5) into the grinder head (4).
- Place the cutting blade (17) onto the end of the screw, ensuring the sharp edges face outwards.
- Select the desired mincing disc (16) (fine, medium, or coarse) and place it over the cutting blade.
- Screw the locking ring onto the grinder head until it is tight.
4.2.2 Vegetable Processing Attachment Assembly
- Insert the desired drum (shredding, slicing, or grating) (10, 11, or 12) into the vegetable processing attachment housing (9).
- Ensure the drum is seated correctly.
4.2.3 Juicer/Puree Attachment Assembly
- Assemble the juicer/puree attachment screw (13) and filter (14) into the juicer/puree attachment housing (15).
- Attach the assembled unit to the motor unit as described in 4.1.
5. Operating Instructions
Ensure the appliance is correctly assembled for the task you wish to perform.

Image 7: Control Panel.
5.1 General Operation
- Plug the power cord into a suitable electrical outlet.
- Press the ON/OFF button on the control panel to start the appliance.
- If food gets stuck, press the REV (Reverse) button to clear the blockage. Release the button to stop the reverse function.
5.2 Meat Grinding
- Prepare meat by cutting it into small pieces that fit into the loading tray. Remove bones, gristle, and excessive fat.
- Assemble the meat mincer attachment (as per 4.2.1).
- Place a bowl under the outlet to collect the minced meat.
- Turn on the appliance.
- Feed the meat pieces into the loading tray and gently push them down with the pusher (1). Do not force the meat.
5.3 Vegetable Processing (Shredding, Slicing, Grating)
- Prepare vegetables by washing and cutting them into appropriate sizes.
- Assemble the vegetable processing attachment with the desired drum (as per 4.2.2).
- Place a bowl under the outlet to collect the processed vegetables.
- Turn on the appliance.
- Feed the vegetables into the loading tray and gently push them down with the pusher (1).
5.4 Juicing and Pureeing
- Prepare fruits or vegetables by washing and cutting them into small pieces.
- Assemble the juicer/puree attachment (as per 4.2.3).
- Place a container under the juice outlet and another for pulp.
- Turn on the appliance.
- Feed the prepared items into the loading tray and gently push them down with the pusher (1).
- The juicer allows for adjustment of pulp level. Rotate the end cap of the juicer attachment to control the thickness of the juice/puree.
5.5 Sausage and Kebab Making
- Prepare your meat mixture for sausages or kebabs.
- Assemble the meat mincer attachment, but instead of a mincing disc, attach the sausage (18) or kebab (19) attachment.
- For sausages, carefully slide the sausage casing onto the nozzle.
- Turn on the appliance and feed the meat mixture into the loading tray, guiding it through the attachment to fill the casing or form kebabs.
6. Maintenance and Cleaning
Regular cleaning ensures the longevity and hygienic operation of your appliance.
6.1 Disassembly and Cleaning
- Always unplug the appliance before cleaning.
- Press the Grinder Head Lock Button and rotate the attachment counter-clockwise to remove it from the motor unit.
- Disassemble all parts of the attachment.
- Wash all removable parts (grinder head, screw, blade, discs, drums, juicer parts, trays, pushers, sausage/kebab attachments) in warm soapy water. Rinse thoroughly and dry immediately.
- The motor unit can be wiped clean with a damp cloth. Never immerse the motor unit in water.
6.2 Disc Cleaning Technology
The VITEK Multi-Kitchen Processor features a special disc cleaning technology. Use the provided disc cleaning tool (20) to easily remove any remaining food particles from the grinding discs after use. This ensures thorough cleaning and prevents residue buildup.
6.3 Storage
The appliance features a space-saving design with special compartments in the body casing to store accessories. After cleaning and drying, store all attachments neatly within the motor unit. The power cord also has a dedicated storage compartment. Store the appliance in a dry, safe place.

Image 8: Side view illustrating integrated accessory storage.
7. Troubleshooting
| Problem | Possible Cause | Solution |
|---|---|---|
| Appliance does not start. | Not plugged in; power outage; attachment not correctly assembled. | Check power connection; ensure attachment is securely locked. |
| Motor stops during operation. | Overload (too much food or hard food); motor overheating. | Press the REV button to clear blockages. If motor overheats, turn off and let cool for 30 minutes. Reduce food quantity or cut into smaller pieces. |
| Food is not processed efficiently. | Incorrect attachment assembly; dull blade/disc; food pieces too large. | Check assembly of blade and disc. Ensure food is cut to appropriate size. |
8. Specifications
- Brand: VITEK
- Model Number: VT-3602BW-I
- Power: 2000W
- Color: White & Black
- Item Weight: 6 kg 110 g
- Recommended Uses: Meat Grinding, Vegetable Processing, Juicing, Pureeing
- Included Components: Meat Grinder, Various Accessories, User Manual
- Material: High-quality food-grade materials, 100% rust-free parts in direct contact with food.
9. Warranty and Support
This VITEK Multi-Kitchen Processor comes with a 2-year warranty. For any service, support, or warranty claims, please contact SPG India Private Limited customer care at 18002660495. Keep your purchase receipt as proof of purchase for warranty validation.
10. Product Videos
No embeddable video URLs were found in the provided JSON data that meet the criteria for inclusion (creator_type: "Seller" and not a preview file). Please refer to the product page for any available video demonstrations.


