1. Introduction
The De Dietrich AD 137 is a wired programmable room thermostat designed to provide precise and efficient control over your heating system. It is compatible with both oil and gas low-temperature boilers. This thermostat allows for weekly programming and offers three distinct operating modes to suit various needs: Automatic, Permanent, and Holiday.
This manual provides essential information for the installation, operation, and maintenance of your AD 137 thermostat, ensuring optimal performance and comfort.
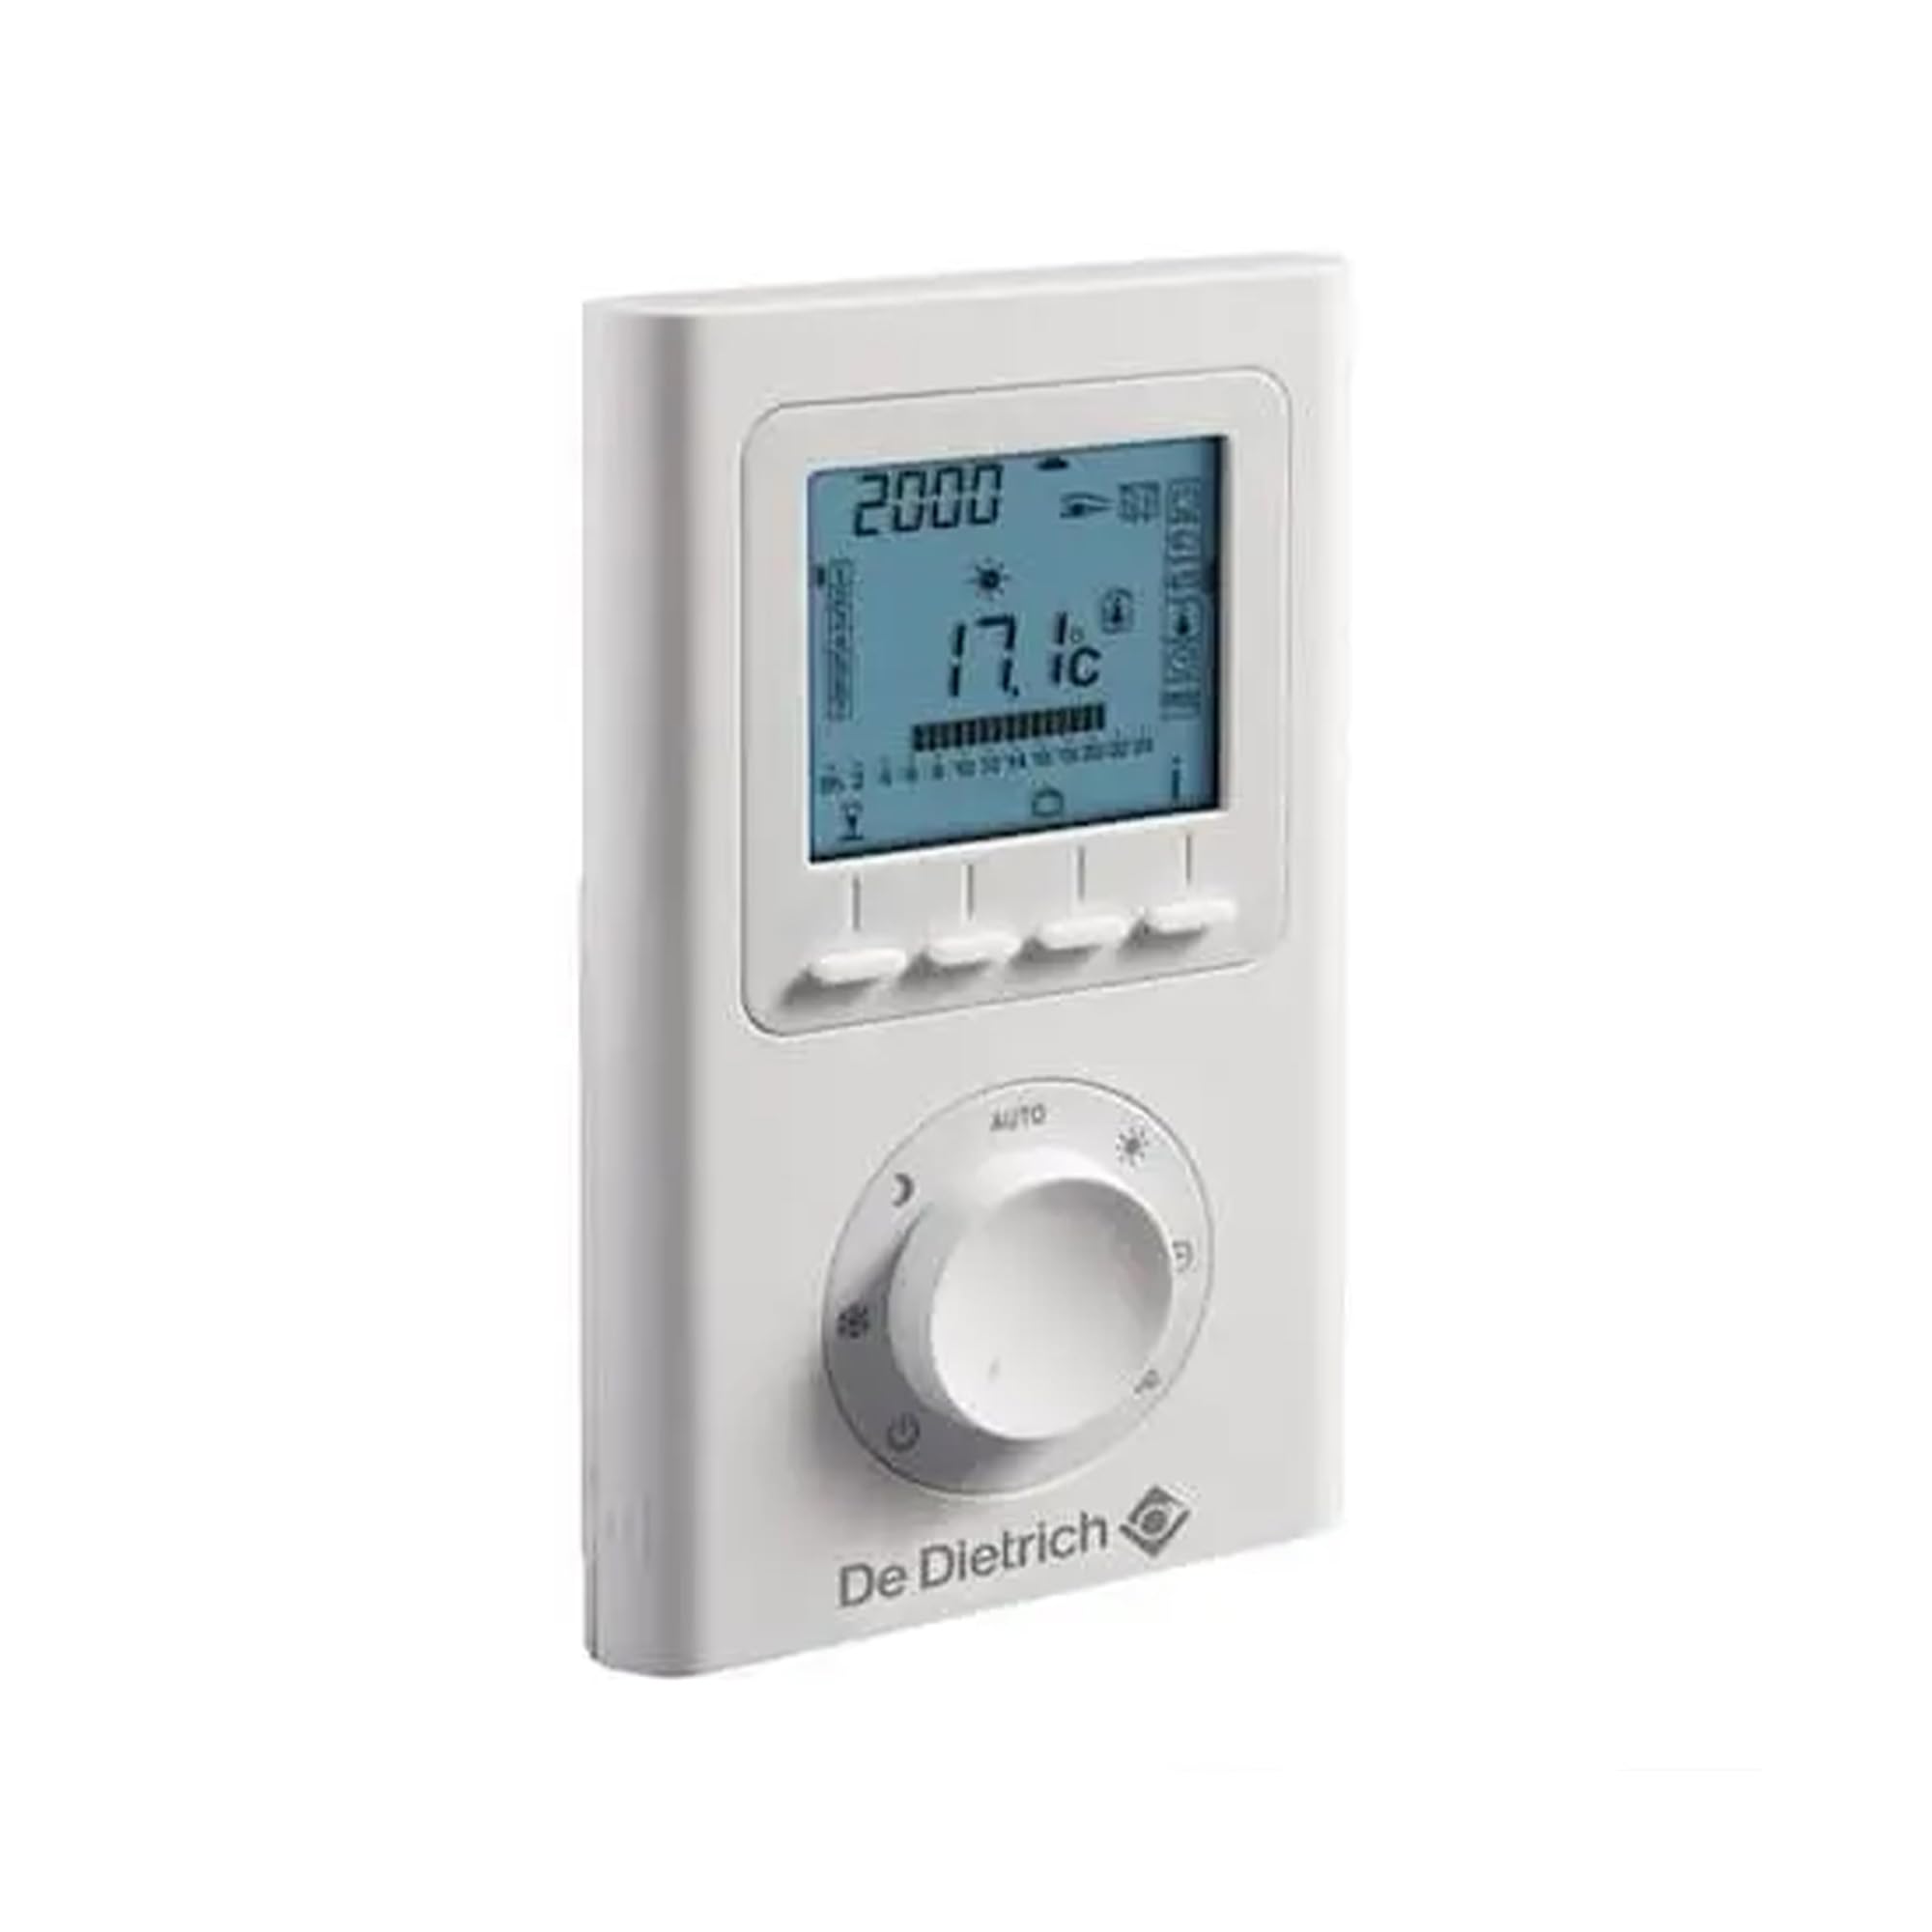
Image 1.1: De Dietrich AD 137 Wired Programmable Room Thermostat. This image shows the front view of the thermostat unit, typically mounted on a wall, with its display and control buttons.
2. Setup and Installation
2.1. Important Safety Information
- Installation must be performed by a qualified electrician or heating technician.
- Ensure the main power supply to the heating system is switched off before commencing any installation work.
- Follow all local electrical codes and regulations.
2.2. Choosing the Installation Location
The correct placement of the thermostat is crucial for accurate temperature sensing and efficient heating control. Consider the following guidelines:
- Height: Install the thermostat approximately 1.5 meters (5 feet) from the floor.
- Central Location: Choose a central location within the main living area, away from direct drafts, heat sources, and direct sunlight.
- Avoid Obstructions: Do not install the thermostat behind curtains, furniture, or near doors that are frequently opened, as this can lead to inaccurate readings.
- Minimum Distance from Doors: Ensure a minimum distance of 20 cm from door frames to prevent drafts from affecting temperature readings.
- Avoid Heat Sources: Do not place the thermostat near radiators, televisions, lamps, or other appliances that generate heat.
- Avoid Cold Sources: Do not place the thermostat near windows or exterior doors where cold drafts could influence its readings.

Image 2.1: Thermostat Installation Location Diagram. This diagram illustrates optimal and incorrect placement for the thermostat. It shows the recommended height of approximately 1.5 meters from the floor. Locations near doors (marked with an 'X' and dashed lines indicating drafts) and near windows or radiators (also marked with an 'X') are shown as unsuitable. A minimum distance of 20 cm from the door opening is indicated.
2.3. Wiring Instructions
The AD 137 is a wired thermostat. Connect it to your boiler's dry contact terminals according to the boiler manufacturer's instructions and the wiring diagram provided with your thermostat. Ensure all connections are secure and insulated.
- Connect the thermostat's output terminals to the boiler's control input (typically marked as 'TA', 'LS', or 'Room Thermostat').
- The thermostat operates on 230 Volts.
2.4. Initial Power-Up
Once installation and wiring are complete, restore power to the heating system. The thermostat display should illuminate, indicating it is powered on. Follow the on-screen prompts for initial setup, such as setting the current time and day.
3. Operating Instructions
The AD 137 thermostat offers three main operating modes to manage your heating.
3.1. Operating Modes
- Automatic Mode: This mode allows you to program specific comfort and reduced temperature settings for different times of the day and days of the week. The thermostat will automatically switch between these settings based on your weekly schedule. You can choose from up to 4 programming options. The temperature range for this mode is 5°C to 30°C.
- Permanent Mode: In this mode, the thermostat maintains a single desired temperature continuously. This is suitable when you need a constant temperature without a schedule. The temperature can be set between 5°C and 30°C.
- Holiday Mode: Designed for extended absences, this mode allows you to set a specific temperature for a defined duration (from 1 to 99 days). This helps save energy while preventing pipes from freezing or maintaining a minimal temperature in your home during your absence.
3.2. Setting Temperature
Use the up/down buttons on the thermostat to adjust the desired temperature. The current setpoint will be displayed on the screen. In Automatic mode, you will adjust the comfort or reduced setpoints during programming.
3.3. Weekly Programming
Refer to the detailed programming section in your thermostat's dedicated manual for step-by-step instructions on setting up your weekly schedule in Automatic mode. This typically involves:
- Selecting the day(s) of the week.
- Defining time periods for each day.
- Assigning a comfort or reduced temperature to each time period.
4. Maintenance
4.1. Cleaning
To maintain the appearance and functionality of your thermostat, clean it periodically with a soft, dry cloth. Do not use abrasive cleaners, solvents, or chemical sprays, as these can damage the casing or internal components.
4.2. Battery Replacement (if applicable)
The AD 137 is a wired thermostat and typically does not require batteries for primary operation. However, some models may include a small backup battery for retaining settings during power outages. If your model has such a battery and a low battery indicator appears, replace it according to the instructions in the full product manual.
5. Troubleshooting
If you encounter issues with your De Dietrich AD 137 thermostat, consider the following common troubleshooting steps:
- No Display/No Power: Check the main power supply to your heating system and ensure the thermostat is correctly wired and receiving power.
- Heating Not Turning On: Verify that the thermostat is set to a temperature higher than the current room temperature and that it is in an active heating mode (Automatic or Permanent). Check the boiler for any error codes or issues.
- Inaccurate Temperature Readings: Ensure the thermostat is not exposed to direct sunlight, drafts, or heat sources (see Section 2.2).
- Programming Issues: Double-check your weekly program settings for correct times and temperatures. Ensure the thermostat is in Automatic mode for programmed operation.
- Thermostat Not Responding: Try resetting the thermostat if a reset button is available (refer to your full manual). Otherwise, temporarily disconnect and reconnect power to the unit.
If problems persist after attempting these steps, contact a qualified technician or De Dietrich customer support.
6. Specifications
| Feature | Detail |
|---|---|
| Model Name | AD 137 |
| Brand | De Dietrich |
| Connectivity Technology | Wired |
| Power Source | Electric Cable (230 Volts) |
| Controller Type | Push Button |
| Special Feature | Programmable (Weekly) |
| Temperature Control Type | Programmable / Smart |
| Compatible With | Oil and Gas Low-Temperature Boilers |
| Operating Modes | Automatic, Permanent, Holiday |
| Temperature Range | 5°C to 30°C |
| Color | White |
| Product Dimensions (L x W x H) | 3 x 20 x 10 cm |
| Item Weight | 210 g |
| Included Components | Cable |
7. Warranty & Support
7.1. Manufacturer's Warranty
The De Dietrich AD 137 thermostat comes with a 2-year manufacturer's warranty. This warranty covers defects in materials and workmanship under normal use. Please retain your proof of purchase for warranty claims.
7.2. Customer Support
For technical assistance, warranty claims, or further information regarding your De Dietrich AD 137 thermostat, please contact De Dietrich customer support or visit their official website. Contact details can typically be found on the product packaging or the manufacturer's website.


