
Introduction
The RICOH GR II is a high-performance digital compact camera designed for professional-grade imagery. It features a newly developed wide-angle lens and a 16-megapixel APS-C size image sensor, all integrated into a compact body. Its anti-aliasing filter-less design and fast 28mm equivalent F2.8 lens contribute to incredible, high-sensitivity image capture. The GR II also includes high-speed autofocus improvements, onboard Wi-Fi, and NFC compatibility, offering DSLR-like handling and functionality, including full 1080 HD video capture.
Setup
Before using your Ricoh GR II camera, ensure it is properly set up. This section guides you through the initial steps.
1. Charging the Battery
Insert the supplied battery into the camera. Connect the camera to a power source using the provided USB cable and AC adapter. The charging indicator will illuminate during charging and turn off when complete. A full charge typically takes approximately 180 minutes.
2. Inserting a Memory Card
Open the battery/card compartment cover located at the bottom of the camera. Insert a compatible SD, SDHC, or SDXC memory card into the slot with the contacts facing the correct direction until it clicks into place. Close the cover securely.

Figure 1: Bottom view of the Ricoh GR II showing the battery and SD card compartment open.
3. Initial Settings
Upon first power-on, the camera may prompt you to set the date, time, and language. Follow the on-screen instructions to configure these basic settings.
Operating the Camera
This section covers the fundamental operations of your Ricoh GR II camera, from powering on to capturing images and videos.
Powering On/Off
Press the ON/OFF button located on the top of the camera to power it on or off. The lens will extend upon power-on and retract upon power-off.

Figure 2: Front view of the Ricoh GR II Digital Camera, showing the lens and grip.
Taking Still Images
- Select a Shooting Mode: Rotate the mode dial on the top of the camera to select your desired shooting mode (e.g., P, A, S, M).
- Compose Your Shot: Use the 3-inch LCD screen to frame your subject.
- Focus: Press the shutter button halfway down to activate autofocus. The camera will focus on the subject.
- Capture: Press the shutter button fully down to take the picture.
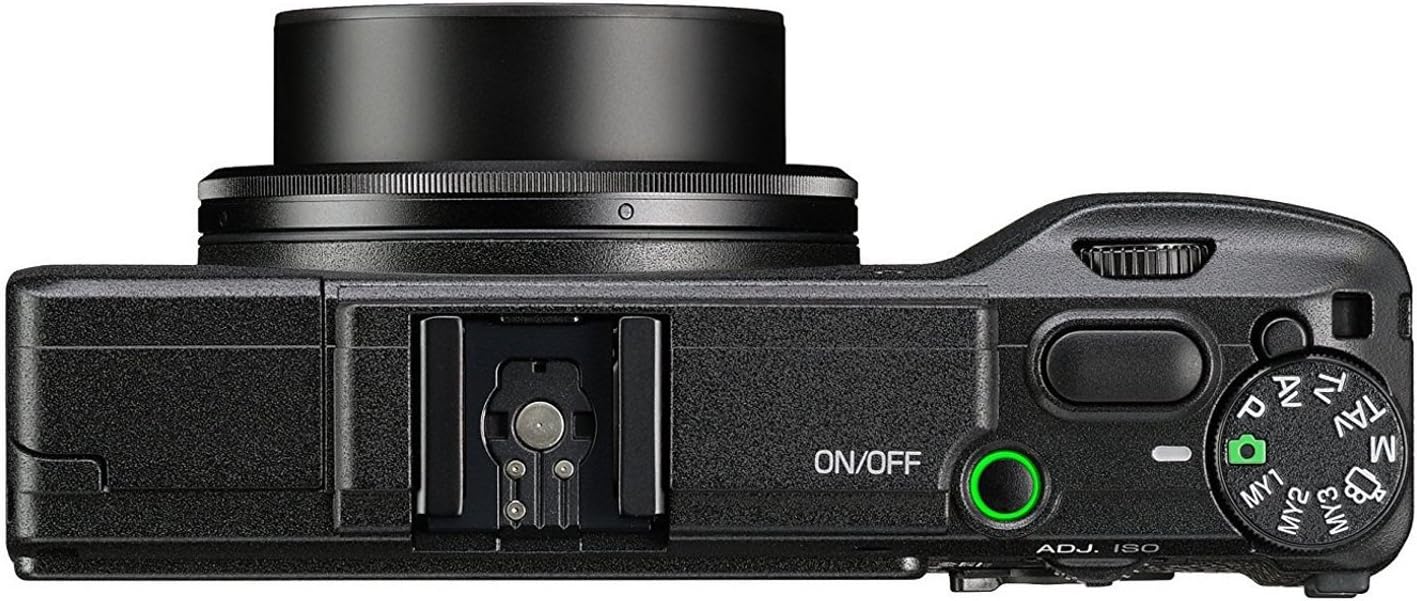
Figure 3: Top view of the Ricoh GR II, highlighting the mode dial and shutter button.
Recording Videos
The Ricoh GR II can record full HD 1080p video at 30 frames per second with H.264 compression. The autofocus system remains active during video recording.
- Enter Video Mode: Select the movie recording mode from the mode dial or menu.
- Start/Stop Recording: Press the dedicated movie recording button (if available) or the shutter button to start and stop recording.
Using Wi-Fi and NFC
The GR II is equipped with Wi-Fi for wireless connection to mobile devices and NFC for easy pairing. Use the Ricoh Image Sync app (or similar compatible application) on your smartphone or tablet to transfer images, control the camera remotely, and more.

Figure 4: Rear view of the Ricoh GR II, displaying the LCD screen and various control buttons.
Maintenance
Proper maintenance ensures the longevity and optimal performance of your Ricoh GR II camera.
Cleaning the Camera Body and Lens
- Use a soft, dry cloth to wipe the camera body. For stubborn dirt, slightly dampen the cloth with water.
- For the lens, use a lens brush or a blower to remove dust. For smudges, use a specialized lens cleaning solution and a microfiber cloth. Avoid touching the lens surface directly.
Battery Care
- Store batteries in a cool, dry place when not in use.
- Avoid fully discharging the battery frequently to prolong its lifespan.
- If the camera will not be used for an extended period, remove the battery.
Storage
When storing the camera for long periods, place it in a dry, well-ventilated area, away from direct sunlight and extreme temperatures. Consider using a desiccant to prevent moisture buildup.
Troubleshooting
This section addresses common issues you might encounter with your Ricoh GR II camera. For more detailed troubleshooting, refer to the comprehensive user manual available online.
Camera Does Not Turn On
- Ensure the battery is fully charged and correctly inserted.
- Try using a different, fully charged battery if available.
Images Are Blurry
- Check if the lens is clean and free from smudges or dust.
- Ensure the camera has properly focused before taking the shot.
- In low light, use a tripod or increase ISO sensitivity to prevent camera shake.
Wi-Fi/NFC Connection Issues
- Ensure Wi-Fi and NFC functions are enabled on both the camera and your mobile device.
- Restart both devices and try connecting again.
- Verify that you have the latest version of the Ricoh Image Sync app installed.
Specifications
Key technical specifications for the Ricoh GR II Digital Camera.
| Feature | Specification |
|---|---|
| Model Name | Ricoh GR II |
| Photo Sensor Resolution | 16.2 MP (Effective) |
| Photo Sensor Size | APS-C |
| Lens Type | Fixed 18.3mm (28mm equivalent) f/2.8 |
| Display Type | 3-inch LCD |
| Video Resolution | FHD 1080p at 30 FPS |
| Connectivity | USB, Wi-Fi, Bluetooth (NFC) |
| Battery Life (Still Images) | Approx. 320 shots |
| Item Weight | 0.6 Pounds |
| Dimensions (D x W x H) | 1.3"D x 4.3"W x 2.4"H |
Warranty and Support
Your Ricoh GR II Digital Camera comes with a standard 1-year manufacturer's warranty, covering defects in materials and workmanship under normal use.
For comprehensive information, detailed troubleshooting, and advanced features, please refer to the official user manual:
Download Official User Manual (PDF)
For further assistance, please contact Ricoh customer support through their official website.