
Hitachi CP-X3041WN
Contents
Hitachi CP-X3041WN LCD Projector User Manual
Model: CP-X3041WN
Introduction
This manual provides essential information for the safe and efficient operation of your Hitachi CP-X3041WN LCD Projector. Please read it thoroughly before using the projector and keep it for future reference. The Hitachi CP-X3041WN is designed for clear, high-quality projection in various environments, from classrooms to conference rooms, offering superior image clarity and reliability.
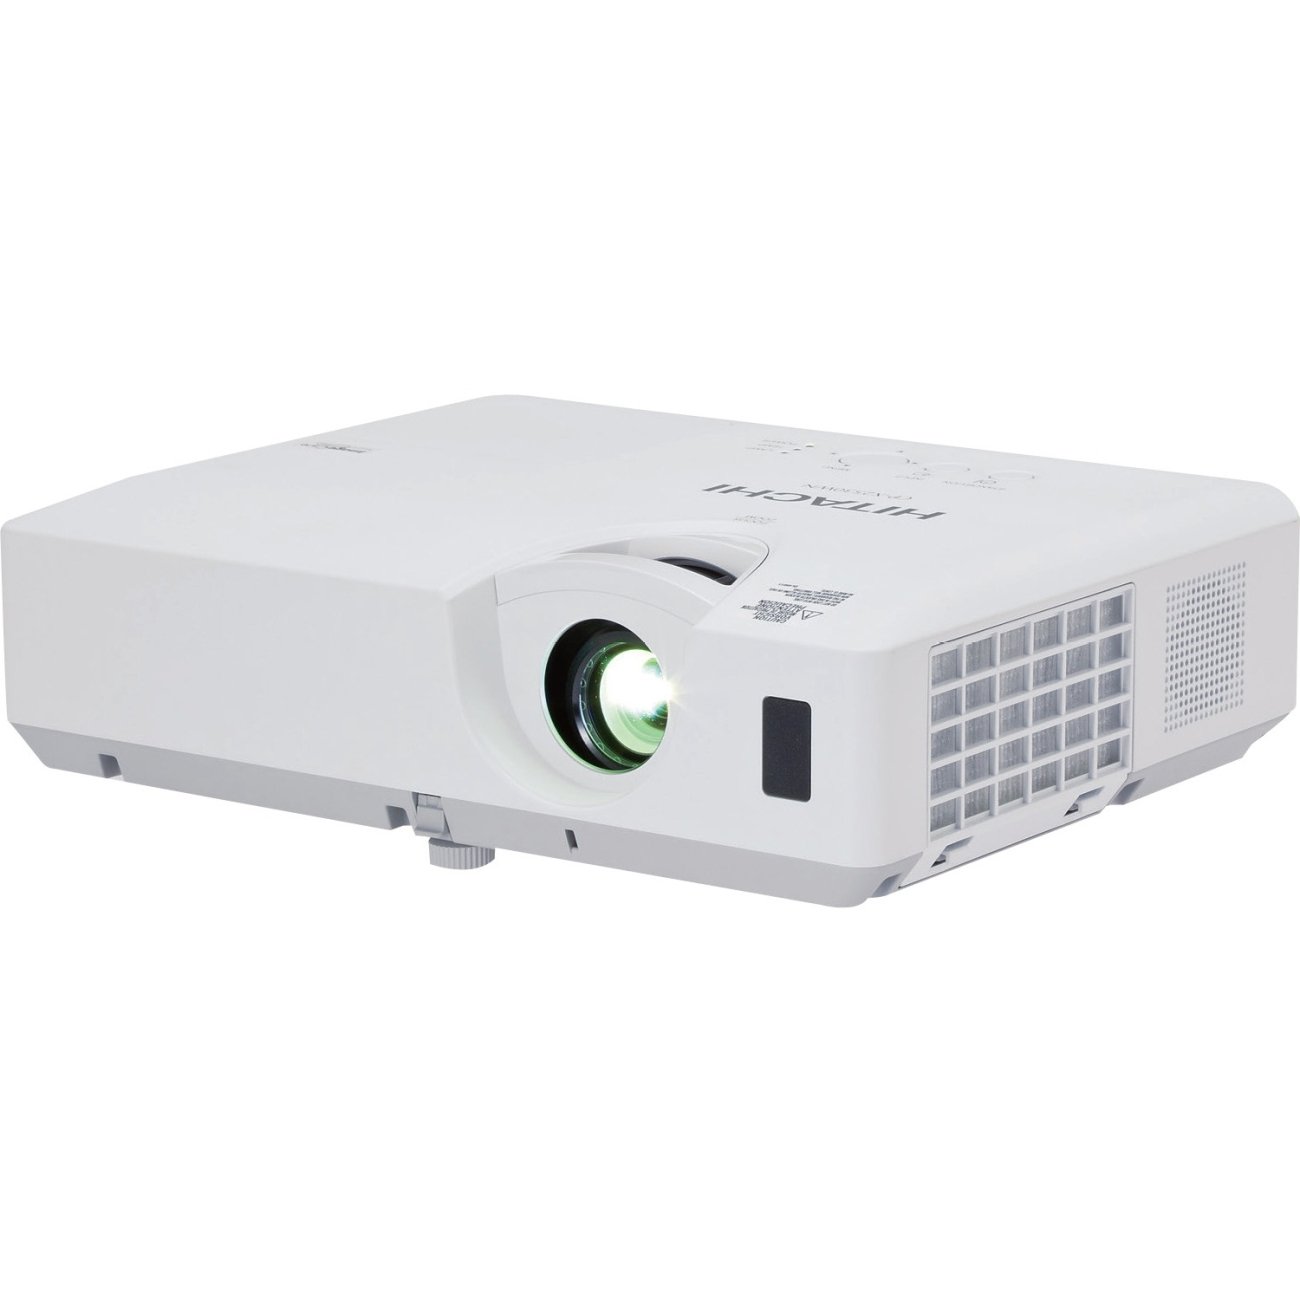
Figure 1: Hitachi CP-X3041WN LCD Projector. This image displays the front and right side of the projector, highlighting the projection lens, control panel, and ventilation grilles.
Safety Precautions
- Do not block ventilation openings. Ensure adequate space around the projector for proper airflow.
- Do not look directly into the lens when the projector is on, as the bright light can cause eye damage.
- Avoid placing the projector in direct sunlight, near heat sources, or in areas with excessive dust or humidity.
- Use only the power supply specified for this projector.
- Do not attempt to service the projector yourself. Refer all servicing to qualified service personnel.
Setup
Unpacking and Inspection
Carefully remove the projector and all accessories from the packaging. Verify that all components listed in the packing list are present and undamaged. Retain the original packaging for future transport or storage.
Placement
The Hitachi CP-X3041WN is designed for tabletop mounting. Place the projector on a stable, flat surface. Ensure the projection path is clear of obstructions. For optimal image quality, position the projector perpendicular to the screen.
Connecting Power
- Ensure the projector's power switch is in the OFF position.
- Connect the power cord securely to the projector's AC inlet.
- Plug the other end of the power cord into a grounded electrical outlet.
Connecting Input Sources
The projector supports various input sources. Use appropriate cables to connect your devices (e.g., computer, DVD player) to the corresponding input ports on the projector. The projector features USB connectivity for certain functions.
Operating Instructions
Powering On/Off
- To Power On: Press the Power button on the projector's control panel or remote control. The power indicator light will illuminate.
- To Power Off: Press the Power button again. A confirmation message may appear. Press the Power button once more to confirm shutdown. Allow the projector to cool down completely before unplugging it.
Adjusting the Image
- Focus: Rotate the focus ring on the lens until the image is sharp and clear.
- Zoom: Adjust the zoom lever on the lens to change the image size.
- Keystone Correction: If the image appears trapezoidal, use the keystone correction function (usually found in the projector's menu or via dedicated buttons) to square the image.
Selecting Input Source
Press the "Input" or "Source" button on the projector or remote control to cycle through available input sources (e.g., HDMI, VGA, USB). Select the desired input that corresponds to your connected device.
Menu Navigation
Use the arrow buttons and "Enter" or "OK" button on the control panel or remote to navigate the on-screen display (OSD) menu. Here you can adjust various settings such as picture mode, brightness, contrast, and audio settings.
Maintenance
Cleaning the Projector
- Exterior: Wipe the projector's exterior with a soft, dry cloth. For stubborn dirt, use a slightly damp cloth and then dry thoroughly. Do not use abrasive cleaners or solvents.
- Lens: Gently clean the lens with a soft, lint-free cloth specifically designed for optical lenses. Avoid touching the lens with your fingers.
- Air Filters: Regularly check and clean the air filters to prevent dust buildup, which can affect performance and lifespan. Refer to the full manual for specific instructions on filter removal and cleaning.
Lamp Replacement
The projector lamp has a finite lifespan. When the lamp indicator illuminates or the image becomes dim, it's time to replace the lamp. Always use genuine Hitachi replacement lamps. Refer to the full manual for detailed lamp replacement procedures. Caution: Allow the projector to cool down completely before attempting lamp replacement.
Troubleshooting
| Problem | Possible Cause | Solution |
|---|---|---|
| No image projected |
|
|
| Image is dim or faded |
|
|
| Image is blurry |
|
|
For more detailed troubleshooting, refer to the comprehensive user manual available on the Hitachi support website.
Specifications
- Model: CP-X3041WN
- Display Technology: LCD
- Native Resolution: 1024 x 768 (XGA)
- Maximum Display Resolution: 1024 x 768
- Brightness (Luminous Flux): 3200 Lumens
- Contrast Ratio: 10000:1
- Wattage: 210 watts
- Connectivity Technology: USB
- Special Features: Speakers
- Mounting Type: Tabletop Mount
- Item Weight: 6.61 pounds
- Product Dimensions: 14.5 x 12.5 x 6.2 inches
Warranty Information
Hitachi provides a limited warranty for the CP-X3041WN LCD Projector. The specific terms and duration of the warranty may vary by region and purchase date. Please retain your proof of purchase. For detailed warranty information, including coverage and limitations, please refer to the warranty card included with your product or visit the official Hitachi support website.
Customer Support
If you require further assistance, technical support, or service for your Hitachi CP-X3041WN LCD Projector, please contact Hitachi customer support. You can find contact information, FAQs, and additional resources on the official Hitachi website. When contacting support, please have your product model number (CP-X3041WN) and serial number ready.
Online Resources: www.hitachi.com/support (Example link, actual link may vary)
Documents and downloads
Ask a question about this manual
Ask about setup, troubleshooting, compatibility, parts, safety, or missing instructions. Manuals+ will review the question and use this page’s manual context to help answer it.