
Glixal ATKS-029
Contents
Glixal ATKS-029 A9 Camshaft Instruction Manual
Model: ATKS-029 | Brand: Glixal
1. Introduction
The Glixal ATKS-029 High Performance A9 Camshaft is designed as a replacement and upgrade for GY6 50cc-100cc engines. This camshaft is engineered to enhance engine performance, particularly when upgrading cylinders and cylinder heads, by optimizing valve timing. It is suitable for use in Go Karts, Mopeds, Scooters, and ATVs equipped with 139QMB or 139QMA engines.
2. Safety Precautions
- Always wear appropriate personal protective equipment, including safety glasses and gloves, when working on engines.
- Ensure the engine is cool and disconnected from the battery before beginning any work.
- Work in a well-ventilated area.
- If you are unsure about any step, consult a qualified mechanic or refer to a comprehensive service manual for your specific vehicle model.
- Keep all small parts and tools away from children and pets.
3. Package Contents
Verify that all items are present and undamaged upon opening the package:
- 1 x Glixal ATKS-029 High Performance A9 Camshaft
- Integrated bearings (High Quality XX or C&U Bearing)

Image: Glixal ATKS-029 A9 Camshaft with integrated gear.
4. Installation Guide
Installing a camshaft requires precision and familiarity with engine mechanics. It is recommended to consult a detailed service manual for your specific engine model and consider professional installation if you are not experienced.
Key Installation Steps & Important Notes:
- Preparation: Remove the valve cover and any other components necessary to access the camshaft. Ensure the engine is at Top Dead Center (TDC) on the compression stroke.
- Camshaft Removal: Carefully remove the old camshaft, noting its orientation and any associated components.
- New Camshaft Installation:
- Install the new Glixal A9 camshaft. Pay close attention to the alignment marks.
- Critical Alignment Note: The 'AT-A9' markings on the camshaft are designed to face the piston (i.e., they will appear upside down when viewed from the top of the engine). The timing should be set using the three holes on the camshaft gear: the single smaller hole should be positioned at the top, aligned away from the motor, with the two larger holes on either side.

Image: Camshaft showing the 'AT-A9' marking and the 6mm alignment hole.

Image: General workshop environment for engine work.
- Valve Clearance Check: After installation, it is crucial to check and adjust valve clearances. This A9 camshaft has different lobe specifications (Intake Lobe-26.5mm±0.05; Exhaust Lobe-26.35mm±0.05) compared to stock, which may require adjustment to prevent valve-to-piston contact.
- Manual Rotation: Before starting the engine, manually rotate the crankshaft several times to ensure there is no interference between the valves and the piston. Listen for any abnormal sounds or resistance.
- Reassembly: Reinstall the valve cover and all other removed components, ensuring all bolts are torqued to manufacturer specifications.
5. Operation & Performance
The Glixal A9 camshaft is designed to provide improved performance, particularly in the mid-range and higher RPMs. Users may experience increased acceleration and a different engine sound compared to the stock camshaft. For optimal results, this camshaft is best utilized when upgrading the cylinder and head to maximize performance gains.
6. Maintenance
The camshaft itself is a durable component and typically requires no specific maintenance beyond ensuring proper engine lubrication. Regular engine maintenance, including timely oil changes and valve clearance checks (especially after initial installation and break-in), will contribute to the longevity and performance of your engine and the camshaft.
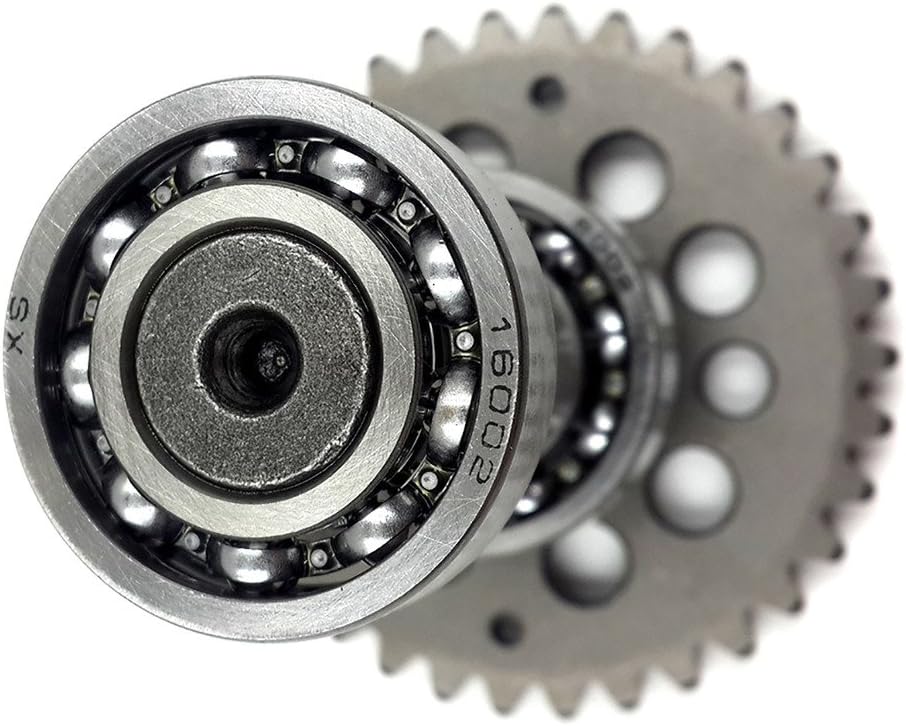
Image: Close-up of the camshaft bearings, which are pre-installed and require no maintenance.
7. Troubleshooting
If you encounter issues after installing the A9 camshaft, consider the following:
- Valves Hitting Piston / Engine Damage: This is a critical issue. It often indicates incorrect timing or insufficient valve clearance. Immediately stop the engine and re-verify the camshaft timing and valve clearances as described in the installation section. Ensure the 'AT-A9' marking is facing the piston and the 3-hole alignment is correct.
- Poor Performance / Low End Struggle: While this camshaft is designed for high performance, some users report a slight struggle at the low end. This can sometimes be mitigated by adjusting other engine components like the CDI or variator weights (e.g., 1500rpm contra spring). Ensure your engine setup is compatible with a performance camshaft.
- Spark Knock / Overheating: Increased performance can generate more heat. Ensure your cooling system is adequate. An oil cooler might be beneficial for sustained high-performance use.
- Unusual Noises: Any new or unusual noises from the engine after installation should be investigated immediately. This could indicate improper installation, loose components, or interference.
8. Product Specifications
| Model Number | ATKS-029 |
| Engine Compatibility | GY6 50cc-100cc (139QMB, 139QMA) |
| Intake Lobe | 26.5mm±0.05 |
| Exhaust Lobe | 26.35mm±0.05 |
| Bearing Type | High Quality XX or C&U Bearing |
| Weight | 9.9 ounces |
| Package Dimensions | 3.82 x 2.87 x 2.8 inches |
9. Warranty and Support
For information regarding warranty, returns, or technical support, please refer to the product packaging or contact Glixal customer service directly through their official website or the retailer from whom the product was purchased. Please retain your proof of purchase for any warranty claims.
Ask a question about this manual
Ask about setup, troubleshooting, compatibility, parts, safety, or missing instructions. Manuals+ will review the question and use this page’s manual context to help answer it.