1. Introduction
This manual provides essential information for setting up, operating, maintaining, and troubleshooting your new Vibox I-24 Gaming PC Bundle. Please read this manual thoroughly before using the product to ensure optimal performance and longevity.
The Vibox I-24 Gaming PC Bundle is a high-performance system designed for an immersive gaming experience and efficient multitasking. It features an AMD Ryzen 3 3200G processor, integrated Radeon Vega 8 graphics, 16GB of high-speed DDR4 RAM, and a rapid 1TB NVMe SSD. The bundle includes a 22-inch monitor, RGB gaming keyboard, RGB gaming mouse, black mouse mat, gamer headset with microphone, and a wireless WiFi network adapter, all pre-installed with Microsoft Windows 11.
2. Package Contents
Ensure all items listed below are present in your package:
- Vibox I-24 Gaming PC Tower
- 22-inch Monitor
- RGB Gaming Keyboard
- RGB Gaming Mouse
- Black Mouse Mat
- Gamer Headset with Microphone
- Wireless WiFi Network Adapter
- Power Cables (for PC and Monitor)
- HDMI Cable
- Documentation (this manual)
3. Setup Guide
3.1 Unpacking and Placement
Carefully remove all components from their packaging. Place the PC tower on a stable, flat surface with adequate ventilation. Ensure there is enough space around the tower for airflow, especially at the rear and top vents.

Image: The complete Vibox I-24 Gaming PC Bundle, showing the PC tower, 22-inch monitor, RGB keyboard, RGB mouse, and headset, all ready for setup.
3.2 Connecting the Monitor
- Connect one end of the HDMI cable to the HDMI port on the back of the PC tower.
- Connect the other end of the HDMI cable to the HDMI input on your 22-inch monitor.
- Connect the monitor's power cable to the monitor and then to a power outlet.
3.3 Connecting Peripherals
Locate the USB ports on the back and top of the PC tower. The Vibox I-24 features 3 USB 2.0 ports and 3 USB 3.0 ports.

Image: Detailed view of the top I/O panel, highlighting the USB ports, headphone jack, and power/reset buttons for easy access.
- Connect the USB cable from the RGB Gaming Keyboard to any available USB port on the PC.
- Connect the USB cable from the RGB Gaming Mouse to another available USB port on the PC.
- Connect the Gamer Headset's audio and microphone jacks (or single 3.5mm jack) to the corresponding ports on the PC (usually on the top or rear).
- Insert the Wireless WiFi Network Adapter into an available USB port.
3.4 Power Connection
Connect the PC tower's power cable to the power supply unit (PSU) input on the back of the tower, then plug the other end into a power outlet. Ensure the power switch on the PSU (if present) is in the 'ON' position.
4. Operating Instructions
4.1 First Boot-Up
After connecting all components, press the power button on the front or top of the PC tower. The system will boot into Windows 11. Follow the on-screen prompts to complete the initial Windows setup, including region, language, and network settings.
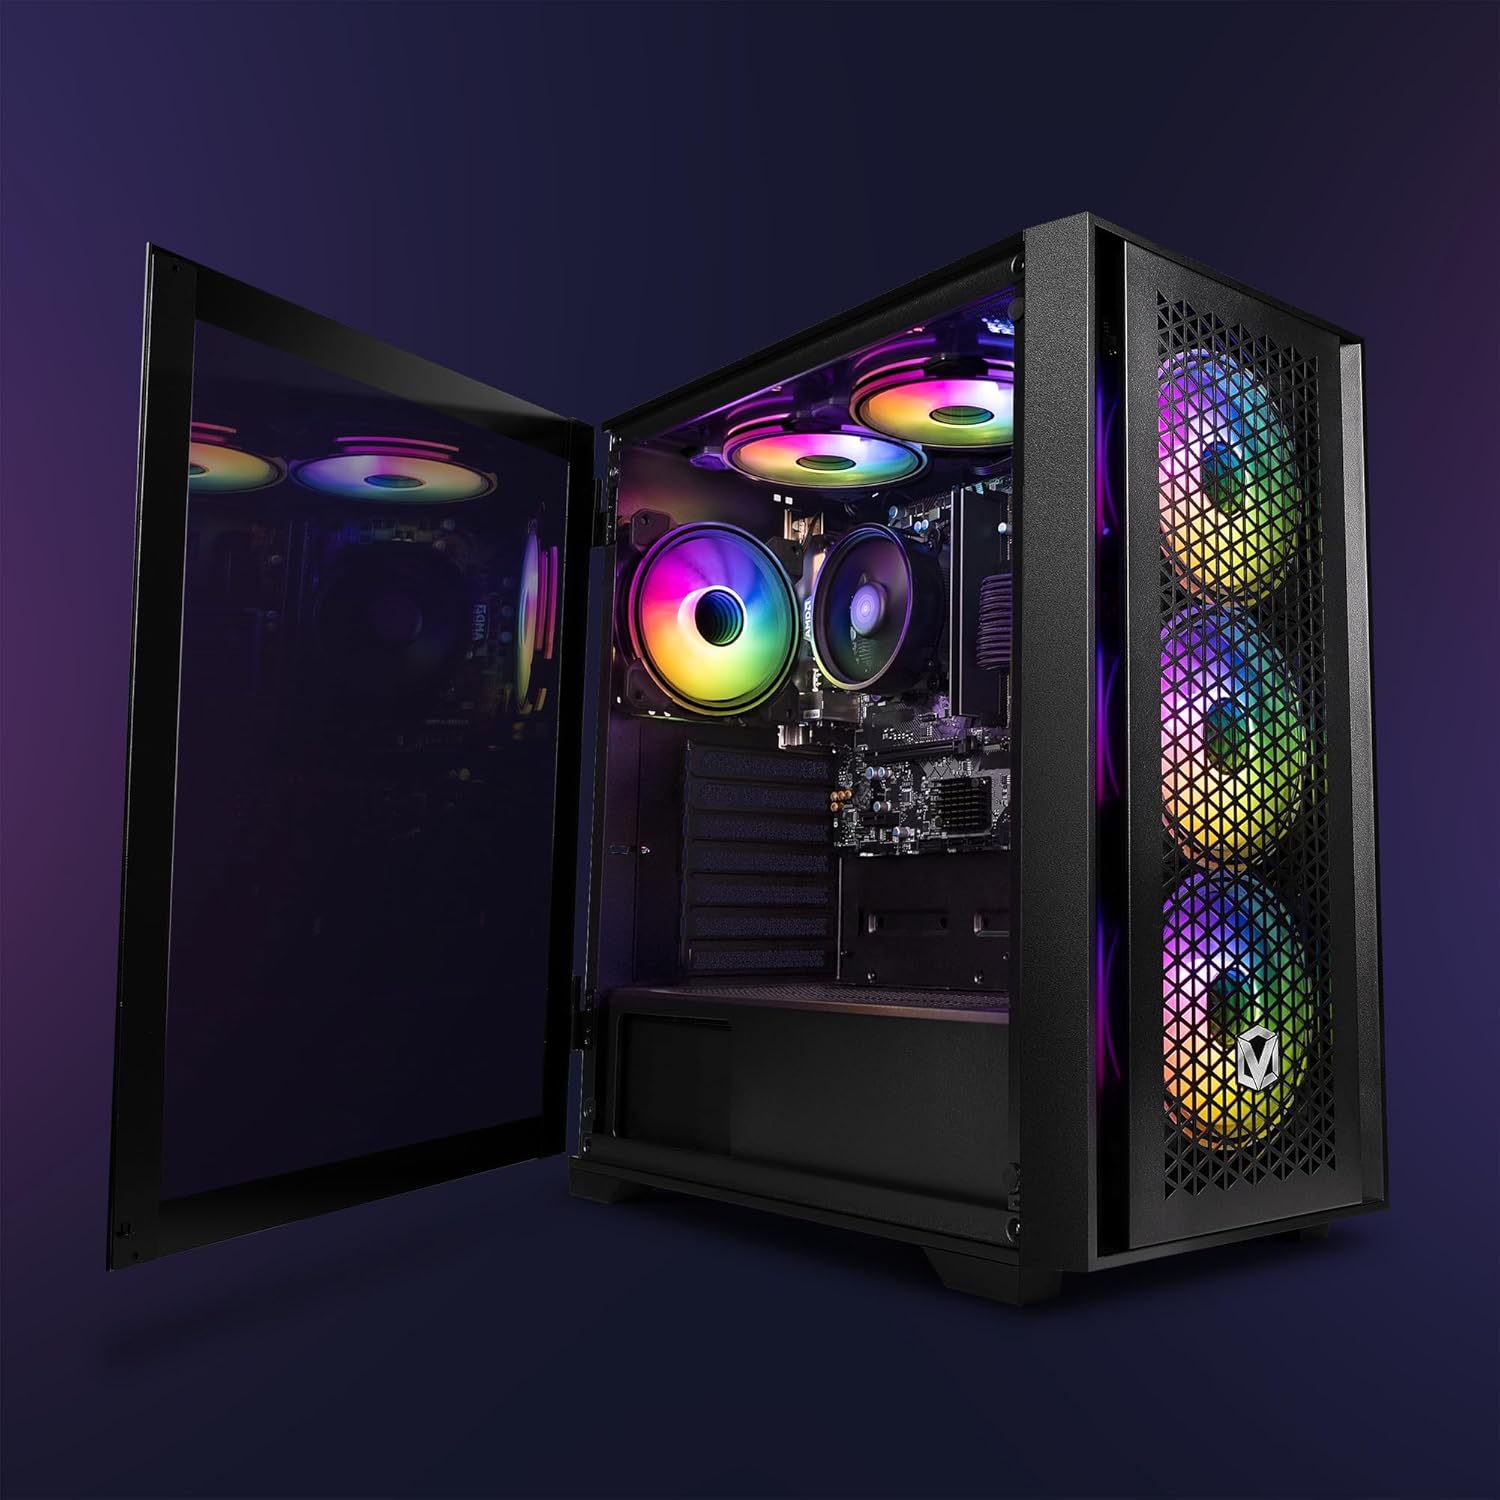
Image: The Vibox I-24 PC tower with its side panel open, showcasing the internal layout, RGB fans, and the AMD CPU cooler.
4.2 Windows 11 Overview
Your PC comes pre-installed with Windows 11 Home. Key features include:
- DirectStorage: For faster game load times.
- AutoHDR: Improves visuals in supported games.
- Game Mode: Optimizes CPU performance for gaming.
- Xbox Game Pass Integration: Seamless access to a library of games.
4.3 Gaming Performance
The integrated AMD Radeon Vega 8 Graphics Chip and AMD Ryzen 3 3200G Quad Core Processor provide solid performance for popular titles. Performance may vary based on game settings and resolution.
For an example of expected performance, consider the following:
| Game | Setting | Average FPS |
|---|---|---|
| Minecraft | High (28 Chunks) | 68 |
| Minecraft | High (12 Chunks) | 215 |
| Minecraft | High (6 Chunks) | 288 |
| Fortnite | High | 31 |
| Fortnite | Medium | 68 |
| Fortnite | Low | 113 |
| Counter-Strike 2 | High | 67 |
| Counter-Strike 2 | Medium | 90 |
| Counter-Strike 2 | Low | 105 |
| Grand Theft Auto V | Ultra | 41 |
| Grand Theft Auto V | High | 57 |
| Grand Theft Auto V | Normal | 63 |
| League of Legends | High | 90 |
| League of Legends | Medium | 96 |
| League of Legends | Low | 104 |
| Apex Legends | High | 35 |
| Apex Legends | Medium | 61 |
| Apex Legends | Low | 84 |
| Dota 2 | High | 80 |
| Dota 2 | Medium | 89 |
| Dota 2 | Fastest | 91 |
| World of Warcraft | High | 74 |
| World of Warcraft | Medium | 105 |
| World of Warcraft | Low | 137 |
| Rocket League | High Quality | 85 |
| Rocket League | Quality | 153 |
| Rocket League | Performance | 214 |
| Valorant | High | 84 |
| Valorant | Medium | 87 |
| Valorant | Low | 106 |
| Overwatch 2 | High | 44 |
| Overwatch 2 | Medium | 80 |
| Overwatch 2 | Lowest | 99 |
| Escape from Tarkov | High | 84 |
| Escape from Tarkov | Medium | 92 |
| Escape from Tarkov | Low | 100 |
Note: Individual game performance may vary. Frame rate can be affected by your monitor's refresh rate and settings.
4.4 Shutting Down
To properly shut down your PC, click the Start button in Windows, then click the Power icon, and select Shut down. Avoid powering off the system directly from the power button unless absolutely necessary to prevent data loss or system corruption.
5. Maintenance
5.1 Cleaning the PC
Regular cleaning helps maintain optimal performance and extends the lifespan of your PC.
- Exterior: Use a soft, damp cloth to wipe down the exterior surfaces. Avoid harsh chemicals.
- Dust Filters: The VTX-3 case features mesh panels and magnetic dust filters. Regularly remove and clean these filters to prevent dust buildup inside the case.
- Internal Components: Periodically use compressed air to clear dust from fans (CPU cooler, case fans, GPU fans) and heatsinks. Ensure the PC is powered off and unplugged before performing internal cleaning.

Image: A close-up view of the AMD CPU cooler, illustrating the importance of keeping internal components free from dust for efficient cooling.
5.2 Software Updates
Keep your Windows operating system and drivers updated to ensure security, stability, and optimal performance. Windows Update will automatically download and install critical updates. For graphics drivers, visit the AMD website to download the latest Radeon Vega 8 drivers.
Regularly check for updates for your games and other installed applications.
6. Troubleshooting
6.1 No Display on Monitor
- Ensure the monitor is powered on and its power cable is securely connected.
- Verify the HDMI cable is firmly connected to both the PC and the monitor.
- Check if the monitor's input source is set correctly (e.g., HDMI 1).
- Try connecting the monitor to a different display output on the PC, if available.
6.2 PC Not Powering On
- Ensure the power cable is securely connected to the PC and the wall outlet.
- Check the power switch on the back of the power supply unit (PSU) and ensure it is in the 'ON' position.
- Try a different power outlet.
6.3 Peripherals Not Responding
- Ensure USB cables for the keyboard, mouse, and WiFi adapter are securely plugged into the PC's USB ports.
- Try connecting the peripherals to different USB ports.
- Restart the PC.
- For audio issues, check sound settings in Windows and ensure the correct output device is selected.
6.4 System Slowdown or Freezing
- Close unnecessary applications running in the background.
- Check Task Manager (Ctrl+Shift+Esc) for high CPU, RAM, or disk usage.
- Ensure your system has sufficient free space on the 1TB NVMe SSD.
- Perform a system restart.
- Run a virus scan.
7. Specifications
| Component | Specification |
|---|---|
| Brand | Vibox |
| Model Number | I-24 |
| Series | VTX-3 Black |
| Processor | AMD Ryzen 3 3200G (4 Cores, 3.6 GHz base, up to 4.0 GHz boost) |
| Graphics | Integrated AMD Radeon Vega 8 Graphics (2 GB Shared RAM) |
| RAM | 16 GB DDR4 3200MHz (Dual-Channel) |
| Storage | 1 TB NVMe SSD |
| Operating System | Windows 11 Home |
| Monitor Size | 21.5 Inches (1920 x 1080 Resolution) |
| Connectivity | Wi-Fi (802.11n), Ethernet |
| USB Ports | 3 x USB 2.0, 3 x USB 3.0 |
| HDMI Ports | 1 |
| Power Supply | 250W |
| Dimensions (PC Tower) | 40 x 19 x 43 cm |
| Weight (PC Tower) | 12 kg |
8. Warranty and Support
Vibox provides dedicated UK support for their products. For any technical assistance, warranty claims, or further inquiries, please contact Vibox customer service.
Refer to your purchase documentation for specific warranty terms and conditions. Vibox has been manufacturing gaming PCs since 2009, emphasizing quality and customer satisfaction.
For more information, you may visit the official Vibox store on Amazon: Vibox Gaming Store


