
Introduction
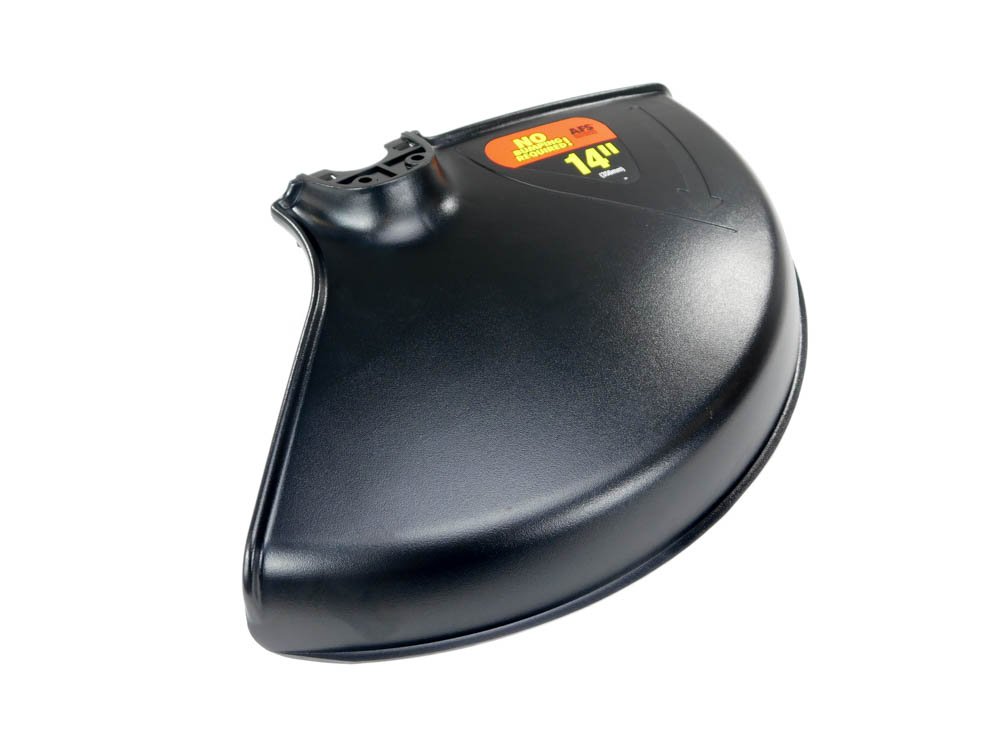
This manual provides essential information for the proper installation, operation, and maintenance of your BLACK+DECKER 47853500 Guard Assembly. This component is an Original Equipment Manufacturer (OEM) authorized replacement part designed for various BLACK+DECKER string trimmer models, including the GH1000 and GH1100 series. Please read these instructions thoroughly before attempting any installation or use to ensure safety and optimal performance.
Safety Information
WARNING: Always disconnect the power tool from its power source (unplug or remove battery) before performing any assembly, adjustments, or maintenance.
- Wear appropriate personal protective equipment (PPE), including safety glasses, gloves, and sturdy footwear, when working with power tools and their components.
- Ensure the work area is clean, well-lit, and free from obstructions.
- Keep children and bystanders away from the work area during installation and operation.
- Inspect the guard assembly for any damage before installation. Do not install a damaged part.
Setup and Installation
The 47853500 Guard Assembly is designed for straightforward replacement. Ensure you have the correct tools before beginning.
Tools Required:
- Allen wrench (size may vary by model)
- Screwdriver (if applicable for your model)
Installation Steps:
- Disconnect Power: Unplug the string trimmer from its power source or remove the battery pack.
- Remove Old Guard: Locate the screws or fasteners securing the old guard assembly to the trimmer head. Use the appropriate tool (e.g., Allen wrench) to remove these fasteners. Carefully detach the old guard.
- Inspect Mounting Area: Clean any debris or residue from the trimmer head's mounting area where the guard attaches.
- Position New Guard: Align the new 47853500 Guard Assembly with the mounting points on the trimmer head. Ensure it sits flush and correctly oriented.
- Secure New Guard: Reinsert the screws or fasteners removed in Step 2. Tighten them securely, but do not overtighten, as this can damage the plastic. Ensure the guard is firmly attached and does not wobble.
- Verify Installation: Gently tug on the guard to confirm it is securely fastened. Check that the line cutting blade (if integrated) is clear and unobstructed.
Operating the Guard Assembly
The guard assembly serves two primary functions:
- Operator Protection: It acts as a barrier to protect the operator from flying debris, such as grass clippings, small stones, and other objects that may be ejected by the rotating trimmer line.
- Line Trimming: Many guard assemblies, including the 47853500, feature an integrated blade designed to automatically cut the trimmer line to the optimal length as it extends from the spool. This ensures efficient cutting and prevents excessively long line from reducing motor efficiency.
Once installed, the guard operates passively during the use of the string trimmer. Always ensure the guard is in place and undamaged before starting the trimmer.
Maintenance
Regular inspection and cleaning will prolong the life of your guard assembly and ensure continued safety.
Inspection:
- Before each use, inspect the guard for cracks, chips, or any signs of damage.
- Check the line cutting blade for sharpness and ensure it is not bent or broken. A dull or damaged blade will not trim the line effectively.
- Verify that all mounting screws are tight and the guard is securely attached to the trimmer head.
Cleaning:
- After each use, disconnect the trimmer from its power source.
- Use a stiff brush or cloth to remove grass clippings, dirt, and debris from the guard assembly, especially around the line cutting blade.
- Avoid using harsh chemicals or solvents that could damage the plastic material.
If the guard assembly shows significant wear, cracking, or the line cutting blade is severely damaged, it should be replaced immediately to maintain safety and performance.
Troubleshooting
Guard Does Not Fit:
- Issue: The new guard assembly does not align with the mounting holes on your trimmer.
- Solution: Verify that your string trimmer model is compatible with the BLACK+DECKER 47853500 Guard Assembly. This part is designed for specific BLACK+DECKER models. Refer to your trimmer's original manual or the product specifications to confirm compatibility.
Trimmer Line Not Cutting Properly:
- Issue: The trimmer line is not being cut to the correct length by the guard's blade.
- Solution: Inspect the line cutting blade on the guard assembly. It may be dull, bent, or broken. If damaged, the guard assembly needs to be replaced. Ensure no debris is obstructing the blade.
Guard Feels Loose After Installation:
- Issue: The guard assembly moves or wobbles after installation.
- Solution: Recheck all mounting screws or fasteners. Ensure they are fully tightened. If the mounting points on the trimmer head are damaged, the trimmer itself may require service or replacement.
Specifications
| Feature | Detail |
|---|---|
| Part Number | 47853500 |
| Item Model Number | 47853500 |
| Brand | BLACK+DECKER |
| Item Weight | 6.6 ounces |
| Product Dimensions | 1 x 1 x 1 inches (Approximate, packaging may vary) |
| Item Package Quantity | 1 |
| Power Source | Manual (for installation, part for powered tool) |
| Compatibility | Various BLACK+DECKER string trimmer models (e.g., GH1000, GH1100) |
Warranty Information
As an Original Equipment Manufacturer (OEM) authorized part, the BLACK+DECKER 47853500 Guard Assembly typically carries a limited warranty against defects in materials and workmanship. Specific warranty terms and duration may vary. Please retain your proof of purchase. For detailed warranty information, refer to the documentation provided with your original BLACK+DECKER string trimmer or contact BLACK+DECKER customer support directly.
Support and Contact
If you encounter any issues not covered in this manual, require further assistance, or need to inquire about warranty claims, please contact BLACK+DECKER customer support.
BLACK+DECKER Official Website: www.blackanddecker.com
You may find contact numbers and support resources on their official website.