
Gre CPH14
Gre CPH14 pH Regulator with Peristaltic Pump
User Instruction Manual
1. Introduction
The Gre CPH14 Peristaltic Dosing Pump is designed to automatically stabilize and regulate the pH level of your swimming pool water. This ensures optimal water quality and enhances the efficiency of disinfection treatments. Its automatic regulation system simplifies chemical dosing, making pool maintenance easier and more effective.

Image 1.1: The Gre CPH14 pH Regulator system, including the main unit, pH probe, and calibration solutions.
2. Safety Information
Please read all safety instructions carefully before installation and operation. Failure to follow these instructions may result in injury or damage to the equipment.
- Ensure the power supply is disconnected before performing any installation or maintenance.
- Handle pH calibration solutions and pool chemicals with care. Wear appropriate personal protective equipment (PPE) such as gloves and eye protection.
- Install the unit in a dry, well-ventilated area, away from direct sunlight and extreme temperatures.
- Keep the device out of reach of children and pets.
- Do not attempt to repair the unit yourself. Contact qualified personnel for service.
3. Package Contents
Verify that all items listed below are present in your package:
- pH Controller Unit
- PVC Tube for Aspiration
- PEHD Tube (4x6 m) for Injection
- Mounting Screws
- Foot Valve (PVC)
- Injection Valve FPM (3/8" GAS)
- pH Probe
- Calibration Solutions (pH 7.02 and pH 4.00)

Image 3.1: The main pH controller unit, pH probe, and calibration solutions.
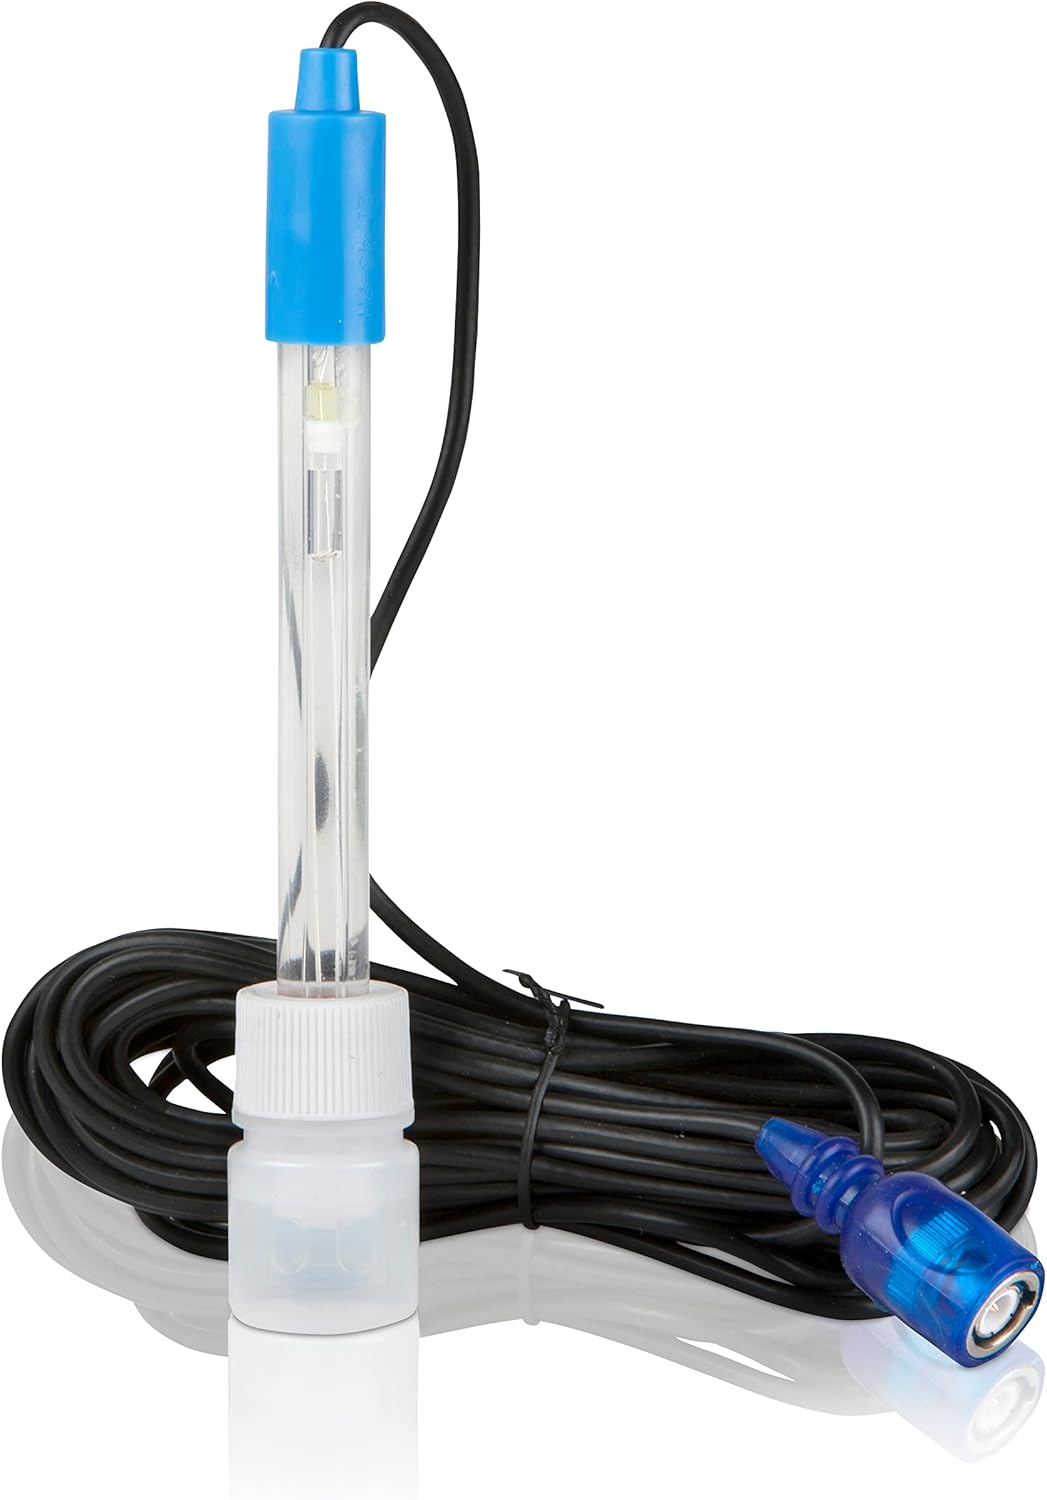
Image 3.2: Detailed view of the pH probe and its connecting cable.
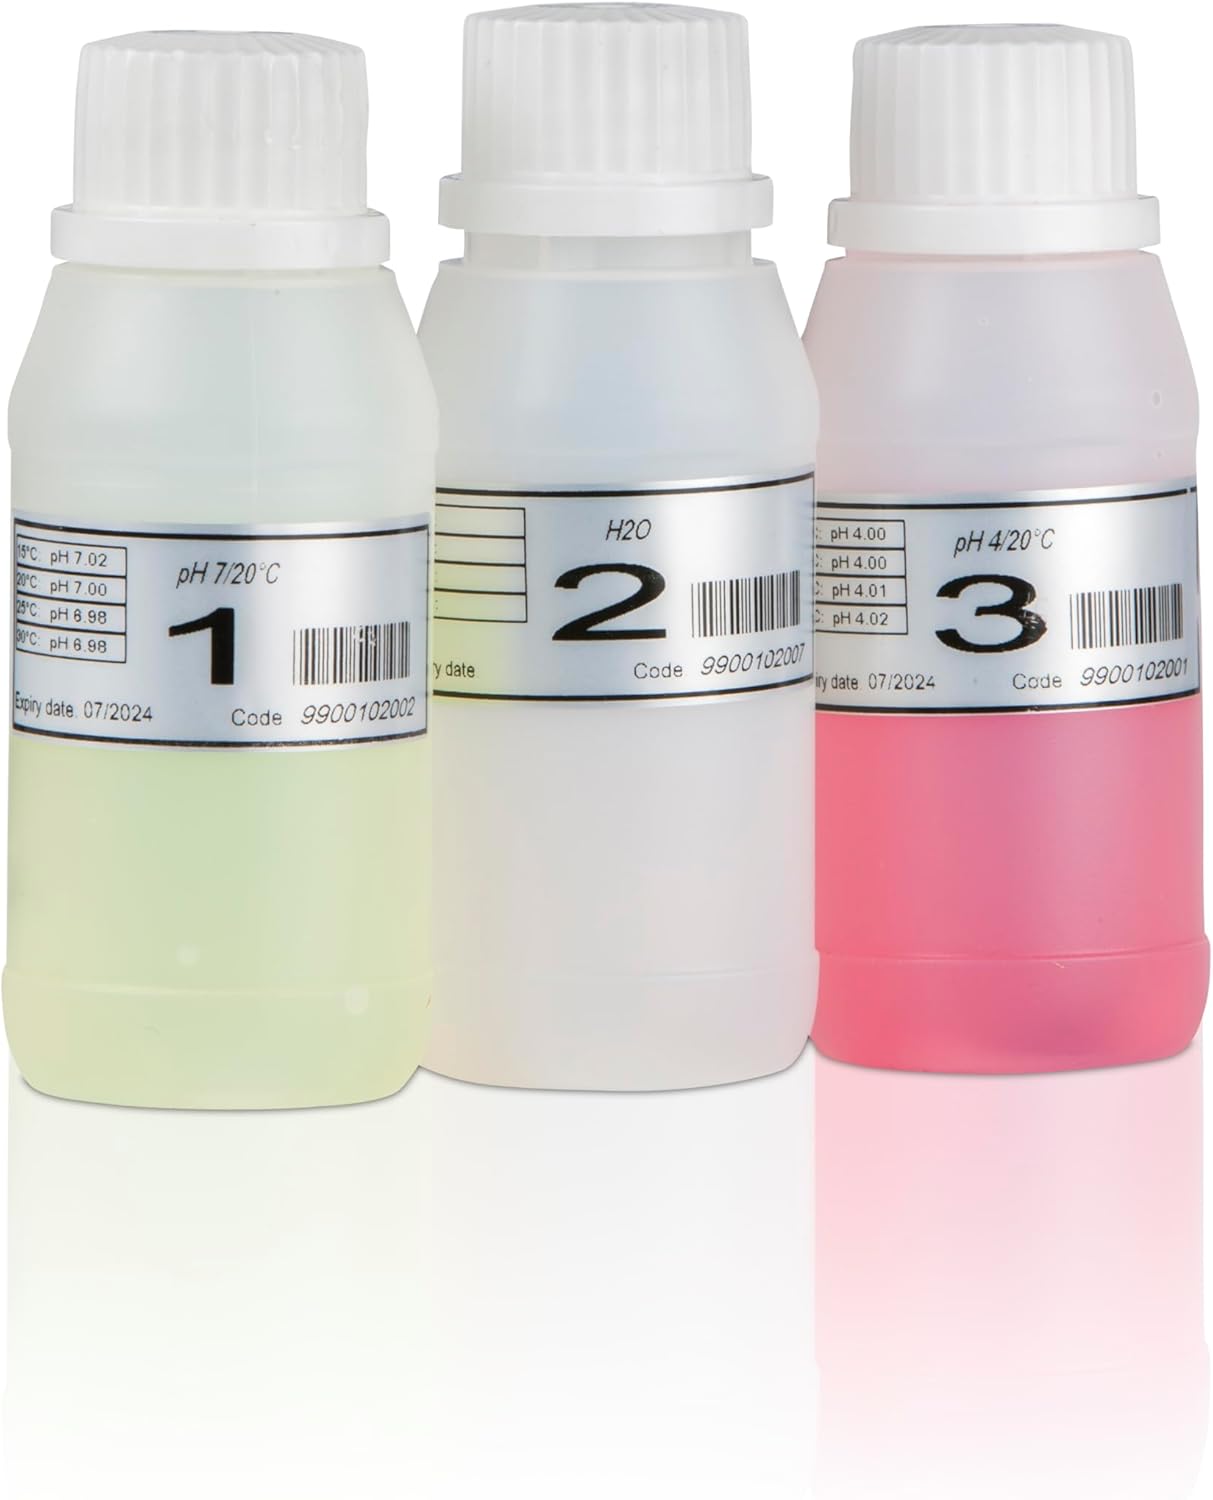
Image 3.3: The included pH calibration solutions (pH 7.02 and pH 4.00).

Image 3.4: The PVC aspiration tube and PEHD injection tube.

Image 3.5: The PVC foot valve and FPM injection valve.

Image 3.6: Mounting screws and saddle clamp for installation.
4. Setup and Installation
Proper installation is crucial for the optimal performance of your pH regulator. It is recommended to install this unit alongside a salt chlorinator, as salt electrolysis tends to increase water pH.
4.1 Mounting the Controller
- Choose a suitable location near your pool's filtration system, ensuring it is protected from direct weather exposure.
- Use the provided mounting screws to securely attach the pH controller unit to a vertical surface.

Image 4.1: Front view of the pH controller unit, showing the display and pump mechanism.
4.2 Connecting the Tubing and Valves
- Connect the PVC aspiration tube to the inlet port of the peristaltic pump on the controller.
- Attach the foot valve to the other end of the PVC aspiration tube and place it into your pH reducer chemical container.
- Connect the PEHD injection tube to the outlet port of the peristaltic pump.
- Install the FPM injection valve into your pool's return line (after the filter and heater, if applicable) using the saddle clamp. Ensure the valve is positioned to inject the pH reducer into the main water flow.
- Connect the PEHD injection tube to the injection valve.

Image 4.2: Close-up view of the peristaltic pump, showing the tubing connections.

Image 4.3: Detail of the connection ports for the pH probe and dosing tubes on the controller.
4.3 Connecting the pH Probe
- Carefully uncap the pH probe.
- Connect the pH probe cable to the designated port on the controller unit.
- Install the pH probe into the pool's circulation system, typically in a bypass line or a dedicated probe holder, ensuring it is constantly immersed in flowing water.
4.4 Calibrating the pH Probe
Accurate calibration is essential for precise pH readings.
- Prepare the calibration solutions (pH 7.02 and pH 4.00).
- Follow the specific calibration procedure outlined in the controller's display menu (refer to the "CAL ENTER" button on the unit). Typically, this involves rinsing the probe, immersing it in pH 7.02 solution, confirming the reading, then rinsing and immersing in pH 4.00 solution and confirming.
- Once calibrated, the probe is ready for use.
5. Operating Instructions
The Gre CPH14 automatically regulates pH levels. Once installed and calibrated, minimal user intervention is required.
- Power On: Connect the unit to a suitable power outlet. The display will illuminate.
- Set Target pH: Use the controller's buttons (e.g., "ESC", "SET") to navigate the menu and set your desired pH target value (typically between 7.2 and 7.6 for swimming pools).
- Automatic Operation: The controller will continuously monitor the pool's pH level via the probe. If the pH deviates from the set target, the peristaltic pump will automatically inject the pH reducer until the desired level is restored.
- Monitoring: Periodically check the display to ensure the pH is within the desired range.
6. Maintenance
Regular maintenance ensures the longevity and accuracy of your pH regulator.
- pH Probe Cleaning: Clean the pH probe regularly (e.g., monthly or as needed) to remove any buildup that may affect its accuracy. Use a soft cloth and a mild cleaning solution specifically designed for pH probes.
- pH Probe Re-calibration: Re-calibrate the pH probe periodically (e.g., every 3-6 months, or if readings appear inaccurate) using fresh calibration solutions.
- Check Chemical Levels: Ensure there is always sufficient pH reducer chemical in the container connected to the aspiration tube.
- Inspect Tubing: Periodically check the PVC and PEHD tubing for any signs of wear, cracks, or blockages. Replace if necessary.
- Winterization: During winter months or extended periods of non-use, disconnect the unit, drain all tubing, and store the controller and probe in a dry, frost-free environment.
7. Troubleshooting
| Problem | Possible Cause | Solution |
|---|---|---|
| Unit does not power on. | No power supply. | Check power connection and outlet. Ensure the power switch (if any) is ON. |
| pH reading is inaccurate or fluctuating. |
|
|
| Pump is not dosing chemical. |
|
|
| pH level not stabilizing. |
|
|
8. Specifications
| Model | CPH14 |
| Brand | Gre |
| Product Dimensions (L x W x H) | 15 x 12 x 16 cm (5.9 x 4.7 x 6.3 inches) |
| Weight | 1.6 kg (3.5 lbs) |
| Material Type | Polypropylene, PVC |
| Pump Flow Rate | 1.5 l/h |
| Power Consumption | 6 W |
| Product Benefits | Kills bacteria, increases pH (Note: This product primarily regulates pH, which indirectly supports disinfection and can help manage pH increases from other processes like salt chlorination). |
| UPC | 084120812590 |
9. Warranty and Support
Information regarding warranty coverage and customer support is typically provided with your purchase documentation. Please refer to the warranty card or contact information included in your product packaging for details on:
- Warranty period and terms.
- How to register your product.
- Contact details for technical support and service.
For further assistance, you may also visit the official Gre website or contact your retailer.
Related documentsCPH14


Ask a question about this manual
Ask about setup, troubleshooting, compatibility, parts, safety, or missing instructions. Manuals+ will review the question and use this page’s manual context to help answer it.