Introduction
The Ferve F85 Electric Voltage Tester is a reliable and essential tool designed for checking the electrical system of your vehicle. It allows for quick and accurate assessment of battery charge status and alternator performance, ensuring your vehicle's electrical components are functioning correctly. This manual provides comprehensive instructions for the safe and effective use of your Ferve F85 tester.
Safety Information
Always prioritize safety when working with electrical systems. Please read and understand all safety warnings before using the Ferve F85 tester.
- Ensure the vehicle's ignition is off before connecting or disconnecting the tester.
- Wear appropriate personal protective equipment, such as safety glasses and gloves.
- Do not use the tester if it appears damaged or if any wires are frayed.
- Avoid contact with hot engine parts or moving components.
- Keep the tester away from moisture and extreme temperatures.
- This device is designed for 12V vehicle electrical systems only. Do not use it on systems with different voltages.
Product Overview
The Ferve F85 Electric Voltage Tester consists of a main unit with indicator lights and two alligator clips for connection to the vehicle battery.
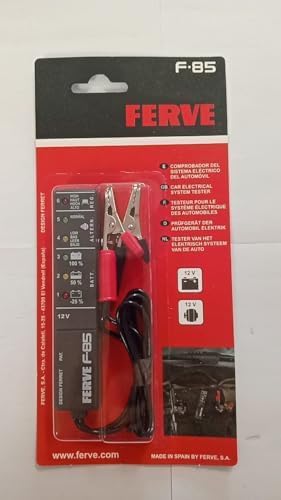
Figure 1: Front view of the Ferve F85 Electric Voltage Tester. This image shows the compact main unit with its indicator lights and the attached red and black alligator clips.

Figure 2: The Ferve F85 Electric Voltage Tester as packaged for retail. The packaging highlights the F-85 model number and the Ferve brand, along with multilingual descriptions of its function as a car electrical system tester.
Components:
- Main Unit: Contains the circuitry and LED indicators for displaying test results.
- Red Alligator Clip: Connects to the positive (+) terminal of the battery.
- Black Alligator Clip: Connects to the negative (-) terminal of the battery.
- Indicator Lights: LEDs on the main unit that illuminate to show battery charge level and alternator status.
Setup
The Ferve F85 is designed for ease of use and requires minimal setup.
- Ensure the vehicle's engine is off and the ignition is in the "OFF" position.
- Locate the vehicle's 12V battery.
- Identify the positive (+) and negative (-) terminals of the battery. The positive terminal is usually marked with a plus sign and is larger, while the negative terminal is marked with a minus sign.
Operating Instructions
Follow these steps to test your vehicle's battery and alternator:
Testing Battery Charge:
- With the engine off, securely attach the red alligator clip to the positive (+) battery terminal.
- Securely attach the black alligator clip to the negative (-) battery terminal.
- Observe the indicator lights on the Ferve F85 unit. The lights under the "BATT" section will illuminate to indicate the battery's charge level (e.g., 100%, 50%, -25%).
- Disconnect the clips from the battery after reading the results.
Testing Alternator Performance:
- Connect the red and black alligator clips to the positive (+) and negative (-) battery terminals as described above.
- Start the vehicle's engine.
- Observe the indicator lights under the "ALTERN" section. These lights will indicate the alternator's charging status (e.g., HIGH, NORMAL, LOW). A "NORMAL" indication suggests the alternator is functioning correctly.
- Turn off the engine and disconnect the clips from the battery after completing the test.
Note: Refer to your vehicle's service manual for specific voltage ranges for optimal battery and alternator performance.
Maintenance
To ensure the longevity and accuracy of your Ferve F85 Electric Voltage Tester, follow these simple maintenance guidelines:
- Cleaning: Wipe the unit with a soft, dry cloth after each use. Do not use abrasive cleaners or solvents.
- Storage: Store the tester in a cool, dry place, away from direct sunlight and extreme temperatures. Keep the clips clean and free of corrosion.
- Inspection: Periodically inspect the wires and clips for any signs of damage, such as cuts, fraying, or corrosion. If damage is found, discontinue use and consider replacement.
Troubleshooting
If you encounter issues while using your Ferve F85 tester, refer to the following common problems and solutions:
- No lights illuminate:
- Ensure the alligator clips are securely connected to the correct battery terminals (red to positive, black to negative).
- Check if the battery itself is completely dead. The tester requires some voltage from the battery to operate.
- Inspect the wires and clips for damage or corrosion that might prevent a proper connection.
- Inconsistent readings:
- Ensure the battery terminals are clean and free of corrosion. Clean them if necessary.
- Make sure the clips have a firm, direct contact with the battery terminals.
- Verify that the vehicle's engine is off when testing battery charge and running when testing alternator.
- Tester feels hot during use:
- Immediately disconnect the tester. This could indicate a short circuit or an incorrect connection. Re-evaluate your connection points and the vehicle's electrical system.
Specifications
| Attribute | Detail |
|---|---|
| Model Number | F85 |
| Manufacturer | Ferve |
| Style | Voltage Tester |
| Color | Red-Black |
| Power Source | Battery-Powered (from vehicle battery) |
| Certifications | CE, EN 61010-1, IEC 1010, IEC 61010-1:2000-1, IEC 61326, UKCA |
| Batteries Included | No |
| Batteries Required | No |
| Measurement Type | Voltage (for battery charge and alternator output) |
Warranty and Support
Specific warranty information and direct support contact details are not provided in the product data. For warranty claims, technical support, or further inquiries, please contact Ferve directly through their official website or authorized distributors. Always retain your proof of purchase.
You may find additional information and support at the manufacturer's website: www.ferve.com


