
1. Introduction
This manual provides essential information for the safe and effective operation, maintenance, and troubleshooting of your POWERPLUS POWX1110 Electric Planer. Please read these instructions carefully before using the tool and keep them for future reference. Proper use and care will ensure optimal performance and extend the life of your planer.
2. General Safety Instructions
Always observe basic safety precautions to reduce the risk of fire, electric shock, and personal injury. Familiarize yourself with all safety warnings and instructions provided with the product.
- Work Area Safety: Keep your work area clean and well-lit. Cluttered or dark areas invite accidents. Do not operate power tools in explosive atmospheres, such as in the presence of flammable liquids, gases, or dust.
- Electrical Safety: Power tool plugs must match the outlet. Never modify the plug in any way. Avoid body contact with earthed or grounded surfaces. Do not expose power tools to rain or wet conditions.
- Personal Safety: Always wear eye protection. Use hearing protection when operating noisy tools. Dress properly; avoid loose clothing or jewelry. Keep hair, clothing, and gloves away from moving parts.
- Tool Use and Care: Do not force the power tool. Use the correct power tool for your application. Disconnect the plug from the power source before making any adjustments, changing accessories, or storing power tools.
- Specific Planer Safety: Wait for the cutter to stop before setting the tool down. Keep hands away from the planing area. Ensure the workpiece is securely clamped.
For detailed safety information, refer to the official safety document available for download.
3. Product Overview and Components
The POWERPLUS POWX1110 is a powerful electric planer designed for efficient woodworking tasks such as planing, rebating, and chamfering wooden workpieces. It features a robust 900 Watt motor and a comfortable soft-grip handle for secure operation.

Figure 1: Side view of the POWERPLUS POWX1110 Electric Planer.
Included Components:
- POWERPLUS POWX1110 Electric Planer (900 Watt)
- Dust Bag
- Depth Stop
- Parallel Guide
- Wrench (8-10 mm)
- Carrying Toolbox

Figure 2: The electric planer and accessories stored in the included toolbox.
4. Setup
4.1 Attaching the Dust Bag
To collect wood chips and dust during operation, attach the provided dust bag to the dust extraction port on the side of the planer. Ensure it is securely fastened to prevent detachment during use.
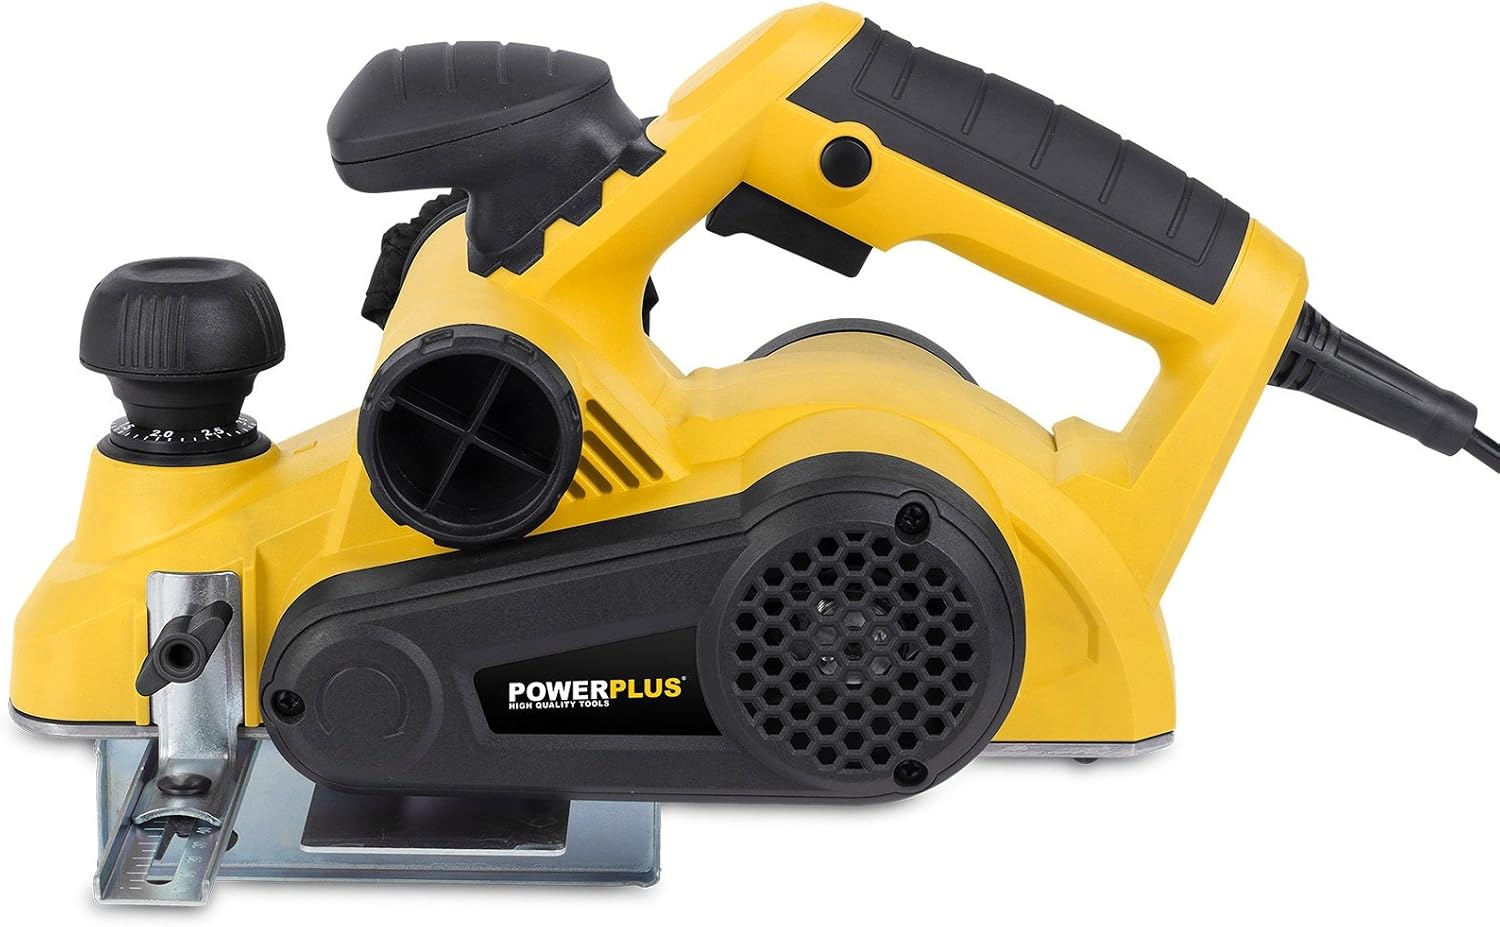
Figure 3: Planer with the dust bag correctly attached to the exhaust port.
4.2 Installing the Parallel Guide
For precise, straight planing along an edge, attach the parallel guide. Slide the guide into the designated slot on the planer base and secure it with the locking screw. Adjust the guide to the desired width from the blade.

Figure 4: Front view showing the parallel guide attached for accurate edge planing.
4.3 Adjusting Planing Depth
The planing depth can be adjusted using the front knob. Rotate the knob to set the desired depth, which is indicated on the scale. The maximum planing depth is 3 mm. Always ensure the tool is unplugged before making adjustments.

Figure 5: Top view illustrating the depth adjustment knob and scale.
5. Operating Instructions
5.1 Preparing the Workpiece
Ensure your workpiece is securely clamped to a stable surface. Mark the areas to be planed. Always check for nails, screws, or other foreign objects in the wood that could damage the blades.
5.2 Starting the Planer
Plug the planer into a suitable power outlet. Hold the planer firmly with both hands, ensuring a stable grip on the soft-grip handle. To start the tool, press the safety switch and then the trigger switch. The safety switch prevents accidental activation.
5.3 Planing Technique
Allow the motor to reach full speed before contacting the workpiece. Apply even pressure and move the planer smoothly across the wood surface. For best results, make several shallow passes rather than one deep pass. The self-retracting kickstand will protect the blades when the planer is not in use or when placed on a surface.

Figure 6: Proper two-hand grip during planing operation.
5.4 Stopping the Planer
Release the trigger switch to stop the planer. Wait for the blades to come to a complete stop before setting the tool down or performing any adjustments.
6. Maintenance
Regular maintenance ensures the longevity and safe operation of your electric planer. Always unplug the tool from the power source before performing any maintenance.
6.1 Cleaning
After each use, clean the planer thoroughly. Remove any wood chips or dust from the dust extraction port, blade area, and ventilation openings. Use a soft brush or compressed air. Do not use solvents or abrasive cleaners.
6.2 Blade Replacement
Dull or damaged blades can affect performance and safety. Refer to the detailed instructions in the full PDF manual for safe blade replacement procedures. Always use genuine POWERPLUS replacement blades.
6.3 Storage
Store the planer in its carrying toolbox in a dry, secure location, out of reach of children. Ensure the power cord is neatly coiled and not kinked.
7. Troubleshooting
This section addresses common issues you might encounter with your electric planer.
| Problem | Possible Cause | Solution |
|---|---|---|
| Planer does not start | No power supply; Safety switch not engaged; Damaged power cord | Check power connection; Ensure safety switch is pressed before trigger; Inspect power cord for damage (replace if necessary) |
| Poor planing quality (rough surface, uneven cuts) | Dull or damaged blades; Incorrect planing depth; Too fast feed rate | Replace blades; Adjust planing depth; Reduce feed rate |
| Excessive vibration or noise | Loose components; Damaged blades; Motor issue | Check all fasteners; Replace blades; Contact customer support if motor issue is suspected |
| Dust bag not collecting chips effectively | Dust bag full; Dust port clogged; Dust bag not properly attached | Empty dust bag; Clear dust port; Re-attach dust bag securely |
If you encounter problems not listed here or if solutions do not resolve the issue, please contact POWERPLUS customer support.
8. Technical Specifications
| Specification | Value |
|---|---|
| Brand | POWERPLUS |
| Model Number | POWX1110 |
| Power Input | 900 Watt |
| Voltage | 230-240 V, 50 Hz |
| No-load Speed | 16,000 RPM |
| Planing Width | 82 mm |
| Max. Planing Depth | 3 mm |
| Cable Length | Approx. 3 m |
| Weight | 7.72 lbs (approx. 3.5 kg) |
| Material (Housing) | Plastic (Yellow) |
9. Warranty and Support
The POWERPLUS POWX1110 Electric Planer comes with a 3-year manufacturer's warranty from the date of purchase. This warranty covers defects in materials and workmanship under normal use. It does not cover damage resulting from misuse, abuse, unauthorized modifications, or normal wear and tear.
For warranty claims, technical support, or to purchase replacement parts, please contact your POWERPLUS retailer or visit the official POWERPLUS website. Please have your proof of purchase and the product model number (POWX1110) ready when contacting support.
Additional resources, including a detailed user manual and safety information, are available in PDF format:
