Product Overview
The 1byone Wireless Driveway Alert System provides a solution to detect movement and alert you when someone enters your property. This system includes one infrared motion sensor and two plug-in receivers. When motion is detected, the Passive Infrared (PIR) sensor transmits a wireless signal to the receiver, which then alerts you via a chime, alarm tone, or silent LED flash.

Figure 1: 1byone Wireless Driveway Alert System components.
Box Contents
- 1 x PIR Transmitter (Infrared Motion Sensor)
- 2 x Receivers (Plug-in Units)
- 1 x Instruction Manual (this document)
- 4 x Wall Plugs
- 4 x Screws
Setup Instructions
1. Install Batteries in PIR Sensor
The PIR Transmitter requires 3 x 1.5V AAA batteries (not included). Open the battery compartment on the back of the sensor and insert the batteries, ensuring correct polarity.
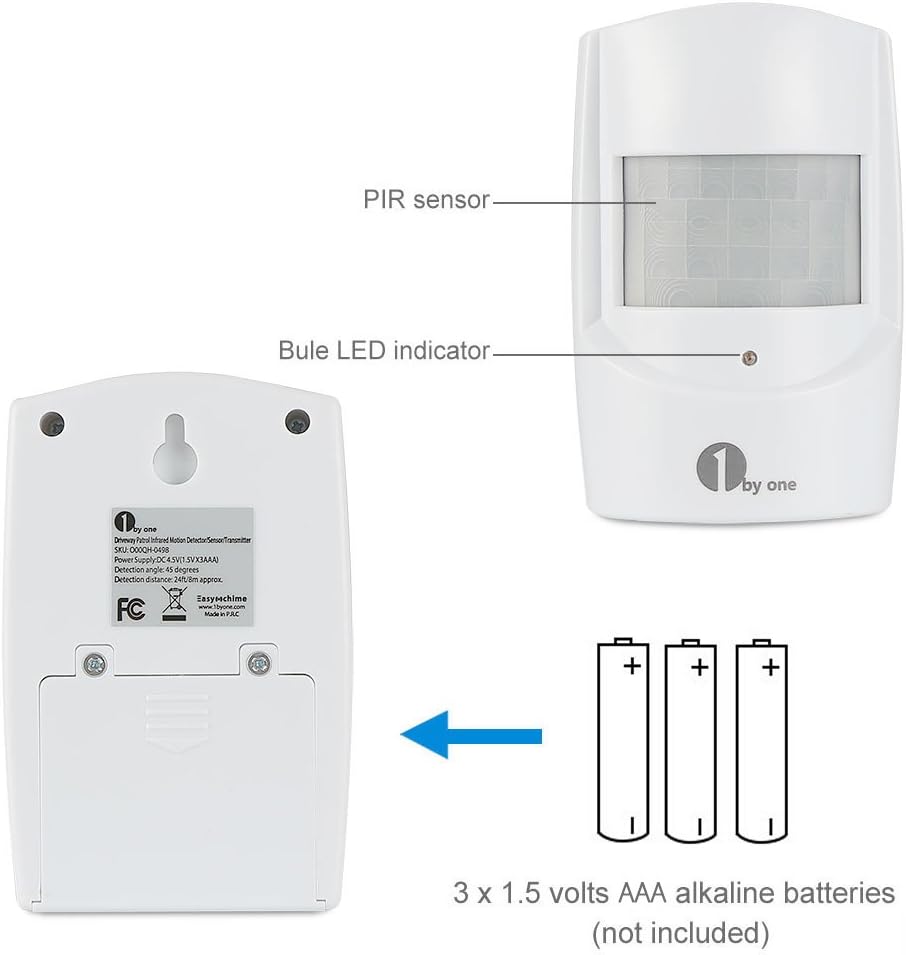
Figure 2: PIR Sensor battery installation. Insert 3 x 1.5V AAA alkaline batteries (not included).
2. Power On the Receivers
Plug each receiver into a standard AC power outlet. The receivers can also be powered by 3 x 1.5V C batteries (not included) for portable use.
3. Pairing the Sensor and Receivers (Code Match)
The sensor and receivers are typically pre-paired. If pairing is needed or if you are adding additional sensors/receivers:
- Ensure the receiver is powered on.
- Press the "Code match button" on the receiver (refer to Figure 3 for location). The receiver will enter pairing mode, indicated by an LED flash or sound.
- Wave your hand in front of the PIR sensor to trigger it.
- The receiver will confirm successful pairing with a chime or LED flash. Repeat this process for each receiver.

Figure 3: Receiver controls, including the Code match button.
4. Mounting the PIR Sensor
Select a suitable location for the PIR sensor. Use the provided wall plugs and screws to securely mount the sensor. Consider the following for optimal performance and to avoid false alarms:
- Avoid Direct Sunlight: Do not mount the sensor in direct sunlight, as moving heat sources can trigger the PIR.
- Protected Location: When installing outdoors, choose a shady, protected place with minimal temperature fluctuations.
- Material Considerations: Avoid mounting on UPVC or metal doorframe surfaces, which may reduce the wireless transmission range.
- Detection Range: The motion detecting range is 5-8 meters (16-26 feet). Position the sensor to cover the desired area effectively.
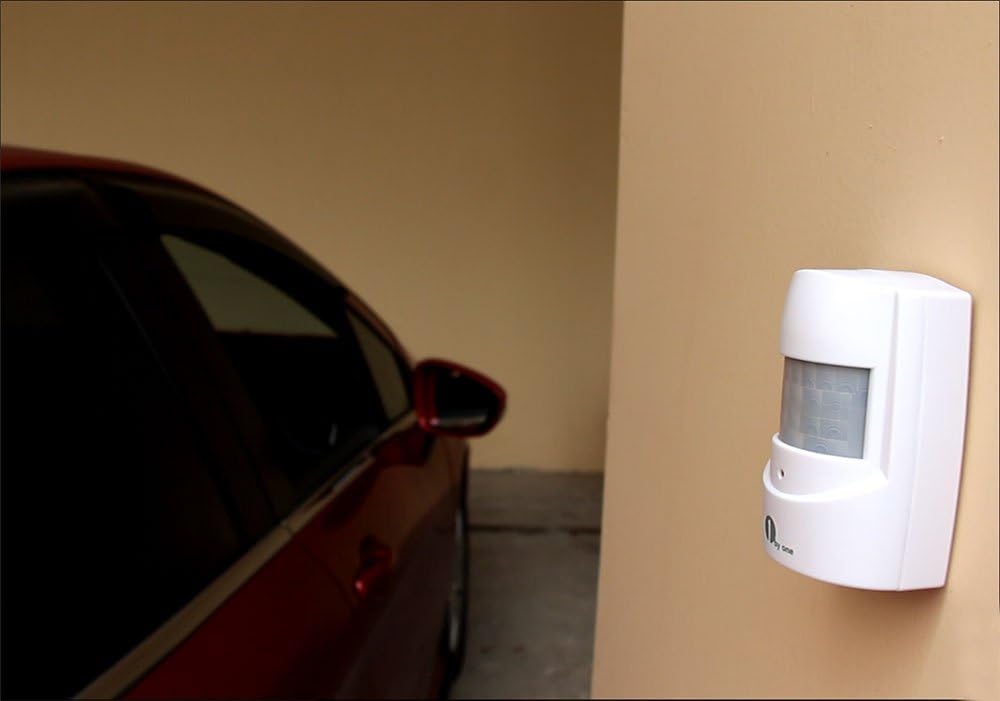
Figure 4: Example of PIR sensor mounting in a sheltered area.
Operating Instructions
Receiver Controls
Refer to Figure 3 for the location of the following controls on the receiver:
- Volume Button: Press to adjust the receiver's alert volume.
- Melody Selector: Press to cycle through the available chime melodies. There are 36 chime tones.
- Bell-and-LED Switch: This switch allows you to select the alert mode:
- Chime/Alarm + LED: The receiver will sound a chime or alarm and flash its LED when motion is detected.
- Silent LED Flash Only: The receiver will only flash its LED, providing a silent alert. This is useful for environments where sound alerts are not desired, such as for napping children or individuals with hearing impairments.
Detection and Alert
When the PIR sensor detects motion within its 5-8 meter (16-26 feet) range, it sends a wireless signal to the paired receiver(s). The receiver(s) will then activate according to the selected alert mode (chime/alarm, LED flash, or both).
The operating range between the sensor and receiver is up to 100 meters (328 feet) in open areas. Environmental factors and obstacles may affect this range. The receiver can pair with up to 50 sensors.

Figure 5: System features and operating range illustration.
Maintenance
Battery Replacement
Replace the 3 x AAA batteries in the PIR sensor when the detection range decreases or the sensor stops transmitting signals reliably. Always use fresh alkaline batteries for optimal performance.
Cleaning
Wipe the sensor and receiver with a soft, dry cloth. Do not use abrasive cleaners or solvents, as these may damage the units.
Troubleshooting
- No Detection or Reduced Range:
- Check PIR sensor batteries and replace if necessary.
- Ensure the sensor is not mounted on UPVC or metal surfaces.
- Verify the sensor and receiver are within the 100m (328ft) operating range.
- Minimize obstacles between the sensor and receiver.
- Re-pair the sensor and receiver (refer to "Pairing the Sensor and Receiver" section).
- False Alarms:
- Relocate the PIR sensor away from direct sunlight or areas with rapid temperature changes (e.g., near vents, large reflective surfaces).
- Ensure the sensor is not in a location affected by strong winds that could move objects within its detection zone.
- Adjust the sensor's angle to avoid detecting unwanted movement (e.g., small animals).
- Receiver Not Responding:
- Ensure the receiver is properly plugged into a working power outlet or has fresh C batteries installed.
- Check if the sensor's batteries are depleted.
- Attempt to re-pair the sensor and receiver.
Specifications
| Power Supply (Receiver) | DC 6 V or 1.5 V C Battery x 3 (not included) |
| Power Supply (PIR Transmitter) | DC 4.5 V (1.5 V AAA Battery x 3) (not included) |
| Motion Detecting Range | 5 - 8 m (16-26 ft) |
| Operating Range (Sensor to Receiver) | Up to 100 m (328 ft) in open areas |
| Ring Volume | ≥100dB (within 0.5 m / 1.6 ft) |
| Number of Chime Tones | 36 |
| Model Number | O00QH-0498 |
| Product Dimensions | 1.7 x 3 x 4.3 inches (PIR Transmitter) |
| Item Weight | 11.7 ounces (total package) |
Warranty and Support
This 1byone product is covered by a 24-month warranty from the date of purchase. For any issues or support inquiries, please refer to the contact information provided with your purchase documentation or visit the official 1byone website.


