1. Introduction
This manual provides essential information for the safe and effective operation, setup, and maintenance of your Metabo W12-125 Quick Angle Grinder. Please read all instructions carefully before using the tool to ensure user safety and optimal performance. Keep this manual for future reference.
2. General Safety Instructions
WARNING: Read all safety warnings, instructions, illustrations, and specifications provided with this power tool. Failure to follow all instructions listed below may result in electric shock, fire, and/or serious injury.
2.1 Work Area Safety
- Keep work area clean and well lit. Cluttered or dark areas invite accidents.
- Do not operate power tools in explosive atmospheres, such as in the presence of flammable liquids, gases, or dust. Power tools create sparks which may ignite the dust or fumes.
- Keep children and bystanders away while operating a power tool. Distractions can cause you to lose control.
2.2 Electrical Safety
- Power tool plugs must match the outlet. Never modify the plug in any way.
- Avoid body contact with earthed or grounded surfaces, such as pipes, radiators, ranges, and refrigerators. There is an increased risk of electric shock if your body is earthed or grounded.
- Do not expose power tools to rain or wet conditions. Water entering a power tool will increase the risk of electric shock.
2.3 Personal Safety
- Always wear eye protection. Use safety glasses, goggles, or a face shield.
- Wear hearing protection when operating power tools for extended periods.
- Dress properly. Do not wear loose clothing or jewelry. Keep your hair and clothing away from moving parts.
- Stay alert, watch what you are doing, and use common sense when operating a power tool.
2.4 Angle Grinder Specific Safety
- Always use the guard provided with the tool. Ensure it is securely attached and positioned for maximum safety.
- Use only grinding wheels and accessories that are rated for the speed of your grinder and are correctly sized.
- Inspect discs for damage before each use. Do not use chipped, cracked, or otherwise damaged discs.
- Hold the tool firmly with both hands during operation.
- Be aware of kickback. The Metabo S-Automatic safety slip clutch helps prevent kickback if a disc jams, but proper handling is still crucial.
- Do not grind or cut near flammable materials. Sparks generated can cause fires.
3. Product Overview
The Metabo W12-125 Quick Angle Grinder is a powerful tool designed for grinding, cutting, deburring, and metal removal. It features a robust Metabo LongLife motor and user-friendly design elements.
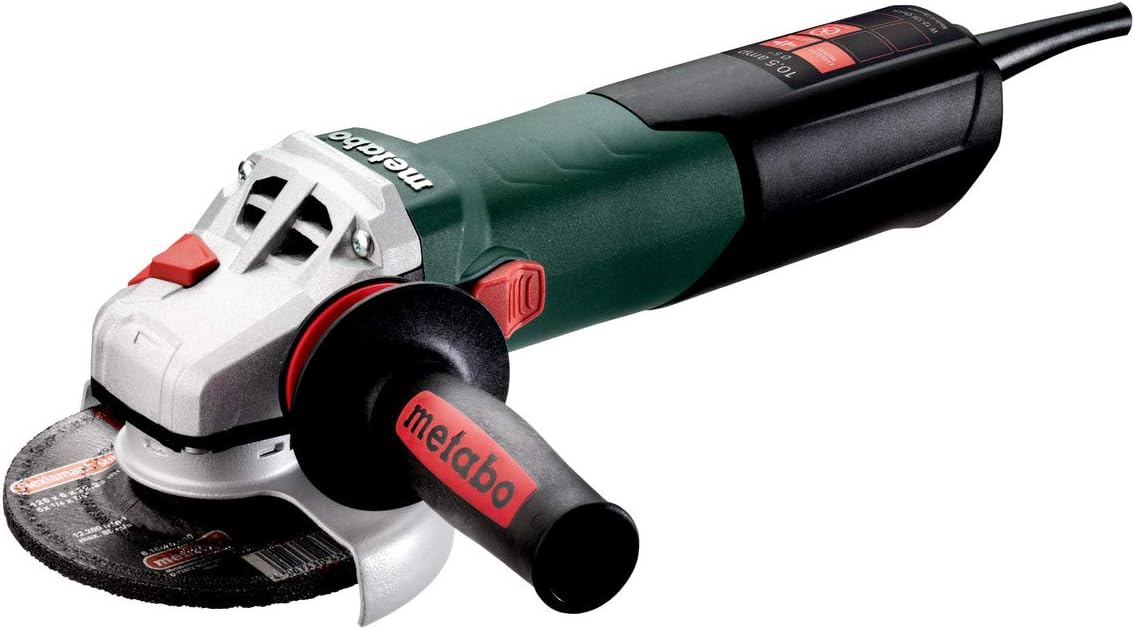
Figure 1: Metabo W12-125 Quick Angle Grinder with side handle and grinding disc attached.
Key Features:
- Metabo LongLife Motor: Provides increased torque for quicker material removal and higher overload capacity.
- AC/DC Operation: Versatile power source compatibility.
- Metabo S-Automatic Safety Slip Clutch: Helps maintain control and reduces kickback if the accessory jams.
- Metabo Quick System: Enables fast, tool-free disc changes.
- Tool-Free Adjustable Guard: Features 7 locking positions for quick and easy adjustment.
- Lock-On Sliding Switch: For continuous operation.
4. Setup
4.1 Attaching the Guard
- Ensure the grinder is unplugged from the power source.
- Align the guard with the grinder's collar.
- Slide the guard into position until it clicks securely. The guard is tool-free adjustable and can be rotated to one of 7 locking positions for optimal protection.
4.2 Changing Grinding Discs (Metabo Quick System)
The Metabo Quick system allows for rapid, tool-free disc changes.

Figure 2: Pressing the spindle lock button to prepare for disc change.
- Unplug the grinder.
- Press and hold the spindle lock button.
- Rotate the M-Quick flange nut counter-clockwise by hand until it loosens.
- Remove the old grinding disc and the M-Quick flange nut.
- Place the new grinding disc onto the inner support flange, ensuring it is centered.
- Re-attach the M-Quick flange nut and tighten it clockwise by hand until secure. No additional tools are required.

Figure 3: Hands demonstrating the quick, tool-free disc change process.
4.3 Attaching the Side Handle
The side handle (Metabo VibraTech - MVT) can be screwed into either side of the gear housing for left or right-handed operation, providing improved control and reduced vibration.
5. Operating Instructions
5.1 Powering On/Off
- To turn on: Slide the lock-on switch forward until it engages.
- To turn off: Press the rear part of the sliding switch to disengage it.
5.2 Grinding and Cutting Techniques
Always ensure the workpiece is securely clamped. Hold the grinder firmly with both hands. Allow the disc to reach full speed before contacting the workpiece.

Figure 4: Worker performing grinding operations on a metal structure.
- Grinding: Apply light, even pressure. Move the grinder smoothly across the surface. Avoid excessive pressure, which can overheat the disc and motor.
- Cutting: Use a cutting disc. Position the guard to deflect sparks away from you. Make straight cuts by guiding the disc along the desired line. Do not twist or bend the cutting disc.

Figure 5: Worker performing cutting operations on metal, with sparks visible.
5.3 S-Automatic Safety Slip Clutch
The integrated S-Automatic safety slip clutch is designed to disengage the drive if the grinding disc jams. This helps to prevent dangerous kickback and protects the user and the tool. If the clutch activates, release the switch immediately, clear the jam, and then restart the tool.
6. Maintenance
Regular maintenance ensures the longevity and safe operation of your Metabo W12-125 Quick Angle Grinder.
6.1 Cleaning
- Always unplug the tool before cleaning.
- Regularly clean the ventilation slots to prevent overheating. Use compressed air if available.
- The rear of the grinder features a dust filter to protect the motor from abrasive particles. Periodically clean this filter.

Figure 6: Rear view of the grinder, highlighting the dust filter for maintenance.
6.2 Inspection
- Inspect the power cord for any damage (cuts, fraying). Replace damaged cords immediately.
- Check the guard for cracks or damage. Ensure it is securely attached.
- Examine the inner support flange and M-Quick flange nut for wear or damage.
6.3 Storage
Store the grinder in a dry, secure location out of reach of children. Protect it from moisture and extreme temperatures.
7. Troubleshooting
| Problem | Possible Cause | Solution |
|---|---|---|
| Grinder does not start | No power supply; Damaged cord; Faulty switch | Check power outlet and cord; Contact authorized service center if cord or switch is faulty. |
| Excessive vibration | Damaged or unbalanced disc; Loose flange nut | Replace disc; Ensure flange nut is securely tightened. |
| Tool stops during operation (S-Automatic clutch activated) | Disc jammed in workpiece | Release switch, unplug tool, clear jam, restart. Reduce pressure during operation. |
| Overheating | Blocked ventilation slots; Excessive load | Clean ventilation slots and dust filter; Reduce pressure and allow tool to cool. |
8. Specifications
Technical data for the Metabo W12-125 Quick Angle Grinder.

Figure 7: Technical drawing with key dimensions of the Metabo W12-125 Quick Angle Grinder.
| Specification | Value |
|---|---|
| Brand | Metabo |
| Model Number | W 12-125 Quick |
| Power Source | Corded Electric (AC/DC compatible) |
| Voltage | 120 Volts |
| Wattage | 1250 watts |
| Maximum Rotational Speed | 11000 RPM |
| Disc Size | 5 inches |
| Item Weight | 1.6 ounces (tool only) |
| Product Dimensions | 12.4 x 2.88 x 12 inches |
| Material | Metal |
| Included Components | Angle Grinder, Guard, Inner support flange, M-Quick flange nut, Side handle Metabo VibraTech (MVT) |
9. Warranty and Support
Metabo products are manufactured to high-quality standards. For information regarding warranty coverage, service, or technical support, please refer to the warranty card included with your product or visit the official Metabo website. Keep your purchase receipt as proof of purchase for any warranty claims.


