1. Introduction
This manual provides detailed instructions for the safe and efficient operation of your Crenova XPE350 Mini Portable Projector. Please read this manual thoroughly before using the projector and retain it for future reference. The Crenova XPE350 is designed for home and backyard theater use, offering a compact and portable solution for displaying media from various sources.
2. Product Overview
The Crenova XPE350 is a mini portable projector featuring a 480x320 resolution and 150 lumens brightness. Its compact design makes it suitable for various environments. Below are key components and features.
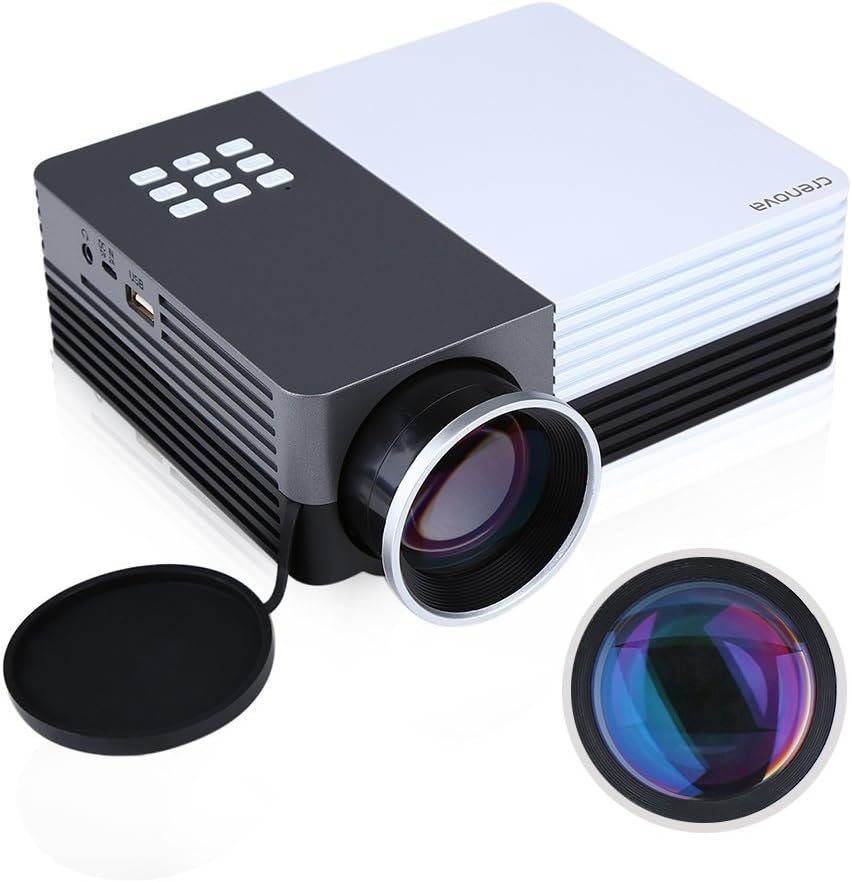
Figure 2.1: Crenova XPE350 Mini Portable Projector. This image shows the overall design of the projector, highlighting its compact form factor and front lens.

Figure 2.2: The Crenova XPE350 projector held in a hand, demonstrating its compact and portable size. A close-up inset highlights the glass lens, indicating clear image projection.
2.3 Package Contents
Upon unpacking, verify that all items listed below are present and in good condition:
- Crenova XPE350 Mini Portable Projector
- Remote Control
- AC Power Adapter
- AV Cable
- User Manual (this document)

Figure 2.3: Contents of the Crenova XPE350 Projector package. This image displays the projector, remote control, power adapter, AV cable, and the printed user manual.
2.4 Projector Components
Familiarize yourself with the various parts of your projector:
- Lens: Projects the image onto the screen.
- Function Buttons: Control basic projector functions.
- Vents: For heat dissipation. Ensure they are not obstructed.
- Input Ports: VGA, HDMI, AV, USB, SD Card Slot.
- Audio Output: Headphone jack.
- Keystone Adjustment: Corrects trapezoidal image distortion.
- Power Interface: Connects to the AC power adapter.

Figure 2.4: Close-up view of the projector's function buttons, lens, and ventilation vents. These are essential for basic control and maintaining optimal operating temperature.

Figure 2.5: Detailed view of the Crenova XPE350 projector's various input and output ports, including VGA, HDMI, AV, USB, headphone jack, mobile power input, SD card slot, and power interface. Also visible is the keystone adjustment dial.
3. Setup
3.1 Power Connection
- Connect the AC power adapter to the "Power Interface" port on the projector.
- Plug the other end of the power adapter into a suitable electrical outlet.
- The power indicator light on the projector will illuminate.
3.2 Connecting Input Sources
The Crenova XPE350 supports various input sources. Choose the appropriate connection method for your device:

Figure 3.1: Diagram illustrating various devices that can be connected to the Crenova XPE350 projector, including laptops, desktop computers, DVD players, game consoles, speakers, mobile hard disks, USB drives, SD cards, digital cameras, tablet PCs, and TV set-top boxes.
- HDMI: For high-definition digital video and audio from devices like laptops, game consoles, or streaming sticks.
- VGA: For connecting to computers with a VGA output.
- AV: For connecting older devices using the included AV cable (e.g., DVD players, some game consoles).
- USB: For playing media files directly from a USB flash drive.
- SD Card: For playing media files directly from an SD memory card.
- MHL (Mobile High-Definition Link): Some smartphones and tablets with MHL-out function can connect via HDMI for screen mirroring. Note: Most Android smartphones do not support MHL function.

Figure 3.2: Illustration of the MHL (Mobile High-Definition Link) feature, showing how a tablet and smartphone can mirror their screens to the projector. This feature requires the source device to support MHL-out.
3.3 Positioning the Projector
Place the projector on a stable, flat surface. Ensure there is adequate ventilation around the projector to prevent overheating. The distance from the screen will determine the image size.
4. Operating Instructions
4.1 Powering On/Off
- To Power On: Press the power button on the projector or the remote control. The projector lamp will illuminate.
- To Power Off: Press the power button again. The projector will shut down.
4.2 Adjusting Image Quality
- Focus Adjustment: Rotate the lens ring (refer to Figure 2.4) until the projected image is clear and sharp.
- Keystone Correction: Use the keystone adjustment dial (refer to Figure 2.5) to correct trapezoidal distortion if the projector is not perfectly perpendicular to the screen.
4.3 Selecting Input Source
After connecting your desired input device, press the "Source" button on the remote control or the projector's function panel to cycle through available input options (HDMI, VGA, AV, USB, SD Card) and select the correct one.
4.4 Media Playback (USB/SD Card)
Insert a USB flash drive or SD card into the respective port. The projector's interface will typically prompt you to select the media type (e.g., Photo, Music, Movie, Text) for playback. Navigate using the remote control's arrow keys and "OK" button.
5. Maintenance
5.1 Cleaning the Lens
Gently wipe the projector lens with a soft, lint-free cloth specifically designed for optical surfaces. Do not use abrasive cleaners or excessive force, as this can scratch the lens.
5.2 Ventilation
Ensure the projector's ventilation vents (refer to Figure 2.4) are clear of obstructions to allow for proper airflow. Blocked vents can lead to overheating and reduced lamp life.
5.3 Lamp Life
The Crenova XPE350 projector features a long-life lamp, estimated at 20,000 hours under normal operating conditions, thanks to its SmartEco technology.

Figure 5.1: Illustration highlighting the Crenova XPE350 projector's long lamp life of 20,000 hours, supported by SmartEco technology, indicating energy efficiency and durability.
6. Troubleshooting
- No Power:
- Ensure the power adapter is securely connected to both the projector and a working electrical outlet.
- Check if the power indicator light is on.
- No Image:
- Verify that the correct input source is selected (HDMI, VGA, AV, USB, SD).
- Check all cable connections between the projector and the source device.
- Ensure the source device is powered on and outputting a signal.
- Blurry Image:
- Adjust the focus ring on the lens until the image is sharp.
- Ensure the projection surface is flat and the projector is at an optimal distance.
- Image is Trapezoidal:
- Use the keystone adjustment dial to correct the image shape.
- Position the projector as perpendicular to the screen as possible.
- No Sound:
- Check the volume settings on both the projector and the source device.
- If using external speakers, ensure they are properly connected to the headphone jack and powered on.
- For HDMI connections, ensure the source device is sending audio.
- Remote Control Not Working:
- Ensure there are no obstructions between the remote and the projector's IR receiver.
- Replace the batteries in the remote control.
7. Specifications
| Feature | Specification |
|---|---|
| Model | XPE350 |
| Brand | Crenova |
| Resolution | 480x320 |
| Brightness | 150 Lumens |
| Lamp Life | 20,000 hours (SmartEco) |
| Special Feature | Portable |
| Form Factor | Portable |
| Mounting Type | Tabletop Mount |
| Item Weight | 2.45 pounds |
| Package Dimensions | 11.2 x 7.1 x 4.4 inches |
| Color | 150 Lumens-Black |
8. Warranty and Support
For warranty information or technical support, please refer to the documentation included with your purchase or contact Crenova customer service. Keep your purchase receipt as proof of purchase for warranty claims.
For further assistance, please visit the official Crenova website or contact their support channels.


