
1. Important Safety Instructions
Please read all instructions carefully before using your Gallet MAP205 Bread Machine. Keep this manual for future reference.
- Always ensure the appliance is unplugged from the power outlet before cleaning or when not in use.
- Do not immerse the appliance, power cord, or plug in water or any other liquid.
- This appliance is for household use only. Do not use outdoors.
- Supervise children closely when the appliance is in use.
- Avoid contact with moving parts.
- Do not operate any appliance with a damaged cord or plug, or after the appliance malfunctions or has been damaged in any manner.
- Do not place on or near a hot gas or electric burner, or in a heated oven.
- Always attach plug to appliance first, then plug cord into the wall outlet. To disconnect, turn any control to "off", then remove plug from wall outlet.
- Do not use attachments not recommended by the appliance manufacturer.
2. Product Overview
Familiarize yourself with the components of your Gallet MAP205 Bread Machine.
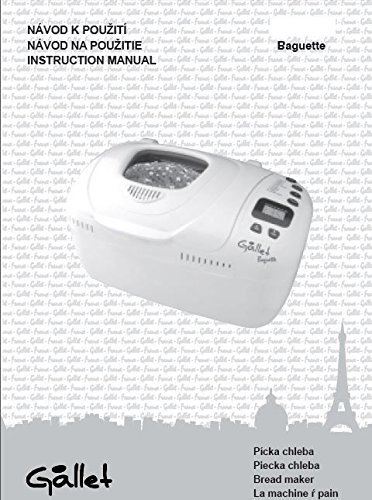
Figure 1: Gallet MAP205 Bread Machine components. This image shows the main unit, including the control panel, viewing window on the lid, and the general shape of the appliance. The baking pan and kneading paddle are internal components.
Key Components:
- Control Panel: Buttons for program selection, crust color, loaf size, and start/stop.
- LCD Display: Shows program status, time, and settings.
- Lid with Viewing Window: Allows monitoring of the baking process.
- Baking Chamber: Houses the removable baking pan.
- Baking Pan: Non-stick pan where ingredients are mixed and baked.
- Kneading Paddle: Detachable paddle inside the baking pan for mixing dough.
- Measuring Cup and Spoon: Included accessories for accurate ingredient measurement.
3. Setup and First Use
- Unpacking: Carefully remove the bread machine and all accessories from the packaging. Retain packaging for future storage or transport.
- Cleaning: Before first use, wash the baking pan and kneading paddle with warm, soapy water. Rinse thoroughly and dry completely. Wipe the exterior of the appliance with a damp cloth. Do not immerse the main unit in water.
- Placement: Place the bread machine on a stable, flat, heat-resistant surface, away from direct sunlight and heat sources. Ensure adequate ventilation around the appliance.
- Power Connection: Plug the power cord into a grounded electrical outlet. The display will illuminate, indicating the machine is ready.
4. Operating Instructions
4.1 Adding Ingredients
Always add liquid ingredients first, followed by dry ingredients, and finally yeast. Ensure the kneading paddle is correctly installed in the baking pan.
- Place the kneading paddle onto the shaft at the bottom of the baking pan.
- Add all liquid ingredients (water, milk, eggs, oil) to the baking pan.
- Add dry ingredients (flour, sugar, salt, powdered milk, spices). Ensure the flour covers the liquids.
- Create a small indentation in the center of the dry ingredients (do not reach the liquid) and add the yeast into this indentation. Keep yeast separate from salt and liquids until mixing begins.
- Place the baking pan into the bread machine, ensuring it clicks securely into place. Close the lid.
4.2 Program Selection
Use the "MENU" button to cycle through the available programs. The selected program number and name will appear on the LCD display.
| Program No. | Program Name | Description |
|---|---|---|
| 1 | Basic | For white and mixed breads, mainly consisting of wheat flour. |
| 2 | French | For light breads made from fine flour. Not suitable for recipes requiring butter, margarine, or milk. |
| 3 | Whole Wheat | For breads containing a high percentage of whole wheat flour. |
| 4 | Sweet | For breads with additives like fruit juices, coconut, raisins, chocolate, or added sugar. |
| 5 | Dough | Prepares dough for rolls, pizza, or other baked goods to be baked in a conventional oven. No baking cycle. |
| 6 | Bake | For baking only. Use for additional baking time or to bake pre-made dough. |
4.3 Crust Color and Loaf Size
- Crust Color: Press the "COLOR" button to select Light, Medium, or Dark crust.
- Loaf Size: Press the "LOAF SIZE" button to select the desired loaf weight (e.g., 1.0 lb, 1.5 lb, 2.0 lb). This adjusts baking times.
4.4 Starting and Stopping
- Start: After selecting your program, crust color, and loaf size, press the "START/STOP" button once. The machine will beep, and the timer will begin counting down.
- Stop/Cancel: To stop an ongoing program, press and hold the "START/STOP" button for approximately 3 seconds until a beep sounds and the display resets.
4.5 Delayed Start Function
The delay timer allows you to set the machine to finish baking at a later time, up to 13 hours. This includes the baking time of the selected program.
- Add ingredients to the baking pan.
- Select your desired program, crust color, and loaf size.
- Press the "+" or "-" buttons to adjust the delay time. The display will show the total time until the bread is ready.
- Press "START/STOP" to activate the delay timer. The colon (:) on the display will flash, indicating the delay function is active.
Note: Do not use the delay function with recipes containing highly perishable ingredients like milk, eggs, or fresh fruit.
5. Maintenance and Cleaning
Proper cleaning and maintenance will extend the life of your bread machine.
- Always unplug the appliance and allow it to cool completely before cleaning.
- Baking Pan and Kneading Paddle: Remove the baking pan from the machine. Fill with warm, soapy water and let it soak for 10-15 minutes to loosen any stuck-on dough. Use a soft sponge or cloth to clean. Do not use abrasive cleaners or metal utensils, as this can damage the non-stick coating. Rinse and dry thoroughly.
- Exterior: Wipe the exterior of the bread machine with a soft, damp cloth. Do not use harsh chemicals or abrasive cleaners.
- Lid and Viewing Window: Clean with a damp cloth. For stubborn stains, a mild detergent can be used.
- Storage: Ensure all parts are clean and dry before storing. Store the bread machine in a cool, dry place.
6. Troubleshooting
If you encounter issues with your bread machine, refer to the following common problems and solutions:
| Problem | Possible Cause | Solution |
|---|---|---|
| Bread does not rise | Expired yeast, incorrect water temperature, too much salt/sugar, old flour. | Check yeast expiration, use lukewarm water (105-115°F / 40-46°C), ensure correct ingredient measurements, use fresh flour. |
| Bread collapses in the middle | Too much liquid, too much yeast, high humidity, incorrect flour type. | Reduce liquid slightly, reduce yeast, use strong bread flour, adjust for humidity. |
| Machine does not start | Not plugged in, lid not closed, program not selected. | Check power connection, ensure lid is fully closed, select a program and press START/STOP. |
| Kneading paddle stuck in bread | Common occurrence. | Allow bread to cool slightly, then carefully remove the paddle using a non-metallic utensil. |
7. Specifications
- Model: Gallet MAP205
- Power Supply: 120V ~ 60Hz
- Power Consumption: 600W
- Loaf Sizes: 1.0 lb, 1.5 lb, 2.0 lb
- Programs: 12 automatic programs
- Dimensions (approx.): 14.5" (L) x 10.5" (W) x 12" (H)
- Weight (approx.): 12 lbs
8. Warranty and Customer Support
Your Gallet MAP205 Bread Machine comes with a standard manufacturer's warranty against defects in materials and workmanship. Please refer to the warranty card included with your original purchase for specific terms and conditions, including the warranty period and coverage details.
For technical assistance, troubleshooting beyond this manual, or to inquire about warranty service, please contact Gallet Customer Support.
- Website: www.gallet.com/support (Example link, actual link may vary)
- Email: support@gallet.com (Example email, actual email may vary)
- Phone: 1-800-GALLET-HELP (Example number, actual number may vary)
When contacting support, please have your model number (MAP205) and purchase date available.