
1. Introduction
This manual provides detailed instructions for the safe and effective use, setup, maintenance, and troubleshooting of your TRUPER RE-9X Professional Riveter. Please read this manual thoroughly before operating the tool to ensure proper function and to prevent injury.

Figure 1: TRUPER RE-9X Professional Riveter, 9-inch, orange and black with three interchangeable nozzles stored on the handle.
2. Product Components
The TRUPER RE-9X Riveter is designed for efficient and reliable riveting. Familiarize yourself with its main parts:

Figure 2: Diagram of the TRUPER RE-9X Riveter showing its main components: aluminum body, PVC handle, nozzle, and the included nozzle installation wrench. A small assortment of rivets is also shown.
- Aluminum Body: The main structural component of the riveter, providing durability and strength.
- PVC Handle: Ergonomically designed for comfortable grip and leverage during operation.
- Nozzle: The part where the rivet is inserted. Interchangeable nozzles accommodate different rivet sizes.
- Nozzle Installation Wrench: A specialized tool for securely attaching and removing nozzles.
- Rivets: Fasteners used with the riveter to join materials.
3. Setup
Before using the riveter, ensure the correct nozzle is installed for your rivet size.
3.1 Nozzle Selection
The TRUPER RE-9X Riveter includes four interchangeable nozzles to accommodate various rivet diameters:
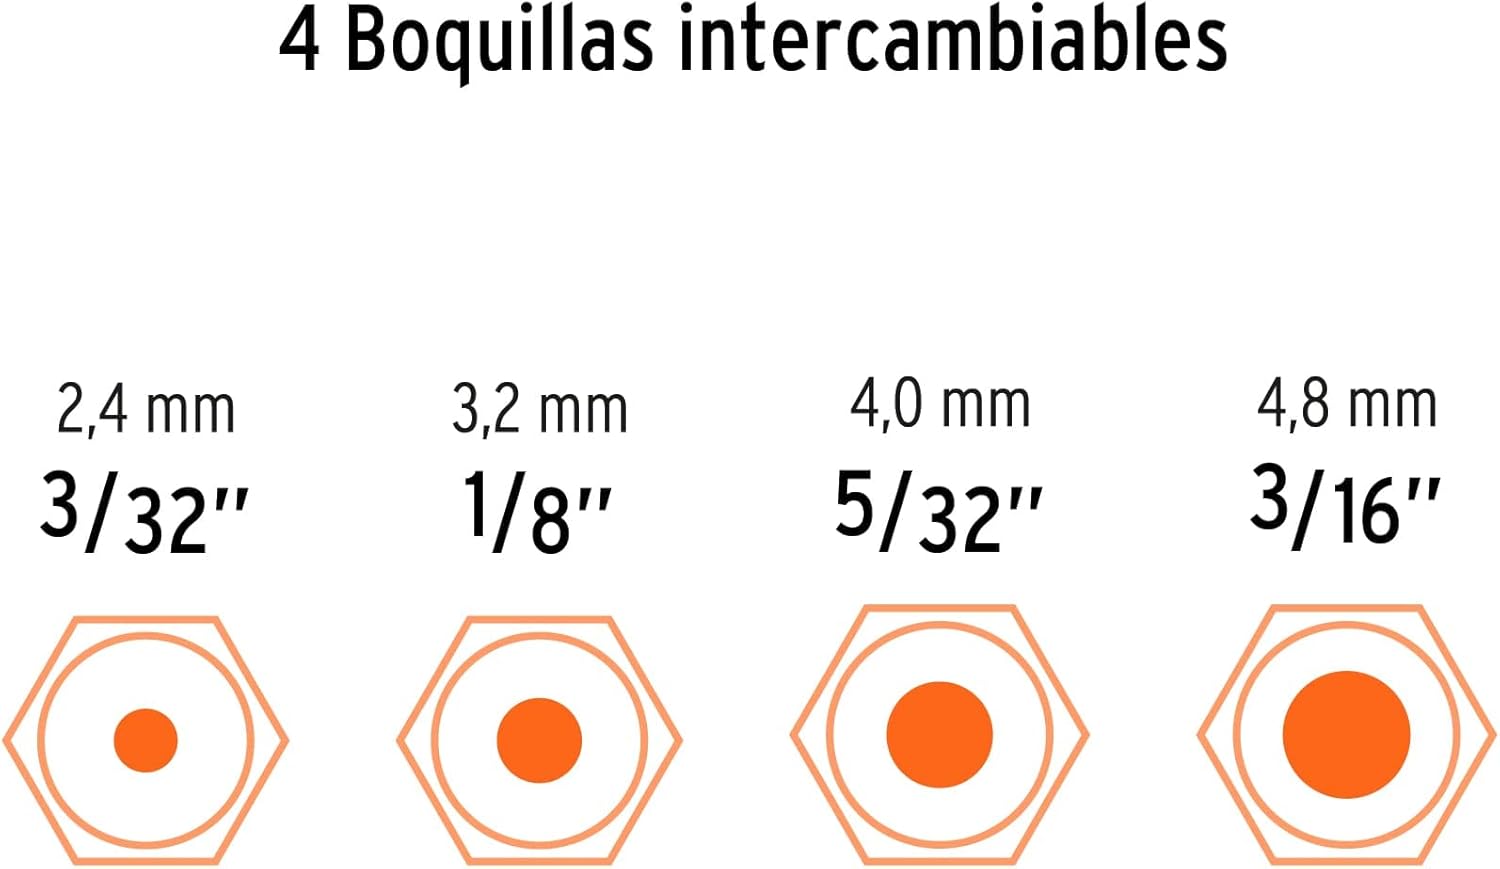
Figure 3: Illustration of the four interchangeable nozzles included with the TRUPER RE-9X Riveter, displaying their metric and imperial sizes: 2.4 mm (3/32 inch), 3.2 mm (1/8 inch), 4.0 mm (5/32 inch), and 4.8 mm (3/16 inch).
- 2.4 mm (3/32")
- 3.2 mm (1/8")
- 4.0 mm (5/32")
- 4.8 mm (3/16")
3.2 Nozzle Installation
- Select the appropriate nozzle size that matches the diameter of the rivet you intend to use.
- Unscrew the currently installed nozzle (if any) from the front of the riveter using the provided nozzle installation wrench.
- Screw the desired nozzle firmly into place. Ensure it is tightened securely with the wrench to prevent loosening during operation.
4. Operating Instructions
Follow these steps to properly set a rivet:
- Prepare Materials: Drill a hole through the materials to be joined. The hole diameter should match the rivet diameter.
- Insert Rivet: Insert the rivet's mandrel (the pin) into the selected nozzle of the riveter. The rivet body should rest against the nozzle.
- Position Rivet: Insert the rivet into the prepared hole in the materials. Ensure the rivet head is flush against the surface of the material.
- Operate Riveter: Squeeze the riveter handles together firmly and completely. This action pulls the mandrel, deforming the rivet body on the blind side of the material, creating a secure joint.
- Repeat: Continue squeezing the handles until the mandrel snaps off, indicating the rivet is properly set. The broken mandrel will fall out of the back of the riveter or can be removed.
- Inspect: Verify that the rivet is securely set and the materials are firmly joined.
5. Maintenance
Regular maintenance ensures the longevity and optimal performance of your TRUPER RE-9X Riveter.
- Cleaning: After each use, wipe down the riveter with a clean, dry cloth to remove any dust, debris, or metal shavings.
- Lubrication: Periodically apply a small amount of light machine oil to the pivot points and moving parts to ensure smooth operation.
- Nozzle Care: Keep nozzles clean and free of obstructions. Store unused nozzles in a safe place to prevent loss or damage.
- Storage: Store the riveter in a dry, clean environment, away from moisture and extreme temperatures.
6. Troubleshooting
If you encounter issues with your riveter, refer to the following common problems and solutions:
- Rivet does not set properly:
- Ensure the correct nozzle size is used for the rivet diameter.
- Verify that the rivet is fully inserted into the nozzle and the hole.
- Apply full and consistent pressure to the handles until the mandrel snaps.
- Mandrel does not snap off:
- This can indicate an incorrect nozzle size or insufficient force applied.
- Check for obstructions in the nozzle or the riveter's internal mechanism.
- Mandrel gets stuck in the riveter:
- Open the handles fully to release the mandrel. If it remains stuck, gently tap the riveter or use pliers to extract it.
- Regular cleaning and lubrication can prevent this issue.
7. Specifications
| Feature | Specification |
|---|---|
| Manufacturer | Truper |
| Part Number | RE-9X |
| Item Weight | 1.36 pounds |
| Product Dimensions | 12.68 x 5.43 x 1.34 inches |
| Model Number | RE-9X |
| Item Package Quantity | 1 |
| Date First Available | January 6, 2018 |
8. Warranty and Support
The TRUPER RE-9X Professional Riveter comes with a 10-year warranty, ensuring quality and reliability. For warranty claims or technical support, please refer to the contact information provided with your purchase or visit the official Truper website.

Figure 4: TRUPER RE-9X Professional Riveter in its retail packaging, showing the included 60 rivets and the 10-year warranty.