1. Introduction
This user manual provides detailed instructions for the safe and effective operation of your JVC GY-LS300CHU 4KCAM Super 35 Pro Camcorder. Please read this manual thoroughly before using the camcorder to ensure proper handling and to maximize its performance and longevity. Keep this manual for future reference.
Figure 1.1: JVC 4KCAM branding.
This image displays the JVC 4KCAM logo prominently with the camcorder subtly in the background, emphasizing its 4K capabilities.
2. Safety Information
Always observe the following safety precautions to prevent injury, damage to the camcorder, or loss of data.
- Power Source: Use only the specified power adapter and ensure the voltage is compatible with your region.
- Water and Moisture: Do not expose the camcorder to rain, moisture, or high humidity. If liquid enters the camcorder, disconnect power immediately and contact JVC service.
- Temperature: Operate the camcorder within the recommended temperature range (0°C to 40°C / 32°F to 104°F). Avoid direct sunlight or extreme heat/cold.
- Handling: Handle the camcorder with care. Avoid dropping or subjecting it to strong vibrations.
- Cleaning: Use a soft, dry cloth for cleaning. Do not use liquid or aerosol cleaners directly on the camcorder.
- Disassembly: Do not attempt to disassemble or modify the camcorder. Refer all servicing to qualified JVC personnel.
3. Package Contents
Verify that all items listed below are included in your package. If any items are missing or damaged, contact your dealer immediately.
- JVC GY-LS300CHU 4KCAM Camcorder Body
- Top Handle Audio Unit
- Power Adapter / AC Cable
- Battery Pack
- Shoulder Strap
- User Manual (this document)
Note: Lenses, memory cards, and other accessories are sold separately unless specified by your retailer.
4. Product Overview
The JVC GY-LS300CHU is a professional 4KCAM camcorder featuring a Super 35mm-sized CMOS sensor and an MFT (Micro Four Thirds) interchangeable lens mount, offering exceptional flexibility for various shooting scenarios. It supports 4K, Full HD, SD, and proxy recording formats.
4.1 Key Features
- Single Super 35mm-sized CMOS sensor for high-quality imaging.
- Records Ultra HD, Full HD at 4:2:2, SD & proxy formats.
- Supports .MOV and AVCHD recording with dual SDHC/SDXC memory card slots.
- Equipped with 3G-SDI & 4K HDMI Output for versatile connectivity.
- Built-in wireless streaming capabilities.
- Integrated network remote control for flexible operation.
- MFT mount supports various lens mount adapters (PL, C, EF, full-frame).
- Features a 3.5" Color LCD Display and a 0.24" EVF (Electronic Viewfinder).
- Two XLR audio inputs with Phantom power for professional audio recording.
4.2 Camcorder Components
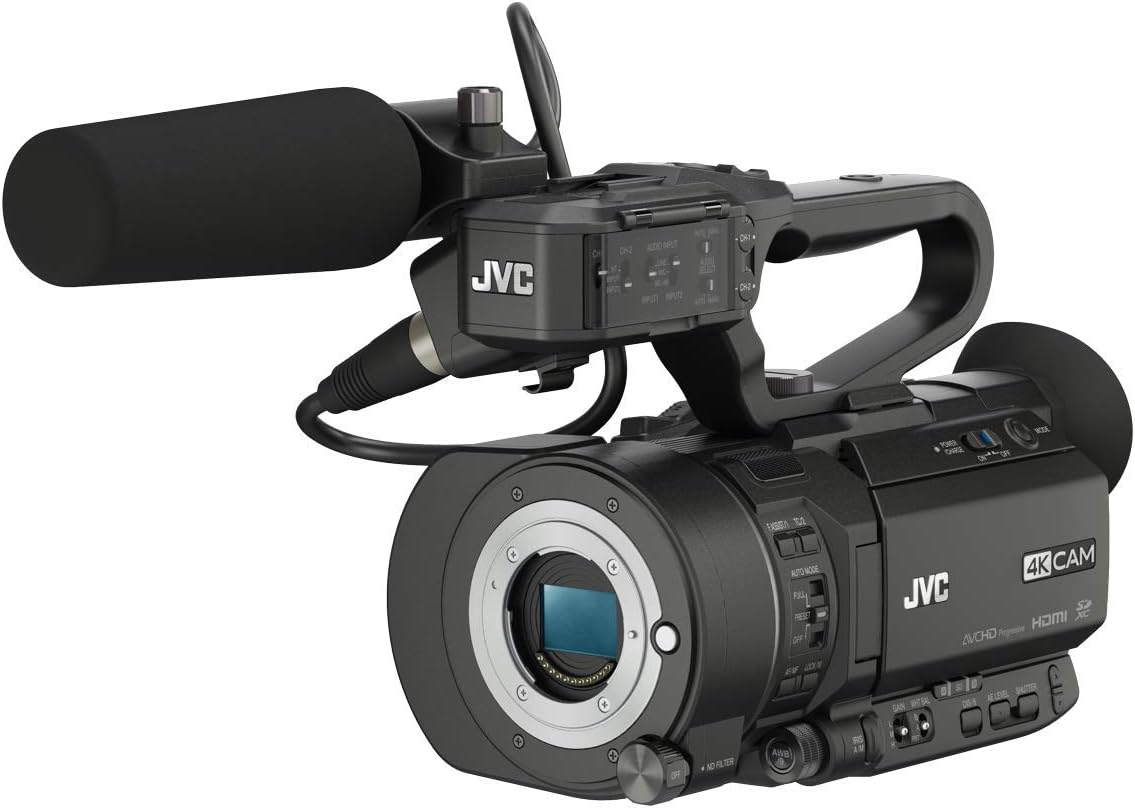
Figure 4.1: Front-side view of the GY-LS300CHU.
This image shows the JVC GY-LS300CHU camcorder from a front-side angle, highlighting the lens mount, integrated top handle with audio controls, and the attached microphone unit. Key controls for auto mode, gain, white balance, and shutter are visible on the side panel.
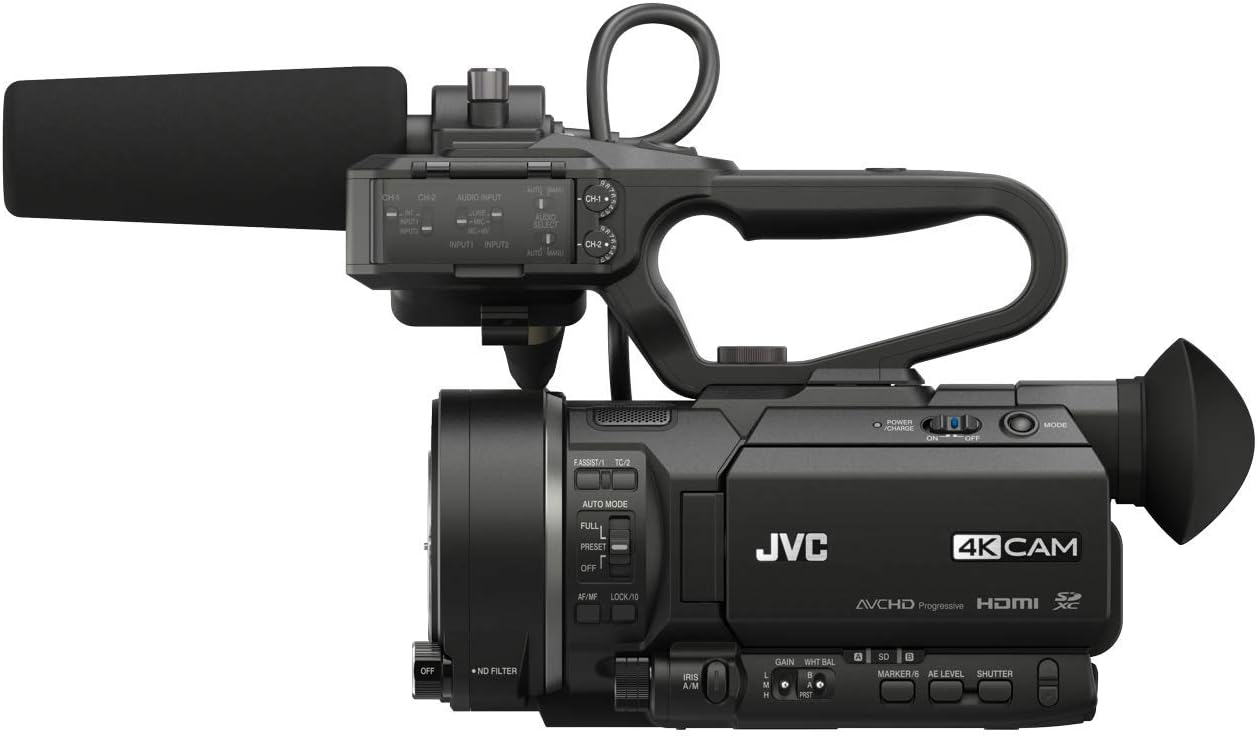
Figure 4.2: Side view with controls.
This image provides a clear side view of the JVC GY-LS300CHU, detailing the various control buttons and switches, including those for power, mode, gain, white balance, AE level, and shutter. The dual SD card slots and HDMI output port are also visible.

Figure 4.3: Camcorder with professional lens and rig.
This image illustrates the JVC GY-LS300CHU camcorder integrated into a professional camera rig, showcasing its adaptability with large, high-quality lenses and external support systems. This setup demonstrates the camcorder's suitability for advanced cinematic productions.
5. Setup
5.1 Attaching the Top Handle Audio Unit
- Align the mounting screws on the top handle unit with the corresponding holes on the camcorder body.
- Securely fasten the screws.
- Connect the audio cable from the handle unit to the camcorder's audio input port.
5.2 Powering the Camcorder
- Using the AC Adapter: Connect the supplied AC adapter to the camcorder's DC IN terminal and plug it into a wall outlet.
- Using a Battery: Attach a fully charged battery pack to the battery mount on the rear of the camcorder. Ensure it clicks into place.
5.3 Inserting Memory Cards
The GY-LS300CHU features dual SDHC/SDXC memory card slots.
- Open the memory card slot cover.
- Insert the SD card(s) with the label facing the correct direction until it clicks into place.
- Close the memory card slot cover.
5.4 Attaching a Lens
The camcorder uses an MFT (Micro Four Thirds) mount. You can attach native MFT lenses or use optional adapters for PL, C, or EF mount lenses.
- Remove the body cap from the camcorder and the rear cap from the lens.
- Align the mounting marks on the lens (or adapter) with those on the camcorder body.
- Twist the lens clockwise (or counter-clockwise, depending on the mount) until it locks into place.
6. Operating the Camcorder
6.1 Basic Recording
- Turn on the camcorder using the POWER switch.
- Select your desired recording mode (e.g., 4K, HD) using the MODE dial.
- Adjust exposure settings (iris, gain, shutter speed) manually or use auto mode.
- Press the REC START/STOP button to begin and end recording.
6.2 Audio Recording
The top handle unit provides two XLR inputs for professional microphones. Adjust audio levels using the dedicated controls on the handle.
- Connect XLR microphones to INPUT 1 and/or INPUT 2.
- Enable Phantom Power (+48V) if your microphones require it.
- Monitor audio levels using the on-screen meters and headphones.
6.3 Network Functions
The GY-LS300CHU supports built-in wireless streaming and network remote control.
- Access network settings via the camcorder's menu.
- Connect to a Wi-Fi network or use an optional network adapter.
- Utilize JVC's streaming services or remote control applications for live broadcasting and camera control.
7. Maintenance
- Lens Cleaning: Use a lens brush or air blower to remove dust. For smudges, use a lens cleaning solution and a microfiber cloth.
- Body Cleaning: Wipe the camcorder body with a soft, dry cloth. Do not use harsh chemicals.
- Storage: When not in use for extended periods, store the camcorder in a cool, dry place, away from direct sunlight and extreme temperatures. Remove the battery if storing for a long time.
- Firmware Updates: Periodically check the JVC website for firmware updates to ensure optimal performance and access to new features.
8. Troubleshooting
| Problem | Possible Cause | Solution |
|---|---|---|
| Camcorder does not power on. | Battery is depleted or not inserted correctly; AC adapter is not connected. | Charge the battery or insert it correctly. Ensure AC adapter is securely connected. |
| No image on LCD/EVF. | Lens cap is on; display settings are off; lens not attached properly. | Remove lens cap. Check display settings in menu. Re-attach lens securely. |
| Cannot record. | Memory card is full or not inserted; card is write-protected; incorrect recording mode. | Insert/replace memory card. Unlock write-protect switch. Select appropriate recording mode. |
| No audio recorded. | Microphone not connected; audio levels too low; phantom power off for condenser mics. | Check microphone connection. Adjust audio levels. Enable +48V phantom power if needed. |
9. Specifications
Below are the key technical specifications for the JVC GY-LS300CHU camcorder.
| Feature | Detail |
|---|---|
| Sensor | Single Super 35mm-sized CMOS sensor |
| Video Capture Resolution | 4K (Ultra HD), Full HD (4:2:2), SD |
| Recording Formats | .MOV, AVCHD |
| Memory Type | Dual SDHC/SDXC card slots |
| Lens Mount | MFT (Micro Four Thirds) mount, supports adapters for PL, C, EF |
| Video Outputs | 3G-SDI, 4K HDMI Output |
| Audio Inputs | 2x XLR with Phantom power |
| Display | 3.5" Color LCD Display |
| Viewfinder | 0.24" EVF |
| Connectivity | Built-in wireless streaming, network remote control |
| Dimensions (Product) | 10 x 10 x 12 inches |
| Weight (Item) | 4 pounds |
| Model Number | GYLS300CHU |
| ASIN | B00USBVISE |
10. Warranty and Support
For detailed warranty information, please refer to the warranty card included with your product or visit the official JVC website. JVC provides technical support and service for its products.
- Online Support: Visit the JVC professional video support page for FAQs, drivers, and software downloads.
- Contact Support: Refer to the contact information provided on the JVC website for direct assistance.
Note: Warranty terms and conditions may vary by region and retailer.