
Bostitch BTFP3KIT
Bostitch BTFP3KIT 3-Tool/Compressor Combo Kit
Instruction Manual
1. Introduction
This manual provides essential information for the safe and effective operation, maintenance, and troubleshooting of your Bostitch BTFP3KIT 3-Tool/Compressor Combo Kit. This kit is designed for a variety of finish and interior applications, including interior trim, crown molding, baseboard, shoe molding, and staircases.
The kit includes:
- One 6-Gallon Pancake Air Compressor (150 PSI)
- One 18-Gauge 2-inch Brad Nailer
- One 2-1/2-inch 16-Gauge Straight Finish Nailer
- One Heavy-Duty 3/8-inch Crown Stapler
- One 15 ft. Air Hose with Couplers
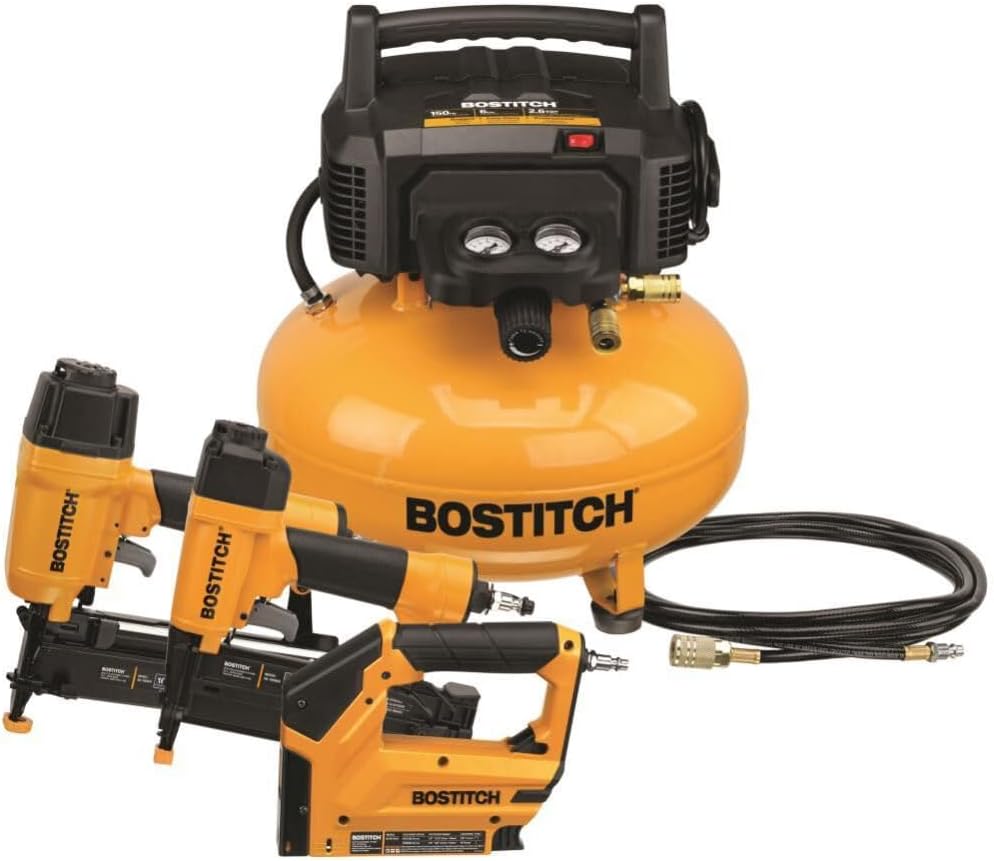
Figure 1: Bostitch 3-Tool/Compressor Combo Kit
2. Safety Information
Always read and understand all safety warnings and instructions provided with the product before operation. Failure to follow these warnings may result in serious injury.
- Wear appropriate personal protective equipment (PPE), including safety glasses, hearing protection, and gloves.
- Ensure the work area is clean, well-lit, and free from obstructions.
- Never point a pneumatic tool at yourself or others.
- Disconnect the air supply before making adjustments, clearing jams, or performing maintenance.
- Do not operate the compressor in wet or damp conditions.
- Keep children and bystanders away from the operating area.
3. Setup
3.1 Unpacking and Inspection
Carefully remove all components from the packaging. Inspect for any damage that may have occurred during shipping. Do not operate damaged equipment.
3.2 Connecting the Air Hose
Connect the provided 15 ft. air hose to the compressor's universal coupler. Ensure a secure connection to prevent air leaks.
Video: A Closer Look at the Bostitch Air Compressor. This video provides a detailed overview of the Bostitch air compressor, demonstrating how to connect the air hose, power on the unit, and adjust the high-flow regulator. It highlights the oil-free pump and the 80 dBA noise level for a quiet work environment.
3.3 Powering On the Compressor
Plug the compressor into a suitable power outlet. Locate the red power switch and flip it to the 'ON' position. The compressor will begin to build pressure. Monitor the tank pressure gauge until it reaches the desired PSI.
3.4 Adjusting Air Pressure
The compressor features a high-flow regulator. Turn the regulator knob to set the desired operating pressure for your pneumatic tool. The regulated pressure gauge will display the output pressure.
3.5 Loading Nails/Staples
Each pneumatic tool has a magazine for fasteners. To load, pull back the magazine follower, insert the strip of nails or staples, and release the follower. Ensure fasteners are correctly oriented.
Video: How to refill nails and use air compressor! This video demonstrates the process of refilling nails in a Bostitch nailer and connecting it to the air compressor for operation.

Figure 2: 18 GA Brad Nailer

Figure 3: 16 GA Finish Nailer

Figure 4: 3/8-inch Crown Stapler
4. Operating Instructions
4.1 Using the Air Compressor
Once the compressor is powered on and the pressure is regulated, connect your desired pneumatic tool to the air hose. The compressor will automatically cycle on and off to maintain the set pressure in the tank.
4.2 Operating Pneumatic Tools
With the tool connected and loaded, press the tool's nose against the workpiece and depress the trigger to drive a fastener. Always test on scrap material first to ensure proper depth and pressure settings.

Figure 5: Operating a Bostitch Nailer
Video: BOSTITCH Air Compressor Combo Kit, 3-Tool. An overview of the Bostitch 3-Tool Air Compressor Combo Kit, showcasing the compressor and the included pneumatic tools in action.
5. Maintenance
5.1 Oil-Free Pump
The compressor features an oil-free pump, which means it requires no regular oil changes. This design contributes to extended life and reduced maintenance.
5.2 Draining the Air Tank
To prevent rust and corrosion, drain the air tank daily or after each use. Locate the drain valve at the bottom of the tank, open it to release condensed water, and close it securely once drained.
5.3 Oiling Pneumatic Tools
Pneumatic tools require lubrication. Apply a few drops of pneumatic tool oil into the air inlet of each tool before each use or at the beginning of each workday. This helps prevent jams and extends tool life.
6. Troubleshooting
6.1 Nailer Not Firing or Jamming
- Check Air Pressure: Ensure the compressor is providing adequate pressure for the tool. Adjust the regulator if necessary.
- Lubrication: Verify that the tool has been properly oiled. Lack of lubrication is a common cause of jams.
- Clear Jams: Disconnect the air supply, open the magazine, and carefully remove any jammed fasteners.
- Fastener Type: Ensure you are using the correct type and size of fasteners for your tool.
6.2 Air Leaks
- Check Connections: Inspect all hose connections, couplers, and fittings for tightness.
- Drain Valve: Ensure the tank drain valve is fully closed.
- Tool Leaks: If the leak is from a tool, check its seals and O-rings.
6.3 Compressor is Loud
Air compressors, especially portable models, can be noisy. The Bostitch BTFP3KIT operates at approximately 78.5 dBA. This is generally considered normal for this type of equipment. Ensure the compressor is on a stable, level surface to minimize vibration-related noise.
7. Specifications
| Feature | Specification |
|---|---|
| Brand | Bostitch |
| Model Name | BTFP3KIT |
| Tank Volume | 6 Gallons |
| Maximum Pressure | 150 PSI |
| Air Flow Capacity | 1 Cubic Feet Per Minute |
| Noise Level | 78.5 Decibels |
| Power Source | Electric (hand_powered) |
| Item Weight | 41.8 Pounds |
| Product Dimensions | 21.1"L x 19.5"W x 18"H |
| Hose Length | 25 Feet |
| Included Components | Pancake compressor, 18-gauge brad nailer, 16-gauge finish nailer, 3/8-in crown stapler, 1 stick 18-gauge brad nails, 1 stick 16-gauge finish nails, 1 stick of BTA700 series staples (T50), and hose with couplers |
8. Warranty and Support
8.1 Warranty Information
This Bostitch product is covered by a 1-year limited warranty. Please refer to the warranty card included with your purchase for full terms and conditions.
8.2 Customer Support
For technical assistance, parts, or service, please contact Bostitch customer support. Contact information can typically be found on the product packaging or the official Bostitch website.
Related documentsBTFP3KIT


Ask a question about this manual
Ask about setup, troubleshooting, compatibility, parts, safety, or missing instructions. Manuals+ will review the question and use this page’s manual context to help answer it.