1. Overview
The AVOCENT MergePoint Unity MPU4032DAC is a high-performance digital KVM (Keyboard, Video, Mouse) switch designed for managing multiple servers and IT devices from a single console. This device supports up to 32 computers, allowing for 1 local user and 4 remote users to access connected systems. It features a maximum resolution of 1280 x 1024, 2 RJ-45 network ports, and 3 USB ports, all within a 1U rack-mountable form factor. This manual provides essential information for the safe and efficient operation of your KVM switch.
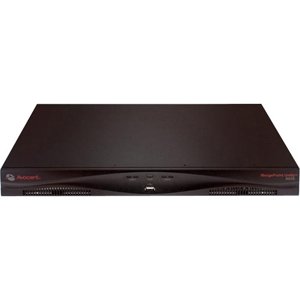
Figure 1.1: AVOCENT MergePoint Unity MPU4032DAC Digital KVM Switch. This image displays the front panel of the KVM switch, featuring the Avocent logo on the left, MergePoint Unity MPU4032DAC branding on the right, and a central USB port for peripheral connections. Ventilation grilles are visible on both sides of the front panel.
2. Safety Information
Please read and understand all safety instructions before installing or operating this equipment. Failure to follow these instructions may result in electric shock, fire, or damage to the product.
- Ensure the power source matches the voltage requirements specified on the device label.
- Do not open the device casing. There are no user-serviceable parts inside. Refer all servicing to qualified service personnel.
- Avoid placing the device in areas with excessive heat, humidity, dust, or direct sunlight.
- Ensure proper ventilation around the unit to prevent overheating.
- Use only approved power cords and accessories.
3. Package Contents
Verify that all items are present in the package. If any items are missing or damaged, contact your vendor immediately.
- AVOCENT MergePoint Unity MPU4032DAC Digital KVM Switch
- Rack-mounting kit
- Power cord(s)
- Documentation (Quick Start Guide, Safety Information)
- KVM cables (may be sold separately depending on configuration)
4. Setup
4.1 Physical Installation
- Rack Mounting: Install the KVM switch into a standard 19-inch equipment rack using the provided rack-mounting kit. Ensure the unit is securely fastened and has adequate space for airflow.
- Power Connection: Connect the power cord(s) to the KVM switch and then to a grounded power outlet or PDU.
4.2 Connecting Devices
- Local Console: Connect a monitor, USB keyboard, and USB mouse to the dedicated local console ports on the KVM switch.
- Target Computers: Connect KVM cables (video, USB) from your servers/computers to the KVM ports on the switch. Ensure each connection is secure.
- Network Connection: Connect the KVM switch to your network using the RJ-45 network ports. This enables remote access functionality.
4.3 Initial Power-On
After all connections are made, power on the KVM switch. Observe the indicator lights for proper boot-up sequence. The system is ready for operation once the status indicators show normal operation.
5. Operating
5.1 Local Console Access
From the local console (connected monitor, keyboard, mouse), you can directly access and control any connected computer. Use the KVM switch's on-screen display (OSD) or hotkey commands to switch between connected systems.
5.2 Remote Console Access
Remote users can access the KVM switch over the network using a web browser or a dedicated client application. Enter the IP address of the KVM switch into your web browser to access the web interface. Authentication credentials will be required.
5.3 Switching Between Computers
The KVM switch allows seamless switching between connected computers. Methods include:
- On-Screen Display (OSD): Access the OSD menu by pressing a designated hotkey sequence (e.g., Scroll Lock + Scroll Lock). Navigate the menu to select the desired computer.
- Hotkey Commands: Specific keyboard hotkey combinations can be used to switch directly to the next/previous port or a specific port number. Refer to the on-screen display or product documentation for default hotkey sequences.
- Front Panel Buttons: If available, use the physical buttons on the front panel to cycle through connected ports.
6. Maintenance
6.1 Cleaning
To maintain optimal performance, periodically clean the exterior of the KVM switch with a soft, dry cloth. Do not use liquid or aerosol cleaners directly on the unit. Ensure ventilation openings are free from dust and obstructions.
6.2 Firmware Updates
Periodically check the manufacturer's website for available firmware updates. Firmware updates can provide new features, performance improvements, and bug fixes. Follow the instructions provided with the firmware update package carefully.
6.3 Environmental Considerations
Operate the KVM switch within its specified environmental ranges for temperature and humidity. Avoid exposing the unit to extreme conditions, which can affect its lifespan and performance.
7. Troubleshooting
This section addresses common issues you might encounter with your KVM switch.
7.1 No Video Display
- Check Cable Connections: Ensure all video cables are securely connected between the KVM switch, monitor, and target computers.
- Power Cycle: Power cycle the KVM switch and the connected computer.
- Resolution Settings: Verify that the video resolution of the target computer is supported by the KVM switch and the monitor (max 1280 x 1024).
7.2 Keyboard/Mouse Not Responding
- USB Connections: Ensure USB keyboard and mouse are properly connected to the KVM switch's console ports.
- KVM Cables: Verify that the USB portion of the KVM cables connecting to the target computers is secure.
- Try Different Ports: If possible, try connecting the keyboard/mouse to different USB ports on the KVM switch.
7.3 Remote Access Issues
- Network Connectivity: Confirm that the KVM switch is properly connected to the network and has a valid IP address.
- Firewall Settings: Check if any firewall settings on your network or computer are blocking access to the KVM switch.
- Authentication: Ensure correct username and password are being used for remote login.
8. Specifications
| Feature | Specification |
|---|---|
| Model | MPU4032DAC-G01 |
| Brand | AVOCENT |
| Computer Ports | 32 |
| Local Users | 1 |
| Remote Users | 4 |
| Max Resolution | 1280 x 1024 |
| Network Ports | 2 x RJ-45 |
| USB Ports | 3 |
| Mounting Type | Rack-mountable (1U) |
| Connectivity Protocol | USB |
| Control Method | Remote |
| Manufacturer | AVOCENT DIGITAL PRODUCTS |
9. Warranty and Support
9.1 Warranty Information
This AVOCENT product is covered by a limited warranty. The terms and conditions of the warranty are typically provided with the product packaging or can be found on the manufacturer's official website. Please retain your proof of purchase for warranty claims.
9.2 Technical Support
For technical assistance, troubleshooting beyond this manual, or warranty inquiries, please contact AVOCENT customer support. Support contact information, including phone numbers and online resources, can usually be found on the official AVOCENT website or in the documentation included with your product.


