1. Introduction
Thank you for choosing the LEDLUX CL8014 Triac Dimmer. This device is designed to provide smooth and reliable dimming control for compatible 220V LED lights, up to a maximum load of 200W. It features a wireless remote control for convenient operation. Please read this manual thoroughly before installation and use to ensure safe and optimal performance.
2. Safety Information
- Electrical Hazard: Installation should only be performed by a qualified electrician or competent person. Always disconnect power at the main circuit breaker before installation or maintenance.
- Voltage and Load: Ensure the input voltage is 220V and the total wattage of connected LED lights does not exceed 200W. Overloading can cause damage or fire.
- Compatibility: This dimmer is designed for dimmable LED lights. Non-dimmable lights may not function correctly or could be damaged.
- Indoor Use Only: This device is intended for indoor use in dry locations. Do not expose to moisture or extreme temperatures.
- Secure Connections: Ensure all wire connections are secure and properly insulated to prevent short circuits.
3. Package Contents
- 1 x LEDLUX CL8014 Triac Dimmer Module
- 1 x Wireless Remote Control
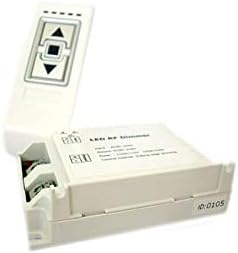
Figure 1: The LEDLUX CL8014 Triac Dimmer module shown alongside its wireless remote control. The dimmer module is a white rectangular unit with screw terminals, and the remote is a smaller white unit with up/down arrows and a central button.

Figure 2: A close-up view of the LEDLUX CL8014 Triac Dimmer module. The top surface displays input and output wiring diagrams, indicating connections for AC 220V and the load, along with specifications like 200W power and TRIAC control method.
4. Specifications
| Brand | LEDLUX |
| Model Number | CL8014 |
| Input Voltage | 220V AC |
| Max Output Power | 200W |
| Switch Type | TRIAC |
| Control Method | Wireless RF Remote Control |
| Material | Acrylonitrile Butadiene Styrene |
| Dimensions (L x W x H) | 14.8 x 9.8 x 5.2 cm |
| Weight | 0.12 g |
5. Setup and Installation
Important: Ensure power is disconnected at the main circuit breaker before proceeding with installation.
- Prepare Wiring: Identify the Live (L) and Neutral (N) wires from your main power supply (220V AC). Also, identify the Live (L) and Neutral (N) wires for your dimmable LED light fixture.
- Connect Input: Connect the main power supply's Live (L) wire to the 'Input L' terminal on the dimmer module. Connect the main power supply's Neutral (N) wire to the 'Input N' terminal on the dimmer module.
- Connect Output: Connect the Live (L) wire from your dimmable LED light fixture to the 'Output L' terminal on the dimmer module. Connect the Neutral (N) wire from your dimmable LED light fixture to the 'Output N' terminal on the dimmer module.
- Secure Connections: Ensure all wires are securely fastened within their respective terminals. Double-check for any loose strands or exposed wiring.
- Mount Dimmer: Mount the dimmer module in a suitable, dry location, ensuring it is not exposed to heat or moisture.
- Restore Power: Once all connections are secure and verified, restore power at the main circuit breaker.
6. Operating Instructions
The CL8014 dimmer is controlled by its wireless remote. Ensure the remote has a working battery (typically a CR2025 or similar, not included unless specified by packaging). Point the remote towards the dimmer module or within its effective range.
- Power ON/OFF: Press the central button on the remote control to turn the connected lights ON or OFF.
- Brightness UP: Press the 'Up' arrow button to increase the brightness of the lights.
- Brightness DOWN: Press the 'Down' arrow button to decrease the brightness of the lights.
The dimmer should provide smooth adjustment of light intensity for compatible dimmable LED fixtures.
7. Maintenance
- Cleaning: Clean the dimmer module and remote control with a soft, dry cloth. Do not use abrasive cleaners or solvents.
- Inspection: Periodically inspect wiring connections to ensure they remain secure.
- Battery Replacement: If the remote control becomes unresponsive, replace its battery. Refer to the remote's casing for the correct battery type and replacement procedure.
8. Troubleshooting
- Lights do not turn ON/OFF or Dim:
- Check if power is supplied to the dimmer module.
- Verify all wiring connections are correct and secure.
- Ensure the connected LED lights are dimmable and compatible with a TRIAC dimmer.
- Check the remote control battery.
- Lights Flicker or Buzz:
- Ensure the total wattage of connected lights does not exceed 200W.
- Confirm the LED lights are high-quality dimmable types. Some low-quality dimmable LEDs may flicker at certain dimming levels.
- Check for loose wiring connections.
- Remote Control Not Responding:
- Replace the remote control battery.
- Ensure there are no obstructions between the remote and the dimmer module.
- If the remote and dimmer are not paired (unlikely for pre-packaged sets but possible), consult the manufacturer for pairing instructions.
9. Warranty and Support
For warranty information, technical support, or service inquiries, please contact your retailer or the manufacturer, LEDLUX, directly. Keep your purchase receipt as proof of purchase.


