Introduction
This manual provides detailed instructions for the proper installation, operation, and maintenance of your Hifonics Brutus BRX3016.1D 3000 Watt Mono Block Amplifier. Please read this manual thoroughly before attempting installation or operation to ensure optimal performance and safety. Keep this manual for future reference.
Important Safety Information
Proposition 65 Warning: This product may contain chemicals known to the State of California to cause cancer and birth defects or other reproductive harm. For more information, visit www.P65Warnings.ca.gov. Always ensure proper ventilation during operation and installation. Disconnect the vehicle's battery before performing any electrical work.
Features
- Powerful 3000 Watt Amplifier: Delivers earth-shaking bass for your car audio system with Super D Class technology and Ultra-Fi MOSFET outputs for maximum power and efficiency.
- Advanced Audio Technology: Utilizes Pro-Fi Output Device Technology and Ultra-Fi MOSFETs for high power with minimal distortion. Super D-Class design employs high-speed microprocessors with proprietary D/A conversion algorithms for lower distortion, higher current efficiencies, and less heat.
- Precise Audio Control: Features variable electronic crossovers and an onboard equalizer to fine-tune sound. Includes a wired bass remote for adjusting bass frequencies and a phase adjustment feature (0-180°) for subwoofer alignment.
- Durable Construction & Cooling: Classic aluminum Hifonics heat sink design minimizes heat buildup. High-temperature, impact-resistant, nickel-plated connectors with allen head set screws ensure secure wire termination. LED system protection circuitry diagnostics monitor overload and speaker short protection.
- Versatile Connectivity: Offers nickel-plated RCA inputs and high-level inputs for easy integration with factory or aftermarket audio systems. Simpatico Coil Design with a dual-coil Pulse Width Modulated power supply maintains constant voltage.
Package Contents
The Hifonics Brutus BRX3016.1D amplifier package includes:
- Hifonics Brutus BRX3016.1D Mono Block Amplifier
- Wired Bass Remote (HFR-31)
- Remote Cable
- Mounting Screws
- Allen Key
- Stickers
- Small Manual (this document)
Product Overview

Figure 1: Top view of the Hifonics Brutus BRX3016.1D amplifier, featuring the brushed aluminum finish and illuminated Hifonics logo.

Figure 2: Control panel side of the amplifier, with knobs for Level, Phase, Center, Width, Boost, Subsonic, LPF, and connections for Remote, Input, and Bridge.

Figure 3: Power and speaker terminal side of the amplifier, featuring robust connections for power, ground, remote, and speaker outputs.

Figure 4: The HFR-31 wired bass remote control, allowing convenient bass level adjustments.
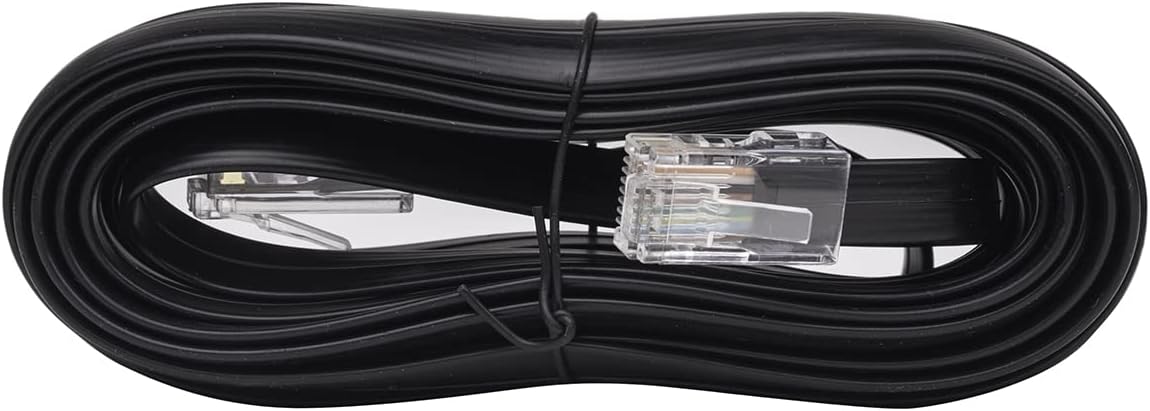
Figure 5: Remote cable for connecting the wired bass remote to the amplifier.
Video 1: An unboxing and in-depth review of the Hifonics Brutus BRX3016.1D Super Class D 3,000 Watts RMS Amp, providing a comprehensive look at its features and performance.
Video 2: A product overview of the Hifonics Zeus ZRX V2 amplifier, showcasing its design and features, which are similar in many aspects to the Brutus series.
Setup & Installation
Proper installation is crucial for the performance and longevity of your amplifier. If you are unsure about any steps, consult a professional installer.
Mounting the Amplifier
- Choose a location that is dry, well-ventilated, and protected from direct sunlight or excessive heat.
- Ensure the mounting surface is sturdy enough to support the amplifier's weight.
- Use the provided mounting screws to secure the amplifier.
Wiring Connections
Refer to Figure 3 for terminal locations.
- Power Input (+12V): Connect a heavy-gauge power cable (up to 2 gauge recommended) directly from the positive terminal of your vehicle's battery. Install an appropriate fuse (external) within 18 inches of the battery.
- Ground (GND): Connect a heavy-gauge ground cable (up to 2 gauge recommended) from the amplifier to a clean, unpainted metal surface on the vehicle's chassis. Ensure a solid, low-resistance connection.
- Remote (REM): Connect a 12V switched source (e.g., from your head unit's remote output) to this terminal. This turns the amplifier on and off with your audio system.
- Speaker Output: Connect your subwoofer(s) to the speaker output terminals. The amplifier supports up to 8 gauge speaker wire. Ensure correct polarity (+ to + and - to -).
- RCA Inputs: Connect RCA cables from your head unit's subwoofer output to the amplifier's RCA inputs (refer to Figure 2).
- Wired Bass Remote: Connect the wired bass remote (HFR-31) to the 'REMOTE' port on the control panel (refer to Figure 2).
Operating Instructions
Adjust the amplifier settings to match your audio system and personal preferences. Refer to Figure 2 for control locations.
Adjusting Controls
- Level (Gain): Adjust this control to match the output voltage of your head unit. Start with the gain at minimum and slowly increase it until you hear distortion, then back off slightly.
- Phase (0-180°): Adjust this to align the subwoofer's output with your main speakers for optimal sound integration.
- Center/Width (Bass Equalizer): These controls allow you to fine-tune the frequency and width of the bass boost.
- Boost (Bass Boost): Provides an adjustable bass boost (0-10dB) at 45Hz for deeper low-frequency impact. Use sparingly to avoid distortion.
- Subsonic Filter: This filter removes ultra-low frequencies that are inaudible and can damage subwoofers. Adjust between 15Hz-35Hz.
- LPF (Low Pass Filter): This filter allows only frequencies below the set point to pass through to the subwoofer. Adjust between 35Hz-250Hz to blend with your main speakers.
- Mode (MST/SLV): Select Master or Slave mode for multi-amplifier setups.
LED Indicators
The amplifier features LED indicators for Power and Protect modes, providing visual feedback on the amplifier's status.
Maintenance
Regular maintenance ensures the longevity and performance of your amplifier.
- Keep the amplifier clean and free from dust and debris. Use a soft, dry cloth for cleaning.
- Periodically check all wiring connections to ensure they are secure and free from corrosion.
- Ensure adequate airflow around the amplifier to prevent overheating, especially during extended use. The aluminum heat sink is designed for efficient heat dissipation.
Troubleshooting
If you experience issues with your amplifier, refer to the following common troubleshooting steps:
- No Power: Check the main fuse near the battery, the in-line fuse on the amplifier, and all power/ground/remote connections. Ensure the remote wire is receiving 12V when the head unit is on.
- No Sound: Verify all RCA and speaker connections. Check the head unit's output and amplifier's gain settings. Ensure the subwoofer is functioning correctly.
- Distortion: Reduce the gain setting on the amplifier. Check for proper impedance matching with your subwoofer(s). Ensure the audio source is not distorted.
- Amplifier Overheating (Protect LED on): Check for proper ventilation around the amplifier. Ensure the impedance of your speakers/subwoofers is within the amplifier's rated range. Reduce the volume or gain.
- LED System Protection Circuitry: If the Protect LED illuminates, the amplifier has detected an issue (e.g., thermal overload, speaker short). Turn off the system, identify and resolve the issue, then restart.
Specifications
| Item dimensions L x W x H | 17.7 x 9.8 x 2.4 inches |
| Manufacturer | Hifonics |
| Mounting Type | Surface Mount |
| Brand | Hifonics |
| Number of Channels | 1 |
| Output Power | 3000 Watts |
| Material | Aluminum |
| UPC | 806576223665 |
| Product Dimensions | 17.7 x 9.8 x 2.4 inches |
| Item Weight | 4.4 pounds |
| Item model number | BRX3016.1D |
| Batteries | 1 12V batteries required. |
| Color | Green |
| Date First Available | February 3, 2015 |
Warranty & Support
For warranty information and technical support, please refer to the official Hifonics website or contact their customer service directly. Keep your purchase receipt as proof of purchase for any warranty claims.


